Honestly, avoiding cross-threading is easier than it sounds. It takes a little attention and some simple techniques to keep those screws aligned. Whether you’re a DIY enthusiast or someone just looking to fix a remote control, understanding the fundamentals will save you time and frustration. Armed with the right knowledge, you can confidently tackle your next project without a hitch. Now, let’s explore the best ways to prevent cross-threading screws during hardware installation.
Understanding Cross-Threading: What It Is and Why It Matters
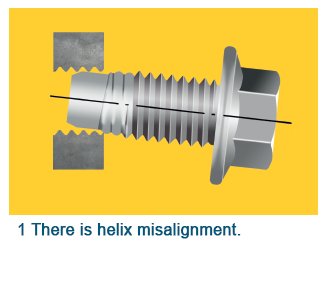
First things first, what exactly is cross-threading? Picture it like this: when you try to screw something into place, the threads of the screw should perfectly match up with the threads in the hole. If they don’t, you could end up stripping the threads and causing permanent damage. This not only makes it nearly impossible to finish your project, but fixing it may require drilling out the original hole and starting over.
Cross-threading often occurs due to poor alignment or using the wrong size screw. It’s like trying to fit a square peg in a round hole. The screw might bend, break, or get stuck, leading to a lot of wasted effort. Here’s the thing—taking the time to understand how screws and threads work isn’t just for advanced DIYers; it’s essential knowledge for anyone working with hardware.
So, why does it matter? To put it simply, preventing cross-threading ensures your project looks good and functions well in the long run. You want your screws fastened securely so they can hold everything together. If they’re cross-threaded, you risk the whole assembly coming apart, which is something no one wants after hours of work!
Choose the Right Tools for the Job
Using the right tools can significantly decrease the chances of cross-threading. Seriously, it makes a world of difference. For starters, a proper screwdriver or drill bit that matches the screw type ensures a snug fit. Using a Phillips screwdriver on a Phillips screw may seem obvious, but it’s a mistake beginners often make—leading to cross-threading.
Furthermore, consider investing in quality tools. An inexpensive screwdriver might work in a pinch, but it often lacks the precision and grip needed to align screws correctly. Tools like torque wrenches can help you apply the right amount of pressure without overtightening, which can also cause cross-threading.
Don’t forget about using a magnetic screwdriver. They help hold the screw in place as you drive it in, reducing the chances of misalignment. And if you’re unsure about the right tool, consult your screw packaging or a knowledgeable friend. Remember, having the right equipment makes every job smoother and reduces the frustration of dealing with cross-threading.
Start With a Pilot Hole
One of the best-kept secrets in hardware installation is the pilot hole. If you’re working with hardwood or dense materials, drilling a pilot hole is like giving your screw a little guide to follow. Here’s how it works: you simply drill a small hole that matches the core size of the screw. When you drive the screw into this hole, it has less resistance, making it easier to align properly.
Here’s a step-by-step approach to using pilot holes:
- Choose the Right Drill Bit: Select a bit that’s slightly smaller than the diameter of the screw.
- Drill Straight: Make sure to hold your drill perpendicular to the surface. A steep angle can lead to cross-threading.
- Depth Matters: Drill deep enough to accommodate the screw length, but not so deep that you hit anything behind the material.
Using a pilot hole is especially helpful when working with materials like metal or plastic as well. It minimizes splitting and makes for a cleaner installation. So, the next time you reach for that screw, remember: a little foresight in the form of a pilot hole can go a long way.
Align Your Screws Properly
Once you have your tools and pilot holes ready, the next step is to ensure proper alignment. It sounds simple, but many people overlook this crucial step. Here’s the thing: if your screw isn’t entering straight, you’re setting yourself up for a headache.
Take a moment to position the screw vertically above the hole, breathing easy as you lower it directly in. If you’re using a drill, control the speed as you start driving the screw. If you feel resistance, stop—this is often a sign you’re off track. Back it out gently, reassess your angle, and try again.
If you’re working in tight spaces, consider using a screw holder attachment on your drill. This can help guide the screw in the right direction and reduce the chances of misalignment. Remember, patience is key here. Rushing the process is one of the largest contributors to cross-threading.
Use the Right Technique for Driving Screws
Now, let’s talk about the technique. You might be thinking, “Isn’t driving screws straightforward?” Well, yes and no. The way you apply force can make a huge difference. When driving screws, start slow to gauge how it’s moving into the material. You want to avoid forcing it.
Here’s a simple technique to follow:
- Engage the screw gently: Begin with low speed to ensure it aligns properly.
- Increase speed gradually: Once you’re confident that the screw is going in straight, you can speed up.
- Stop when it’s flush: Once the screw head is flush with the surface, stop applying pressure. Overtightening can lead to cross-threading.
Honestly, it’s all about feeling. You’ll get the hang of it as you practice. But keeping a light touch can help prevent the screw from engaging the threads incorrectly, which leads to cross-threading.
Check Your Screws Before Installing
A simple step that’s often forgotten is checking the screws themselves. Before starting your installation, examine the screws to ensure they’re not damaged or dull. A bent screw is more likely to cross-thread since it can’t enter the hole straight.
Additionally, using the right type of screw prevents problems. For instance, using wood screws on metal could lead to disaster. It’s like trying to use a butter knife to cut steak—it just doesn’t work well.
If you’re working on different materials, keep a few varieties of screws on hand. Knowing when to switch up your approach can save you a lot of frustration. Always refer to your project instructions to verify that you’re using the correct screw type for that specific job.
Practice Patience and Attention to Detail
Finally, let’s talk about the mindset. Hardware installation isn’t a race. Practicing patience and attention to detail can make all the difference in preventing cross-threading. When you rush, mistakes happen. Take your time to ensure everything is in place before driving the screw.
Honestly, when you find yourself feeling frustrated, take a step back. It’s okay to take a break, grab a coffee, and return with fresh eyes. You might be tempted to power through that last screw, but giving yourself a moment can prevent costly errors down the line.
By creating a habit of thoroughness, you’ll not only prevent cross-threading but also build confidence in your hardware skills. And remember, every expert was once a beginner. Learning the ropes takes practice, but it’ll pay off in your future projects.
In conclusion, preventing cross-threading screws during hardware installation is all about the right tools, techniques, and a bit of patience. By following these steps, you can avoid the pitfalls and ensure a clean, secure installation every time. Whether you’re fixing a simple remote or assembling complex furniture, these tips will help you nail it on the first try. Happy fixing!