Weatherstripping is supposed to keep your home cozy by sealing gaps around doors and windows. Over time, though, it gets brittle, sticky, or just plain gross. Suddenly, you’re dealing with flakes, residue, and a nagging draft you swore you fixed last year. Before you reach for a random screwdriver or butter knife, let’s walk through the best tools to get the job done right—without wrecking your paint or your patience.
Why You Need the Right Tools to Remove Weatherstripping
Here’s the thing: old weatherstripping loves to cling for dear life. Manufacturers design it to stand up to years of sunlight, moisture, and constant door slams. That means the adhesives and materials can be surprisingly tough to remove by hand, even if they feel dry and crumbly.
Using the wrong tool—say, a kitchen knife or your fingernails—usually ends up in gouged trim, bent metal, or worse: a lot of cursing. The best tools for removing old, dried-out weatherstripping don’t just make it faster—they also protect your doors, windows, and your own fingers. Plus, they help you start with a clean surface for the new weatherstripping, so the fix actually lasts.
Choosing the right removal method also depends on what kind of weatherstripping you’re dealing with. Is it rubber, foam, felt, or vinyl? Some strips are held on with nails or screws, others with heavy-duty adhesive. Let’s break down the main types of removers and how to use them, so you’re not stuck halfway through with a pile of ruined tools and sticky gunk.
1. Utility Knives: The Quiet Workhorse
A classic, sharp utility knife comes in handy for almost every step of weatherstripping removal. If the strip is glued or painted over, slice along its edge to break the seal—kind of like scoring a cake before you cut a slice. Run the blade slowly along the seam, letting the knife do the work.
What makes a utility knife so effective? Its sharp, replaceable blade can gently pry up even the most stubborn dried-out weatherstripping without digging into wood or metal beneath. I always keep extra blades on hand—nothing works worse than a dull knife trying to slice through glue.
- Use a utility knife to cut sections of adhesive strips before pulling them up.
- Works especially well on rubber or vinyl weatherstripping that’s cracked but still partly stuck.
- Be careful around painted surfaces; steady hands are key.
If you hit a tricky spot where the adhesive won’t budge, don’t force it. There’s a tool for that coming up next.
2. Pry Bars and Putty Knives: Gentle Leverage
Honestly, my go-to for prying off old, dried-out weatherstripping is a small pry bar or a sturdy putty knife. These tools give you the right balance of force and control, helping to separate the strip from the frame without gouging the wood or scratching metal.
Flat putty knives are perfect for sliding under layers of foam or felt weatherstripping. If you run into something extra stubborn, a mini pry bar (the kind that’s about 6–8 inches long) gives you more leverage without putting your trim at risk.
- Start at one corner and gently work your way along the strip, lifting a few inches at a time.
- Use a twisting motion to lift—not force—a stuck strip.
- For particularly sticky spots, alternate between the knife and a little prying force with the bar.
In my experience, patience is everything here. Go slow, and let the tool—not your brute strength—do the heavy lifting.
3. Adhesive Removers: The Secret Weapon
After you peel away the main strip, you’ll often find a stubborn layer of residual adhesive. It’s similar to peeling off a sticker—there’s always that sticky gunk left behind. This is where a good adhesive remover can save hours of scraping and frustration.
There are lots of options at the hardware store, but look for removers labeled as safe for wood, metal, and plastic. I like Goo Gone or 3M Adhesive Remover—both dissolve old glue without damaging finishes.
- Apply with a cloth or directly onto the residue, let it sit for a few minutes, and wipe away.
- Some tough adhesives might need a second round, especially if they’ve baked in the sun for years.
- Always test on a hidden spot first, just in case.
Don’t forget to ventilate the area and wear gloves. These removers can be strong, and even if a product claims to be “odorless,” you’ll be happier with some fresh air.
4. Scrapers and Multi-Tools: For Built-Up Gunk
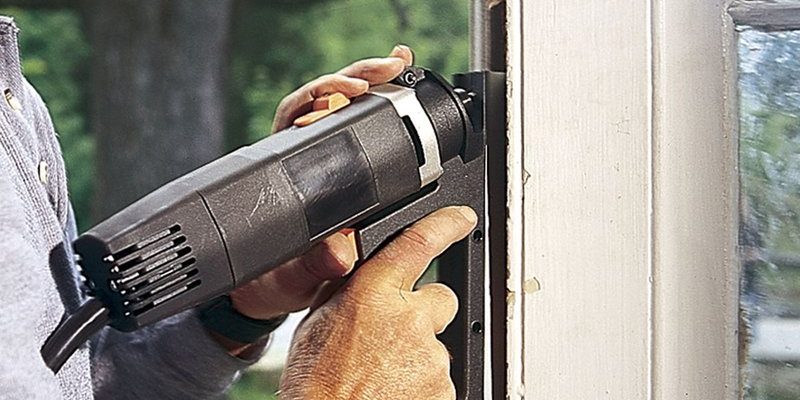
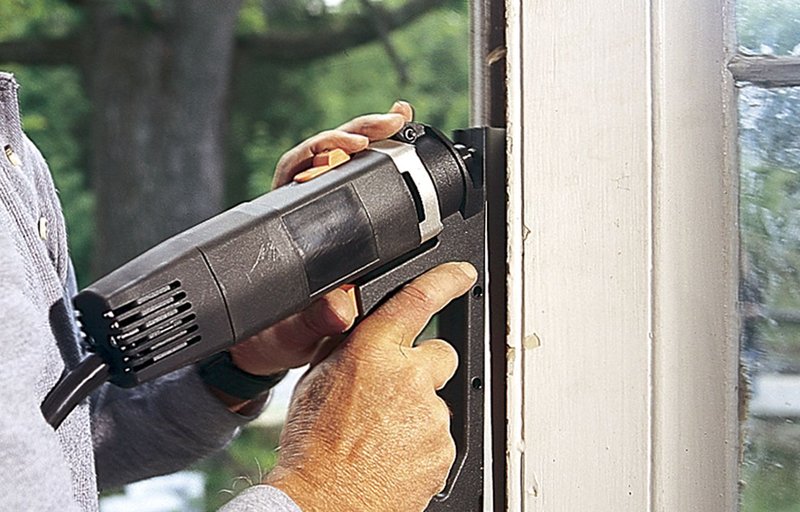
When weatherstripping has been in place since the last century, you’ll probably deal with more than just a single layer of adhesive. Often, you’ll find a thick build-up of caulk, old foam, or even layers of paint. This is where a good scraper or a multi-purpose oscillating tool shines.
Hand scrapers are great for precise work. Think of these as a beefier version of a putty knife, with a thicker, often replaceable blade. For larger, flat surfaces, they let you chip away at stubborn gunk without digging into the underlying material.
Oscillating multi-tools take things up a notch. Attach a scraping blade and let the tool do the work—just gently guide it where you need. These are more expensive, but if you’re redoing windows or doors throughout your home, it’s worth the investment.
- Use a light touch at first—let the tool’s vibration and sharpness do the work.
- Always start with the gentlest blade to avoid damaging your frames.
- Vacuum up dust and crumbs as you go; built-up debris makes the job harder.
If you only have a few spots to do, stick with a hand scraper. But if you’re tackling a whole house, trust me—the multi-tool pays for itself in time saved.
5. Needle-Nose Pliers: Grabbing the Tough Stuff
Sometimes, old weatherstripping breaks off in tiny bits or is held in by tiny nails or staples. This is where needle-nose pliers come in handy. They give you a strong, precise grip so you can pull out stubborn pieces without mangling your fingers.
Pliers are especially helpful when:
- Tugging out small brads, staples, or nails hidden in the weatherstripping.
- Grabbing at brittle sections that won’t lift with a knife or scraper.
- Holding onto narrow strips, especially in tight corners or weird angles.
Here’s my tip: grab the strip as close to the surface as possible, then pull straight out—twisting can break off more crumbly pieces. If you spot rusted fasteners, give them a dab of penetrating oil first.
6. Heat Guns or Hair Dryers: Loosening Stuck Adhesive
For really stubborn weatherstripping that’s glued on tight—or for old foam that’s turned into one with the door—a little heat can work wonders. A heat gun (on its lowest setting) or even a regular hair dryer helps soften adhesives, making them much easier to scrape away.
Here’s how I use heat when nothing else works:
- Warm up a small section of adhesive for 20–30 seconds at a time, moving the heat source constantly.
- Once it’s soft, use your scraper or putty knife to gently lift the weatherstripping.
- Avoid holding the heat in one spot for too long, or you might damage paint or finishes.
Always be careful with heat tools around plastic or vinyl. Too much heat, and you’ll do more harm than good.
Heat isn’t always necessary, but it’s a lifesaver when faced with ancient, sun-baked glue that just laughs at knives and scrapers.
7. Cleaning Up: Getting Surfaces Ready for New Weatherstripping
Once you’ve finally pried, scraped, and wiped away every last bit of the old weatherstripping, it’s tempting to just slap on the new stuff and call it a day. But here’s where a little cleaning makes all the difference.
Use a clean rag and some rubbing alcohol to remove leftover oils or residue. Check for rough spots or splinters—if you find any, a gentle sanding with fine-grit sandpaper gets you back to a smooth, paint-ready surface.
- Clean, dry, and smooth frames help new weatherstripping stick better and last longer.
- If you’re painting or touching up, do it now, before the new strip goes on.
- Double-check for any remaining debris that could mess with your seal.
Trust me—skipping this step means your fresh weatherstripping might peel or shift sooner than it should.
Comparing Hand Tools vs. Power Tools for Weatherstripping Removal
You might be wondering: Should I just go straight for power tools, or can hand tools do the job? Honestly, it comes down to project size, your comfort level, and what kind of weatherstripping you’re facing.
Hand tools (like utility knives, putty knives, and pliers) are great for beginners. They’re cheap, easy to control, and less likely to cause accidental damage. For single doors and windows or delicate trim, hand tools are usually all you need.
Power tools (like oscillating multi-tools or heat guns) make a big difference on bigger projects or where old adhesive is thick and stubborn. They save time and effort, especially if you’re removing weatherstripping throughout your whole house.
| Hand Tools | Power Tools |
| Cheaper | Faster for big jobs |
| More control | Excellent for heavy-duty adhesive |
| Ideal for delicate woodwork | Requires a little practice |
If this is your first time, start simple. You can always upgrade your toolkit if you end up tackling another set of drafty windows down the road.
Putting It All Together: Ready for a Fresh Seal
Pulling off old, dried-out weatherstripping is one of those jobs that feels intimidating until you dive in. With the right tools—utility knife, putty knife, scraper, adhesive remover, pliers, and maybe a heat gun—you can handle just about anything those stubborn strips throw at you. Go slow, take your time, and let your tools do most of the work.
Weatherstripping removal isn’t glamorous, but it’s satisfying to stand back and feel a solid, draft-free seal on a door or window you fixed yourself. Whether you’re prepping for winter, chasing down leaks, or just want to stop hearing that annoying whistle every time the wind blows, having the right tools makes all the difference. Here’s to your next weather-tight project—may it go smoothly, and may you never battle crusty old adhesive with a butter knife again.