Picture yourself in your workshop, preparing to install a new door. You know that having the right tools makes the job easier and ensures everything fits perfectly. Today, we’re diving into the best tools to help you drill those hinge screw pilot holes accurately. We’ll cover everything from drill bits to guides, so you can tackle your next project like a pro.
Understanding Pilot Holes: Why They Matter
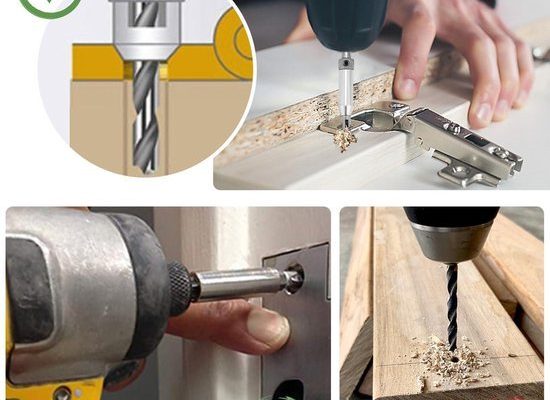
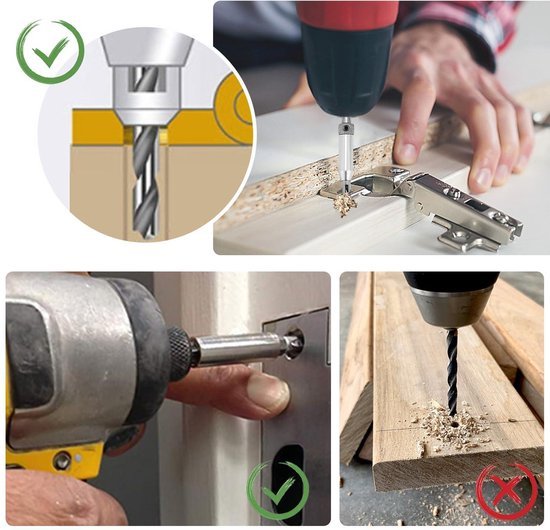
Pilot holes are small holes drilled into wood to guide screws. Think of them as a roadmap for your screws. When you create a pilot hole, you reduce the risk of splitting the wood and ensure that your screws enter straight, which is especially important for hinges. Misalignment can cause a door to sag, making it hard to open and close smoothly.
When you’re drilling a pilot hole for a hinge screw, it’s essential to know the right size. The diameter of the pilot hole should be slightly smaller than the screw’s diameter. This way, the screw can grip the wood without problems. Honestly, taking the time to drill these pilot holes properly might seem like an extra step, but it saves you time and headaches down the line.
Drill Bits: The Heart of Your Toolset
The first tool you’ll want to consider is the humble drill bit. Not all bits are created equal, and using the right one can make your life so much easier. For hinge screw pilot holes, you should look for high-quality bits that drill cleanly and stay sharp.
Types of Drill Bits:
- Twist Drill Bits: These are the most common and versatile. They work well for most types of wood.
- Brad Point Bits: These bits have a pointed tip that helps to position the hole accurately. They’re excellent for avoiding wood splintering.
- Spade Bits: If you’re drilling larger pilot holes, spade bits can create wider openings quickly.
A brad point bit, in particular, is a favorite among woodworkers for hinge applications. Its sharp tip allows for precise placement, making it less likely that the drill bit will wander off course. Remember, a clean hole will give your screws the best chance to hold tight.
Drills: Choosing the Right One
Next up, you need a reliable drill. There are various types of drills to choose from, and each has its own strengths. Here’s a quick rundown:
Drill Types:
- Cordless Drills: These are perfect for mobility and ease of use. Many come with adjustable speed settings, which can be very handy.
- Hammer Drills: If you’re working with tougher materials, a hammer drill might be necessary. It provides extra power but may be overkill for simple wood projects.
- Drill Press: This stationary tool gives you precise control, making it ideal for repetitive drilling tasks.
A cordless drill is often a go-to for most DIYers because it allows for flexibility without being tethered to a power outlet. Look for one with a variable speed setting, as this can help you adjust the speed based on the material you’re working with.
Drilling Guides: Making Precision Easy
Using a drilling guide can take your hinge screw pilot holes from good to great. Why? Because it helps ensure that you’re drilling at the right angle and depth every time. Think of it as a GPS for your drill.
Benefits of Drilling Guides:
- Accuracy: Guides help maintain a straight line, preventing any slips that could ruin your alignment.
- Consistency: If you’re installing multiple hinges, a guide ensures each hole is the same size and depth.
- Easy Setup: Most guides are simple to attach to your material, making setup quick.
Some guides come with built-in depth stops, which can be incredibly helpful for ensuring your screws are seated correctly without over-drilling. This is a must-have for anyone looking to make their projects more efficient.
Depth Stop and Countersink Bits: Perfecting Your Finish
Sometimes, a hinge screw requires a little extra finesse. Using a depth stop or a countersink bit can ensure that your screws sit flush with the surface. Here’s what you need to know about these tools.
Depth Stops:
A depth stop attaches to your drill bit and restricts how deep you can drill. This is useful for preventing you from drilling too far, which could compromise the integrity of your material.
Countersink Bits:
Countersink bits create a conical hole, allowing your screws to sit below the wood surface. This makes for a clean finish and reduces the chance of snagging on clothes or other objects.
Additional Tools to Consider
In addition to the main tools mentioned, there are a few other handy devices that can make your hinge screw pilot hole preparation even easier.
Essential Extras:
- Tape Measure: Accurate measurements are crucial. A good tape measure will ensure your hinges are placed evenly.
- Pencil or Marking Tool: Mark the spot where the holes will go. A sharp pencil line will help guide your drill.
- Clamp: If you’re working on a larger piece, a clamp can hold everything steady while you drill.
Taking the time to measure and mark your areas will help avoid mistakes, making your drilling process smoother. Plus, using clamps can help stabilize your work, allowing you to focus on drilling with precision.
Wrapping It Up: Your Tools, Your Success
Choosing the best tools for drilling hinge screw pilot holes can make a world of difference. From selecting the right drill bits to utilizing drilling guides and depth stops, each tool plays a crucial role in achieving precision. Remember, it’s all about setting up properly and taking your time.
Whether you’re a seasoned DIYer or new to woodworking, the right tools will enhance your projects and lead to a more professional finish. So, gather your gear, take it step by step, and watch as your skills—and your projects—improve over time. Happy drilling!