Plenty of people start out trying to use whatever’s in the junk drawer—kitchen spatulas, butter knives, fingernails (ouch)—but that’s a surefire recipe for frustration or even minor damage. Upgrading your toolkit can turn a clumsy chore into a quick DIY win. Whether you’re swapping out the old, cracked seals on your windows or putting fresh stripping on drafty doors, having the *best tools for installing and removing weatherstripping* makes everything smoother, cleaner, and a lot less stressful.
Why Good Tools Matter for Weatherstripping Projects
Honestly, you could muddle through weatherstripping with just a pair of scissors and some elbow grease. But you might end up squishing, stretching, or tearing the material—especially if you’re dealing with stubborn, sticky old seals. The right tools don’t just speed things up; they help you do the job right the first time, with professional-looking results.
Here’s the thing: *weatherstripping* isn’t just about function. A neat, tight seal looks better and lasts longer, which means fewer headaches down the road. And let’s not forget about your sanity. There’s nothing worse than getting halfway through a window only to realize you can’t remove the old adhesive or get a straight cut. Investing in a few simple tools saves you a ton of trouble.
Finally, quality tools protect your windows, doors, and frames from accidental dings or scratches. You’ll avoid damaging paint, wood, or vinyl—because trust me, that kind of repair isn’t fun (or cheap). So take a breath, grab the right gear, and set yourself up for success.
Basic Tool Kit For Installing Weatherstripping
You might be wondering what actually belongs in a weatherstripping toolkit. You don’t need a suitcase full of gadgets, but having some dedicated tools on hand pays off. I always suggest starting with these basics:
- Measuring tape: Accuracy is everything. You’ll need this to figure out exactly how much weatherstripping you need for each door or window. A flexible, easy-to-read measuring tape makes things faster and reduces mistakes.
- Scissors or utility knife: Cutting weatherstripping to the right length and shape is crucial. Sharp scissors work for foam, but a utility knife is best for thicker or rubber types. Dull blades can leave ragged edges, so keep them sharp.
- Pencil or chalk: Mark your cut lines and placement spots. It sounds basic, but trust me, skipping this step leads to headaches when pieces don’t fit.
- Straightedge or ruler: Great for keeping your cuts straight and even, especially on longer strips for doors.
By starting with these, you can tackle most basic weatherstripping installations. As you get more comfortable, you’ll probably want a few specialty tools to make things even easier.
Specialty Tools for Removing Old Weatherstripping
Removing old weatherstripping can be the trickiest part—especially if the adhesive is stubborn or the material’s become brittle over time. Here’s where a few specialty tools really shine:
- Pry bar or putty knife: These let you gently lift old weatherstripping or scrape away stubborn foam and adhesive without gouging your trim. Opt for a sturdy, thin metal putty knife—plastic ones tend to snap or flex.
- Adhesive remover: If you’re dealing with sticky residue, a dedicated adhesive remover (like Goo Gone) can work wonders. Just apply, wait a few minutes, and wipe away the gunk. Always test in a hidden spot first to avoid damaging paint.
- Needle-nose pliers: For those tiny fragments that refuse to budge, nothing beats a good pair of needle-nose pliers. They let you grab and pull without mashing your fingers (or the material).
Here’s the secret: patience. Work slowly and avoid trying to “muscle off” old weatherstripping. You’ll get a cleaner surface and avoid damaging your frames.
Top Tools for Installing New Weatherstripping
Let me explain why installation tools matter so much. Getting weatherstripping onto a door or window is part art, part science—you want an airtight fit, not a wrinkled mess that falls off in a week. Here’s the gear that makes it easier:
- Roller or seam roller: Pressing down new adhesive-backed weatherstripping? A small roller spreads pressure evenly and helps the glue stick properly. You don’t need a fancy model—look for one made for wallpaper or vinyl.
- Caulk gun: Some types of weatherstripping (like silicone or tubular seals) need a bead of caulk to fully seal out air. A smooth-action caulk gun gives you control and prevents globs or gaps. Go slow, and keep a damp cloth handy for quick cleanups.
- Staple gun or finishing nails: If you’re working with non-adhesive stripping (like felt or certain foam types), a staple gun or small finishing nails secure the material without damaging trim. Use short, thin fasteners so you don’t split wood or vinyl.
These tools aren’t just about speed—they actually improve the quality of your installation, making sure there aren’t any sneaky gaps that let cold air sneak in (or your heated air sneak out).
How to Use Weatherstripping Tools: Step-by-Step
Let’s break down a simple workflow that uses these tools in real life. Whether you’re swapping rubber gaskets on a door or laying fresh foam on windows, here’s a straightforward approach:
Start by removing old weatherstripping. Use a putty knife to gently pry up the edge, working slowly along the length. For stubborn spots, spritz a little adhesive remover and let it soak for a minute or two.
Next, clean the surface thoroughly—a little soap and water, then dry completely. Old adhesive or dust can keep your new material from sticking.
Now, measure the area. Use your measuring tape, jot down the length, then mark the weatherstripping for cutting. Grab your scissors or utility knife and cut a clean, straight edge.
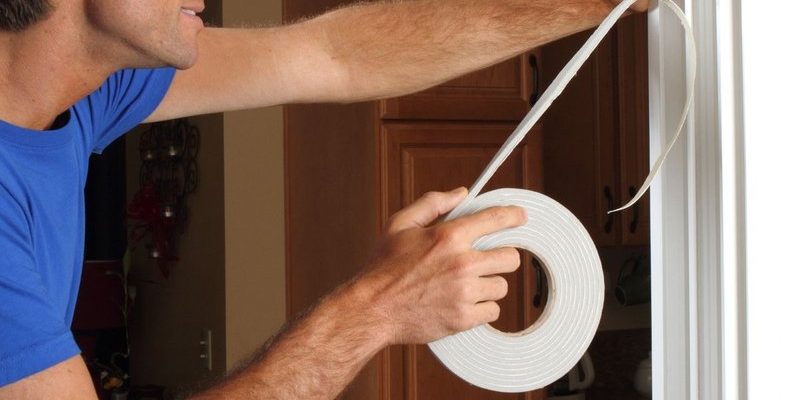
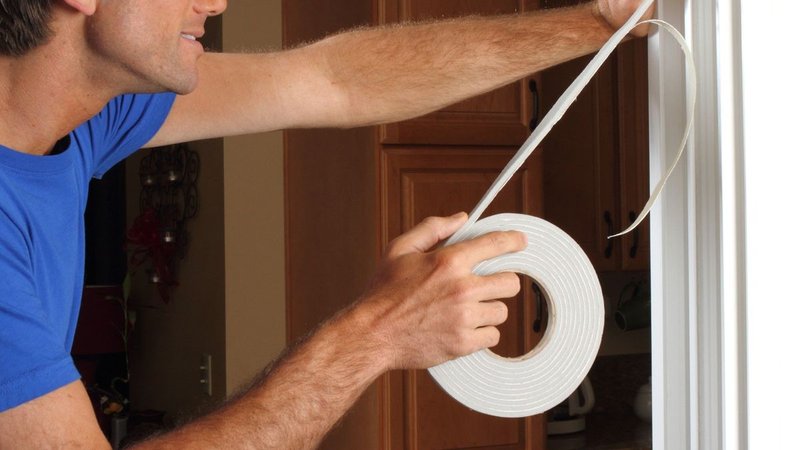
Peel the backing from your new adhesive strip and press it into place. Use a seam roller to apply even pressure, making sure it sticks tight, especially at corners or edges. If you’re using non-adhesive types, staple or nail them in with gentle taps.
Finally, check your work. Open and close the door or window a few times. Listen for rubbing or look for gaps. Adjust or trim as needed.
It might sound like a lot, but each tool does its job to make the process simple and hassle-free, even for beginners.
Recommended Brands for Weatherstripping Tools
You don’t need to spend a fortune, but it’s smart to invest in tools that won’t let you down halfway through a project. A few reliable brands stand out for their durability and ease of use:
- Stanley (utility knives, tape measures, pliers): Consistently sharp, sturdy, and built to last. You’ll find Stanley products in most hardware stores, and they’re a staple for DIYers and pros alike.
- Warner (putty knives, scrapers): Their comfortable handles and flexible blades make them a go-to for scraping off old weatherstripping or paint. Not too pricey, but they hold up over time.
- 3M (adhesive removers): When it comes to cleaning up sticky residue, 3M’s removers are tough on glue but gentle on paint and wood. Always handy for cleanup.
- Arrow (staple guns): If you want a professional-grade staple gun that won’t jam or misfire, Arrow is a safe bet.
There are plenty of off-brand options out there, but you’ll lose time (and patience) if a dull blade or cheap tool slows you down. Spending just a few extra dollars usually pays off every time you tackle a new project.
Common Weatherstripping Problems And How Tools Can Help
Weatherstripping can be tricky, especially in older homes where nothing is perfectly square. You might encounter worn surfaces, awkward corners, or doors that just won’t close right after installing new stripping. Here’s how the right tools put you back in control:
- Sticky adhesive that won’t budge: Don’t waste your fingernails or risk gouging the trim. An adhesive remover and a metal putty knife get rid of old residue so new seals stick better.
- Uneven cuts or jagged edges: A fresh utility blade and a straightedge give you clean, professional lines. Ragged edges let air sneak in, so take the extra minute to measure and cut carefully.
- Gaps in corners or around locks: Needle-nose pliers help you shape the weatherstripping and press it into tight spaces. For stubborn areas, a roller ensures it’s pressed firmly into place and creates an even seal.
Honestly, most weatherstripping headaches come from trying to “wing it” with the wrong tools. Having the right kit turns a chore into a quick, satisfying upgrade that anyone can tackle.
Alternative Approaches and When to Call a Pro
Sometimes, no matter how good your tools are, weatherstripping jobs can get complicated. If you have custom doors, antique windows, or spots with water damage or rot, the DIY route might not cut it.
Here’s what you can try:
- Pre-cut weatherstripping kits: These are designed for common door or window sizes and come with everything included—no need to measure or cut much. They’re not always a perfect fit, but they save time for standard projects.
- Universal weatherstripping: Brands like Frost King and M-D Building Products make weatherstripping that you can trim and fit almost anywhere. It’s a bit more flexible, but still requires that toolkit for a great seal.
If you’re dealing with major drafts, visible damage, or seals that just won’t stay put, it could be time to call in an expert. Pros have specialty tools for tricky installations—like powered caulk guns, unique fasteners, or commercial-grade adhesive removers—that go way beyond most home toolkits.
Knowing when to tackle a project yourself and when to ask for help is all part of being a smart homeowner. Trust your gut—and your toolkit.
Final Thoughts: Making Weatherstripping Easier With the Right Tools
There’s a real sense of satisfaction in sealing up your home and feeling that instant improvement—warmer rooms, lower bills, and a lot less draft sneaking under doors. The best tools for installing and removing weatherstripping don’t just save you time—they help you get it right, so you can enjoy a cozier, quieter space.
Take it one step at a time, lean on tried-and-true brands, and remember: a little patience (and a good putty knife) goes a long way. With the right toolkit, even the draftiest old window can feel brand new.