Cleaning these small gaps might sound tedious, but with the right tools, it can be a breeze. You don’t need to be a DIY expert to tackle this. Just imagine having a toolkit specifically designed to get into those hard-to-reach spots. That’s where the right cleaning tools come in, and I’m excited to share some of the best options available.
Why Cleaning Small Gaps in Door Hardware Matters
You might be wondering why it’s even important to clean those small gaps. Well, over time, dirt, dust, and grime build up in these spaces, which can lead to a variety of issues. For one, they can attract pests or even cause the mechanisms to jam. This can be a real hassle, especially if you have a busy household.
Additionally, keeping door hardware clean improves the overall appearance of your doors. Think of it as maintaining the aesthetic of your home. A clean door handle or knob not only feels better but also showcases your attention to detail. Plus, who doesn’t love a shiny, well-maintained entryway?
Essential Tools for Small Gap Cleaning
You’ll need some specialized tools to tackle those tiny areas effectively. Here’s a list of the best tools for cleaning very small gaps in door hardware:
- Soft-Bristled Toothbrush: This classic tool is great for getting into tight spaces without scratching surfaces.
- Cotton Swabs: These are perfect for precision cleaning around delicate parts.
- Compressed Air Canister: Ideal for blowing out dust and debris from crevices.
- Microfiber Cloth: Excellent for wiping down surfaces after cleaning.
- Pipe Cleaners: These flexible cleaners can reach those small gaps easily.
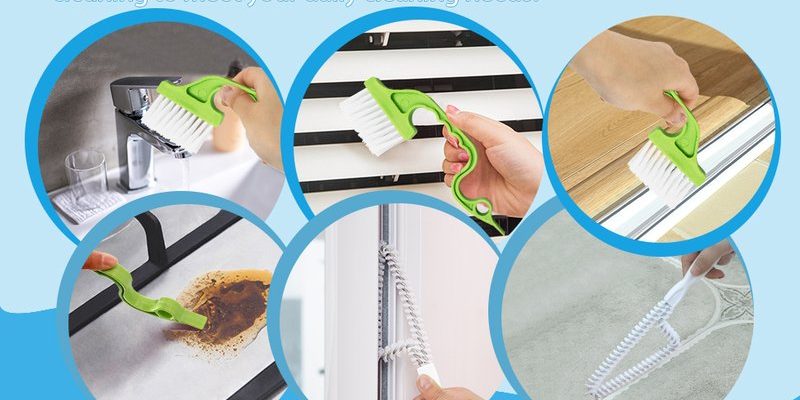
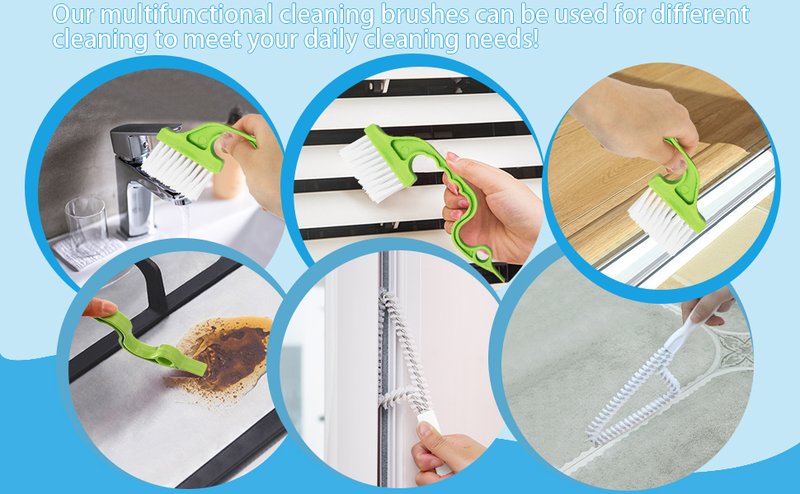
- Specialized Cleaning Brushes: Look for brushes designed for electronics or small hardware.
Each of these tools has its unique strengths, making them great allies when dealing with those pesky spaces.
Using a Soft-Bristled Toothbrush
A soft-bristled toothbrush can be one of your best friends in the fight against dirt and grime. Here’s how to use it effectively:
1. Wet the Brush: Dampen the bristles with a bit of water or a mild cleaning solution. This helps loosen dirt without damaging the hardware.
2. Gently Scrub: Use the brush to gently scrub around the handle, hinges, or any other small areas you notice. The bristles can reach into places your fingers simply can’t.
3. Rinse and Repeat: If you see stubborn spots, don’t be afraid to scrub a little harder, but be cautious not to scratch the surface.
By using this simple tool, you can address even the trickiest of dirt without much effort.
Cleaning with Cotton Swabs
Cotton swabs are not just for ears; they’re cleaning superheroes for small spaces. Here’s how to put them to use:
1. Dip in Cleaner: Start by dipping a cotton swab in your chosen cleaner. A mixture of water and vinegar works wonders!
2. Focus on Crevices: Gently insert the swab into the gaps and crevices of door hardware. The swab is flexible enough to get into the smallest spots, effectively removing dust and grime.
3. Switch It Up: Once the swab gets dirty, don’t hesitate to grab a new one. A clean swab will do a much better job.
Using cotton swabs lets you clean with precision and accuracy, ensuring no corner is left untouched.
Utilizing Compressed Air
Compressed air might seem like an odd cleaning tool, but trust me, it’s a game-changer. Here’s how to use it effectively:
1. Shake the Can: Before use, shake the canister to mix the air properly.
2. Aim for the Gaps: Point the nozzle into the small gaps around the door hardware.
3. Blast Away Dust: Press the nozzle to release a burst of air. This quickly dislodges any dust or debris lurking in those tight spots.
Using compressed air not only cleans but also prevents future build-up by dislodging particles before they settle.
Microfiber Cloths for the Finishing Touch
Once you’ve tackled the grime hiding in the gaps, it’s time to wrap things up with a microfiber cloth. Here’s what to do:
1. Choose the Right Cloth: Make sure it’s clean and dry. Microfiber is excellent because it traps dust and won’t scratch surfaces.
2. Wipe Down: Run the cloth over the door hardware, including the areas you’ve just cleaned. This helps remove any leftover cleaner and adds a nice shine.
3. Final Check: Take a step back and inspect your work. If you see any missed spots, don’t hesitate to go back in and touch them up.
This step might seem simple, but it ensures your door hardware looks its best.
Pipe Cleaners and Specialized Brushes
Pipe cleaners and specialized cleaning brushes can be handy additions to your toolkit. They’re designed specifically to reach those awkward spaces.
1. Pipe Cleaner Use: Grab a pipe cleaner and gently insert it into the gaps. Its flexibility allows it to bend and twist, effectively cleaning where other tools might struggle.
2. Specialized Brushes: Many hardware stores sell tiny brushes designed for electronics or intricate hardware. These brushes often have varying bristle stiffness, allowing you to choose the right one for your specific needs.
Both options offer versatility and efficiency, making your cleaning process quicker and more thorough.
Incorporating Regular Cleaning into Your Routine
Now that you know the best tools for cleaning small gaps in door hardware, it’s time to talk about consistency. Making cleaning these areas a regular part of your routine keeps things looking great and functioning smoothly.
1. Set a Schedule: Consider how often you clean the rest of your home. Maybe every month or two is reasonable for this task.
2. Gather Your Tools: Keep your cleaning tools handy in one spot. This makes it easier to grab them when you’re ready for a quick clean-up.
3. Make It Enjoyable: Put on your favorite playlist or podcast while you clean. It can turn a chore into a moment of relaxation.
Integrating these small cleaning tasks into your routine can save you time and energy in the long run.
In conclusion, staying on top of cleaning those very small gaps in door hardware isn’t just about aesthetics; it’s about function and maintenance. With tools like a soft-bristled toothbrush, cotton swabs, and compressed air, you can tackle the dirt easily. Regular upkeep ensures your hardware remains operational, attractive, and any potential issues are prevented. So grab your tools, roll up your sleeves, and get started! You’ll be amazed at how much of a difference a little cleaning can make.