Here’s the thing: protecting your garage isn’t just about locking up at night. Sealing up those door gaps is just as important. And whether you’re eyeing a heavy-duty door sweep, a trusty garage door seal, or even a bead of sealant, it pays to know your options. Honestly, a little effort now can save you from all sorts of trouble later—like water damage, cold floors, and a sudden “pet” mouse you never wanted.
Why Gaps Under a Garage Entry Door Are a Problem
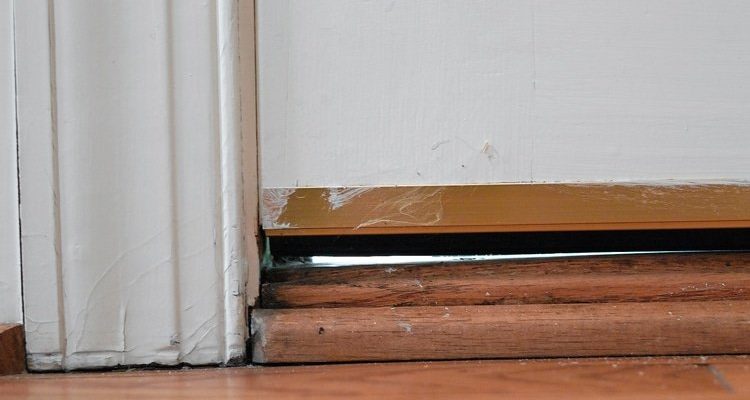
Let me explain why that little sliver of daylight under your garage entry door matters more than you think. For starters, it’s a direct invitation to chilly air in winter and hot, muggy air in summer. That means your garage can become a sauna or a freezer depending on the season—definitely not ideal, especially if you use the space for storage, hobbies, or even as a workshop.
Energy loss is another sneaky issue. If your garage shares a wall with your house, that drafty air influences your heating and cooling bills. Gaps let your climate-controlled air escape, forcing your HVAC system to work harder. Over time, that’s money down the drain.
And then, of course, there’s pest control. Rodents, bugs, and the occasional snake aren’t picky about where they slip inside. A gap under your garage entry door is like rolling out the welcome mat. Even a gap as small as a quarter-inch can be enough for mice to squeeze through. Water intrusion is yet another concern. Heavy rain can send water trickling into your garage, leading to slippery floors, musty smells, and even mold.
In short, plugging those gaps isn’t just about comfort—it’s about keeping your whole garage (and home) safe, clean, and energy-efficient.
When Should You Use Sealant on a Garage Entry Door?
You might be wondering, “Is sealant the right fix for my garage door gap?” Here’s how to decide. Sealant works best on small gaps, cracks, or uneven spots along the edges of the doorframe that sweeps or seals won’t cover. Think of sealant as the caulk you’d use on a bathtub—great for little places where air, water, or bugs could sneak through, but not for big spaces under the door itself.
Most people use a flexible silicone-based or polyurethane sealant. These types hold up well to temperature swings and moisture. Grab a caulking gun, cut the tip of your tube, and run a bead along the edge of the doorframe where you notice daylight or feel a draft. Smooth it with your finger or a finishing tool. Don’t try to seal the entire gap beneath the door with caulk—it won’t last and isn’t meant for that kind of movement.
There are times when sealant is perfect: if you see a hairline crack where your garage entry door frame meets the concrete, or there’s a small patch where the weatherstripping doesn’t reach. For bigger jobs—like a wide, consistent gap along the whole bottom of the door—you’ll want a different solution (keep reading for those).
One tip: Let the area dry thoroughly before applying sealant, and don’t skimp on preparation. Clean off dirt, oil, and any old, crumbling sealant so the new bead sticks properly. If you miss this step, even the best sealant won’t bond well.
Choosing a Garage Door Sweep: What Works Best?
A garage door sweep is like a windshield wiper for the bottom edge of your door. It creates a flexible but solid barrier that blocks drafts, debris, and critters. There are several types you’ll run into at the hardware store, and honestly, not all are created equal.
First up, you’ll see rubber sweeps. These are popular and easy to install. They come in strips you screw into the bottom edge of the door. Rubber sweeps flex with the ground and can seal uneven concrete better than rigid ones. Heavy-duty sweeps with double or triple fins are awesome for rough floor surfaces or larger gaps.
Next, there are bristle sweeps. Picture a thick brush attached to your door—that’s what these are. They do a great job at blocking dust and bugs, and they can handle especially rough or sloped floors. The downside? Bristles can wear down faster than rubber in high-traffic areas or with a lot of moisture.
Don’t forget about vinyl sweeps. These are usually cheaper but can get stiff and crack in cold weather. If you’re in a mild climate or just need a quick fix, they can be okay. For year-round protection, though, heavy-duty rubber is usually best.
The bottom line: for most garages, a sturdy rubber sweep or a dual rubber-and-bristle combo is the gold standard. Just be sure to measure your door and gap size before buying. A sweep that’s too short or too thin won’t give you a proper seal.
How Do You Install a Garage Door Sweep or Seal?
Installing a garage door sweep might sound intimidating, but it’s totally doable—even if you’re not handy. Here’s a step-by-step walk-through to help:
- Measure the width of your garage entry door and the height of the gap when the door is closed.
- Choose the right sweep or seal based on those measurements. If you’re unsure, bring a photo and your numbers to the hardware store—staff are usually happy to help.
- Gather your tools: You’ll likely need a drill, screwdriver, measuring tape, pencil, and possibly a hacksaw for trimming longer sweeps.
- Remove the old sweep (if there is one). Usually, this means unscrewing it from the bottom of the door and scraping off any old adhesive or gunk.
- Hold the new sweep in place at the bottom edge of the door, making sure it touches the floor just enough to block gaps but not so much that it drags badly.
- Mark your screw holes (most sweeps come pre-drilled), then drill pilot holes to make screwing easier without splitting the wood or metal.
- Screw in the sweep securely, trimming any excess length with a hacksaw or sturdy scissors. Double-check that the door opens and closes smoothly.
Take your time with alignment—too high and you’ll still have a gap; too low and your door could be hard to open. If you’re dealing with a concrete floor that isn’t level, look for an adjustable or extra-flexible sweep.
Should You Use a Threshold Seal for Extra Protection?
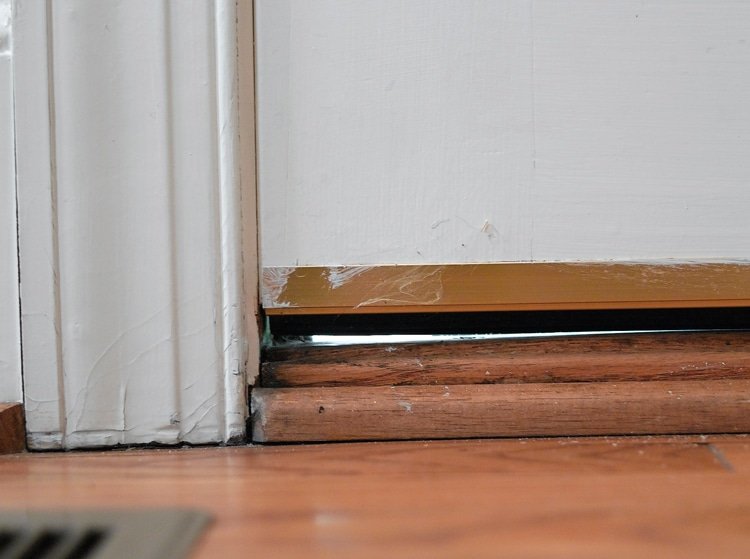
Some folks go a step further and add a garage threshold seal to the floor itself. Think of it as a raised bump that the door presses against when closed. Threshold seals are typically made of thick rubber or vinyl and are glued directly to the concrete using heavy-duty adhesive.
Why bother with a threshold? Here’s the thing: these seals do a stellar job at blocking heavy rain, melted snow, and rodents—especially if your garage slab is a bit lower than your driveway. They’re also helpful if you’ve already installed a door sweep but still see light or feel airflow coming through.
One scenario where a threshold seal shines: sloped driveways. If water tends to roll right up to your garage door, adding a threshold is almost a must. Just be aware they can make sweeping or hosing out your garage a bit trickier, since debris can pile up against the bump.
Installation is straightforward: clean the concrete, dry-fit the seal, apply adhesive, and press it firmly in place. Let it cure before driving over it or closing the door on top. If the seal feels too tall, you can trim it with a utility knife before installing.
Comparing Sealants, Sweeps, and Thresholds: Which Fixes What?
You might be looking at all these choices—sealant, door sweeps, threshold seals—and thinking, “Which one is right for me?” Here’s a simple way to break it down:
- Sealant is best for tiny cracks and spots along the frame—not the main gap under the door.
- Garage door sweeps cover the gap along the bottom of the door, flexing to block drafts, bugs, and small debris.
- Threshold seals sit on the floor itself, creating a raised barrier for water, snow, and rodents, and work especially well with a sweep for double protection.
If you have a big, uneven gap, sometimes combining a sweep and a threshold gives the best results. For a tight, even door with a small crack at the edge, sealant alone might be enough. Think about your climate, the levelness of your garage floor, and the type of pests you’re dealing with.
It’s not uncommon to try one fix, then decide you need a bit more. Luckily, most of these solutions are affordable and can be layered together without much trouble.
What About Weatherstripping for Garage Entry Doors?
Let’s not forget about weatherstripping, another key player in sealing up gaps. Unlike sweeps and thresholds, weatherstripping is usually installed along the sides and top of the door, helping block drafts that sneak around the edges rather than under the door.
There are a few types of weatherstripping you’ll see:
- Foam tape: Easy to stick on, good for sealing uneven frames.
- Rubber gaskets: More durable, often used on steel or heavy wood doors.
- V-shaped (or “kerf”) weatherstripping: Snaps into a slot in the door frame and creates a springy, tight seal.
Adding weatherstripping is especially smart if you find air sneaking in even after you fix the bottom gap. It’s also a must for older doors where wood has warped or the frame isn’t quite square anymore.
One thing to watch? Make sure your weatherstripping compresses just enough to block airflow but not so much that the door is hard to close. It’s a little like fitting the right puzzle piece—when it’s snug, you’ll feel the difference right away.
Maintaining and Replacing Garage Entry Door Seals Over Time
Here’s the reality: even the best garage entry door seal, sweep, or threshold will wear out over time. Weather, cars rolling in and out, and plain old age all take a toll. It’s smart to check your door every few months, especially after big weather swings.
Look for signs of trouble like:
- Light peeking through at the bottom or edges
- Drafts you can feel with your hand
- Soggy, cracked, or missing pieces of rubber or vinyl
Small repairs—like re-caulking a gap or replacing a section of weatherstripping—don’t take much time, but they save you a headache down the road. If your sweep or threshold is really chewed up, don’t be afraid to replace it. Most of these fixes are under $30 and take less than an hour with simple tools.
And remember: a well-sealed garage entry door isn’t just about energy savings or pest control—it also keeps your space looking neat and tidy. There’s something satisfying about closing the door and knowing everything is sealed up tight.
Final Thoughts: Choose the Best Fix for Your Garage Door Gap
Sealing the gap under your garage entry door isn’t complicated, but it makes a big difference for your comfort, your home’s efficiency, and keeping unwanted critters and weather outside. Whether you go with a silicone sealant, a rugged garage door sweep, or a threshold seal—or combine a few—taking the time to do it right pays off.
Start by figuring out where the gap is and how big it is. Pick the solution that matches your needs, and don’t overthink it: most fixes are affordable, beginner-friendly, and quick. With the right approach, your garage will be sealed tight, and you’ll wonder why you waited so long to tackle that little gap in the first place.