Using a threadlocker, like Loctite or Permatex, can save you from minor annoyances and potential repairs down the road. But how do you know when and how to use it? Let’s dive into the best practices and make sure your door hardware stays securely fastened.
What is Threadlocker and Why Use It?
Threadlocker is a type of adhesive designed specifically for locking and sealing threaded fasteners. When you apply it to screws, it forms a bond that holds them tightly in place, preventing them from loosening due to vibration or movement. So why bother? Well, without threadlock, screws can gradually become loose—especially in places that experience a lot of stress or movement, like door hardware.
Here are a few reasons why threadlocker is essential:
- Prevents Loosening: It protects against vibrations that cause screws to become loose over time.
- Sealant Properties: It also acts as a sealant, which helps protect against moisture and dirt.
- Easy Removal: When you need to take the screw out, many threadlockers can be easily broken with the right tools.
So, when you think about your door hardware, consider threadlocker as your reliable buddy that keeps the screws where they should be, saving you from headaches later.
Choosing the Right Type of Threadlocker
Not all threadlockers are created equal. They come in different strengths, so knowing which one to use is crucial. Here’s a simple breakdown of the types you might encounter:
Low Strength (Light Blue)
This is perfect for screws that you might need to remove often, like those on a door handle. It’s easy to take apart but still holds tight enough to keep the handle from wobbling.
Medium Strength (Red)
Ideal for more permanent applications, medium strength threadlockers are great for screws that you don’t plan to remove frequently. This is excellent for hinges or other components that need a solid hold.
High Strength (Purple)
Use this one for high-stress applications. It’s designed for the toughest jobs, but do keep in mind that these screws will be a challenge to remove later on.
Understanding these strengths helps you choose the right product for your specific needs.
Preparing the Surface for Threadlocker
Before you dive in and apply threadlocker, it’s essential to prepare the surfaces properly. Think of it like cleaning your kitchen counter before cooking—you wouldn’t want dirt or grease ruining your meal!
Here’s how to prep your screws and the hardware:
1. Clean the Screws: Use a clean cloth or a brush to remove dirt, grease, or old adhesive from the screws and the threads in the hardware.
2. Dry the Area: Make sure everything is dry. Threadlocker bonds best on dry surfaces, so moisture can interfere with its effectiveness.
3. Inspect for Damage: Check if there are any damaged threads. If a screw or the hole is stripped, you might need to consider a different repair method.
Taking these steps not only ensures that the threadlocker works effectively but also prolongs the life of your door hardware.
Applying Threadlocker: Step-by-Step
Applying threadlocker might seem straightforward, but there are some best practices to ensure you get it right. Here’s a quick guide to follow:
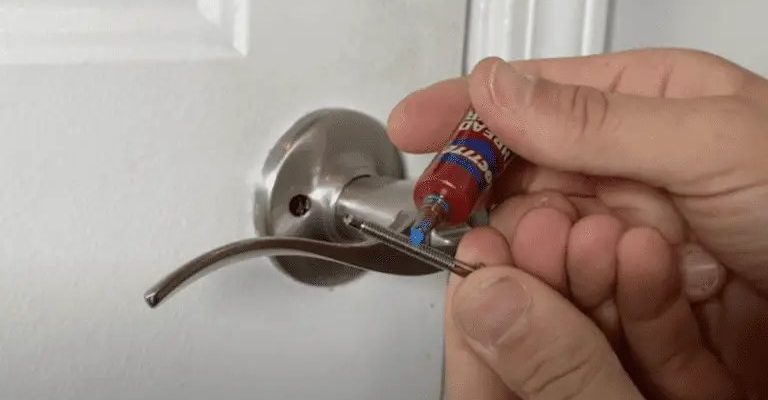
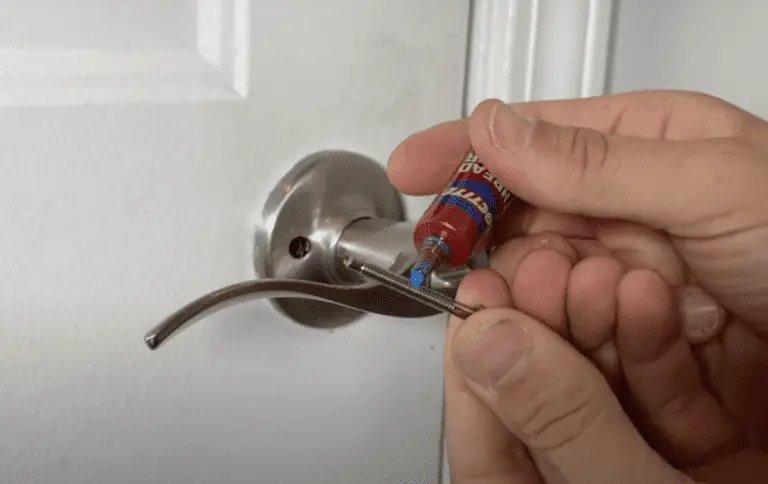
1. Shake the Bottle: Give the threadlocker a good shake before use. This helps mix the components for a more consistent application.
2. Apply to the Screw: Squeeze a small amount of threadlocker onto the threads of the screw. You don’t need a lot—just a thin line around the threads will do the trick.
3. Insert the Screw: Turn the screw into the hole, ensuring it goes in straight. Don’t overtighten it yet; just get it snug.
4. Allow to Cure: Follow the manufacturer’s instructions for curing time. Typically, it takes about 24 hours for the bond to reach full strength.
By following these steps, you’ll ensure that your screws are not only held tightly but also protected from future loosening.
Common Mistakes to Avoid
Even with the best intentions, mistakes can happen when using threadlocker. Here are some common pitfalls to watch out for:
- Overusing Threadlocker: More isn’t always better. Applying too much can make removal difficult and cause issues with the screw’s performance.
- Ignoring the Cure Time: Patience is key—don’t try to use or test the screws before the designated cure time has passed.
- Wrong Type for the Task: Using a high-strength threadlocker for screws you need to remove often is a rookie mistake that can lead to damage.
By being aware of these common missteps, you can better ensure your threadlocker application goes smoothly.
When Not to Use Threadlocker
While threadlockers are fantastic for many applications, there are times when they’re not the right choice. Here are a few scenarios:
1. Soft Materials: If the screws or the material of the door hardware are soft like plastic, a threadlocker may not adhere well.
2. High Heat Applications: Some threadlockers can break down under high heat, so if your door hardware is in a high-temperature area, it’s better to avoid using it.
3. Hollow Screws: For any screws that are hollow or significantly damaged, threadlocker isn’t going to fix the underlying issue.
Knowing when to avoid threadlocker is just as important as knowing when to use it.
Using threadlocker on door hardware screws can be a simple yet effective way to keep everything secure and functioning smoothly. By understanding the different types of threadlockers, preparing surfaces properly, and applying them correctly, you can greatly reduce the chances of loose screws causing problems down the road.
So next time you tighten a doorknob or hinge, remember that a little bit of threadlocker can go a long way in ensuring your hardware stays securely in place. It’s like having a safety net that keeps your home safe and sound.