You might be wondering how to get the most out of your chisel when tackling this essential woodworking task. Let’s dig into some best practices to ensure your mortise cuts are precise, clean, and ready for action, whether you’re using a trusty chisel from Stanley or a more specialized brand like Narex. With a bit of know-how, you’ll be creating those perfect mortises in no time.
Understanding Mortises and Their Importance
Mortises are cutouts made in wood that allow hardware like locks and hinges to fit neatly into the door. Think of them as the “homes” for your door hardware. If these slots aren’t well-made, your hardware can stick out, making it look sloppy and potentially affecting the functionality of the door.
When you use a wood chisel to create a mortise, you’re not just cutting wood; you’re crafting a precise space where the hardware will fit snugly. This is critical for ensuring the door operates properly. If the mortise is too shallow or uneven, your lock might not sit right, and that could lead to security issues.
Getting the mortise right is crucial for aesthetics and functionality. Misaligned or poorly cut mortises can lead to doors jamming or hardware breaking. A little attention can save you a lot of headaches down the line, so let’s break down how to do this effectively.
Choosing the Right Wood Chisel
Not all chisels are created equal, and choosing the right one for door hardware mortises is essential. The type of chisel you’ll want for this task is the bench chisel, which is versatile and ideal for general woodworking. Look for one with a straight edge and a sharp blade, typically ranging from 1/4 inch to 1 inch in width.
You might also consider a mortise chisel. These are thicker and designed specifically for making mortises. The extra heft helps you push through hardwoods more effectively without damaging the chisel. Brands like Narex and Stanley offer dependable options that will serve you well.
Here’s a quick tip: Always keep your chisel sharp. A dull chisel can lead to uneven cuts and make your job ten times harder. You can easily sharpen your chisel using a whetstone or honing guide. This will not only help your cuts be cleaner but will also make the whole process smoother.
Preparing Your Work Area
A cluttered workspace can turn even the simplest tasks into a nightmare. Before you start chiseling, make sure your work area is organized and well-lit. A sturdy workbench is ideal, and if you can, secure the door so it doesn’t move while you’re working.
Marking your mortise locations accurately is the next step. Use a measuring tape and a square to draw precise lines where you want the hardware to go. Here’s where a combination square comes in handy; it’ll help ensure your markings are both square and level.
Once your marks are in place, it’s often a good idea to score the outlines with a utility knife. This helps to define the edges of your mortise and minimizes splintering when you start chiseling. Plus, who doesn’t like a nice, clean line to follow?
Chiseling Techniques for Mortises
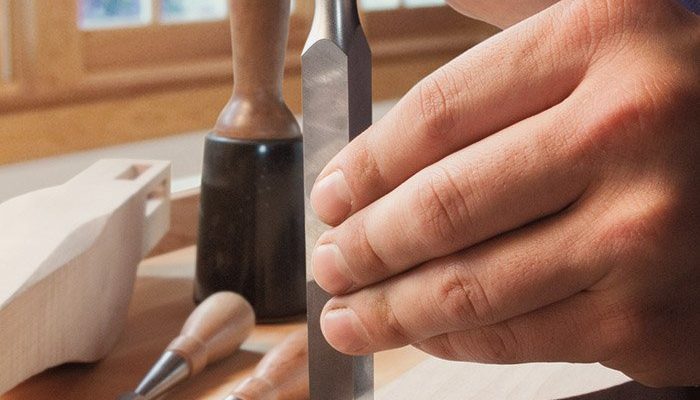
Now that your area is prepped and your tools are ready, it’s time to get into the nitty-gritty of chiseling. Start by positioning your chisel at the edge of your marked lines. You’ll want to strike the chisel’s handle gently with a mallet or hammer to start the initial cut.
Here’s a pro tip: Always angle your chisel slightly away from your lines. This will keep you from cutting deeper than intended and ensure you stay within your marked area. After making the initial cuts, you can work progressively deeper, using short, controlled taps.
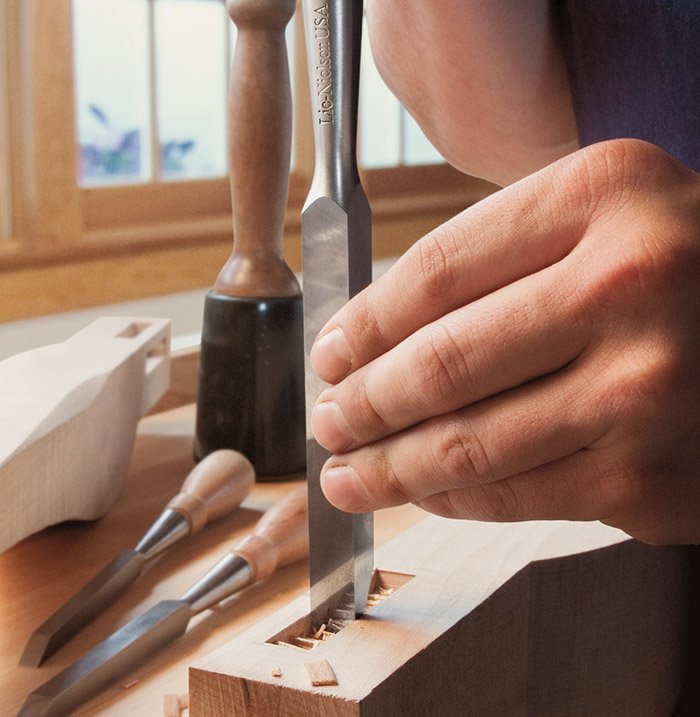
When chiseling down into the wood, take your time. It’s better to make several shallow passes than to try to remove too much wood at once. This method gives you more control and helps prevent blowout, where chunks of wood can splinter off and ruin your mortise.
Cleaning Up Your Mortise
After you’ve dug out your mortise, it’s time to clean it up. Use the chisel to shave down any rough edges or high spots. A well-defined mortise will make fitting your hardware much easier.
If your mortise looks a little rough around the edges, don’t worry. You can also use sandpaper or a small file to smooth out the interior. A smooth surface will help your hardware fit more snugly and operate smoothly.
Make sure to check the depth and width of the mortise with your hardware frequently during this cleanup process. You want to ensure everything is perfect, so the hardware seats correctly when you’re done.
Common Mistakes to Avoid
Let’s face it, every beginner makes mistakes—it’s part of the learning process! One common issue is misalignment. If your markings are off, even a well-made mortise won’t fit your hardware. Double-check your measurements and markings before you start chiseling.
Another mistake is applying too much force. Many people think that chiseling requires brute strength, but it’s really about finesse. Too much force can break or chip your chisel and lead to messy cuts. Always use controlled taps and be patient with the process.
Lastly, neglecting to sharpen your tools can lead to frustration. Dull blades make the job harder and can cause more mistakes than almost anything else. Regularly check your chisel’s sharpness, and don’t hesitate to sharpen them if they feel dull.
Finishing Touches: Installing Hardware
Once your mortise is beautifully crafted, it’s time to install your door hardware. Place your lock or hinge into the mortise and check to ensure it fits snugly. If there’s too much wiggle room, you may need to adjust your mortise further.
Follow the manufacturer’s instructions for attaching the hardware. Typically, this involves lining up the hardware and securing it with screws. Be gentle when screwing; overtightening can strip the wood or hardware, leading to issues down the line.
Once the hardware is installed, give the door a test swing. Make sure everything operates smoothly. If it doesn’t, double-check your mortise and hardware alignment. Minor tweaks might be necessary to get everything just right.
Wrapping It Up
Using a wood chisel for door hardware mortises isn’t rocket science, but it does take skill and patience. By understanding the importance of your cuts, choosing the right chisel, and employing proper techniques, you’ll find that creating mortises isn’t just doable—it can also be satisfying.
Remember to keep your workspace organized and your tools sharp. Take your time and don’t rush the process. With practice, you’ll become more confident in your chiseling skills and produce clean, professional-looking mortises that hold your hardware securely. So grab your tools and get started—you’ve got this!