Honestly, cleaning the internal housing of a door lock sounds intimidating, but it’s surprisingly doable. You don’t need a locksmith’s toolkit or years of experience with tricky home repairs. A few basic tools, a gentle hand, and some patience will go a long way toward keeping your lock working like new. Let’s break down the process, step-by-step, so you’ll know exactly what bits to clean, what to avoid, and why all of this actually matters for security and peace of mind.
Why Cleaning Your Door Lock’s Internal Housing Matters
You might be wondering, “If my key turns, why bother?” Here’s the thing: just because your lock works today doesn’t mean it won’t fail when you least expect it—like when you’re running late or it’s freezing outside. The internal housing is where all the magic happens. It’s packed with small springs, pins, and wafers that need to move freely. Letting dirt or old lubricant build up is like pouring sand into a remote’s battery compartment; eventually, connections get blocked, and the whole thing stops working.
A neglected lock isn’t just an inconvenience. It can pose real security risks. If the pins inside stick or jam, the cylinder may not turn fully, leaving you locked out or making your door easier for someone to force open. For smart locks or keypad models from brands like Schlage or Kwikset, internal grime can even affect electronic sync or battery contacts, causing frustrating troubleshooting issues. In short, a clean lock is a reliable lock, whether it’s manual or remote-powered.
Regular cleaning also helps you catch wear or damage early—before it turns into an expensive repair. Inside the housing, you might notice rust, broken springs, or misaligned parts, all of which affect performance. Think of this as a little “wellness check” for your door hardware, keeping both old-school and new tech working smoothly.
Tools and Supplies You’ll Need
Before you start, let’s round up your cleaning gear. Here’s a quick list, based on what real pros use—but adjusted so anyone can do it at home:
- Small Phillips and flathead screwdrivers: For removing lock covers and faceplates.
- Needle-nose pliers: For gently handling small springs and pins.
- Soft-bristle brush or old toothbrush: Great for scrubbing away dust and debris.
- Microfiber cloths or lint-free rags: To wipe everything clean without scratching.
- Canned air: Perfect for blowing out grit from hard-to-reach spots inside the internal housing.
- Lock lubricant (graphite powder or silicone spray): Not WD-40—oil-based sprays attract dust down the line.
- Isopropyl alcohol (70%+): For cleaning off sticky residue or old, gummed-up lubricant.
- Small container or tray: To keep screws, springs, and tiny parts safe while you work.
Some homeowners like to use tweezers or cotton swabs for delicate areas, but you can manage just fine with the basics above. Remember, if you’re working on a smart or electronic lock, be extra careful—any contact with internal wiring or battery compartments should be done gently, with the batteries removed for safety.
How To Disassemble Your Door Lock Safely
Let me explain: opening up a lock isn’t as scary as it sounds, but it does take some patience. The method varies slightly between knob locks, deadbolts, and digital locks, but the core steps are similar.
Start by unlocking the door and propping it open. Use a small Phillips or flathead screwdriver to loosen the visible screws on the interior side of the lock. Keep a firm grip—sometimes the external faceplate or mounting plate will pop free as soon as the screws come out. Set all parts and screws in your tray or container.
Once the outer housing is off, you’ll see the lock’s internal cylinder, tailpiece, and sometimes a cam mechanism or battery compartment if it’s a remote or keypad lock. Carefully slide out the cylinder, pulling straight back so you don’t bend any delicate inner parts. For electronic locks, make sure to remove the battery pack and keep it somewhere safe while you work.
Tip: Snap quick photos during each step, so you have a reference for putting everything back together. Trust me—those tiny springs all look the same once they’re out!
If the lock has a keyhole, the cylinder will be packed with pins and maybe driver springs. Handle these gently—if any pop loose, use needle-nose pliers to pick them up and set them in your container.
Best Ways to Clean Inside the Lock Housing
Cleaning the internal housing is all about gentle, targeted action. Here’s how I usually go about it:
- Start with canned air: Hold the lock over a trash can and give a few short blasts inside the cylinder and through any slots or holes. This dislodges loose dust, lint, and tiny metal shavings.
- Brush away stubborn dirt: Take a soft-bristle brush or old toothbrush and gently scrub inside the housing, especially around pins, springs, and the tailpiece. Move in circles and be patient—don’t pry or poke hard, especially near electronic contacts.
- Wipe with alcohol: Dampen a microfiber cloth with isopropyl alcohol and wipe all surfaces, focusing on areas with built-up grime or old lubricant. Avoid soaking or dripping alcohol inside smart lock battery compartments.
- Clean removable parts separately: If you took out the cylinder or any springs, clean these individually. A quick dip in isopropyl alcohol and a thorough dry with a lint-free cloth work wonders.
For digital or keypad locks, use a dry microfiber cloth or a tiny bit of alcohol on a swab to avoid moisture near battery terminals. Avoid cleaning sprays that can leave residue or short out sensitive circuits.
Insight: Graphite powder, not oil, is usually recommended as a lubricant inside mechanical lock cylinders. Oils attract dust and gum up the works over time, kind of like using the wrong remote code and wondering why it’s not syncing.
When and How To Apply Lubricant
After cleaning, it’s time to re-lubricate—this step’s more important than most people think. A well-lubricated lock feels like new and prevents jams and sticking. But not all lubricants are created equal.
Here’s the rundown:
- Graphite powder is the gold standard for traditional locks. It goes on dry, doesn’t attract dirt, and keeps things moving smoothly. Just puff a tiny bit into the keyway and work the key back and forth a few times.
- Silicone-based spray also works well, especially for newer locks or if you’re allergic to graphite dust. Spray very lightly, then wipe up any excess.
- Avoid WD-40 or oil-based sprays. They’ll feel slick for a week, then turn into a sticky mess as they collect dust and moisture.
For battery-powered smart locks, skip the mechanical lubricant on any contacts or wiring. You can use a tiny dab of dielectric grease on terminal connections if needed, but only if your manufacturer recommends it.
Don’t go overboard. Too much lubricant can actually backfire, gumming up the pins inside the lock or creating a mess for next time. Less is more here.
How To Troubleshoot After Cleaning
Once you’ve reassembled everything, it’s time to test. Insert the key and turn it a few times—does it move smoothly? If you have a remote or smart lock, put the batteries back, sync up any electronic components, and check if the locking mechanism cycles cleanly.
Here’s where you might hit a snag:
- If the key feels rough or sticks, you may have misaligned a pin or not seated the cylinder properly. Double-check your photos and try again.
- If your smart lock’s not responding, make sure the battery’s seated correctly and that contacts are dry and clean. Resync if needed—sometimes smart locks need to “reset” after being opened up.
- If anything rattles, there’s probably a spring or pin out of place. Disassemble carefully, find the rogue part, and start over.
Patience is key. Locks are precise gadgets, kind of like universal remotes—put even one part in the wrong spot, and the whole system goes sideways. Take your time, and don’t be afraid to start over if something feels off.
Maintenance Tips to Keep Locks Clean Longer
Let’s keep that freshly cleaned lock running like new. Here are some simple habits that make a big difference:
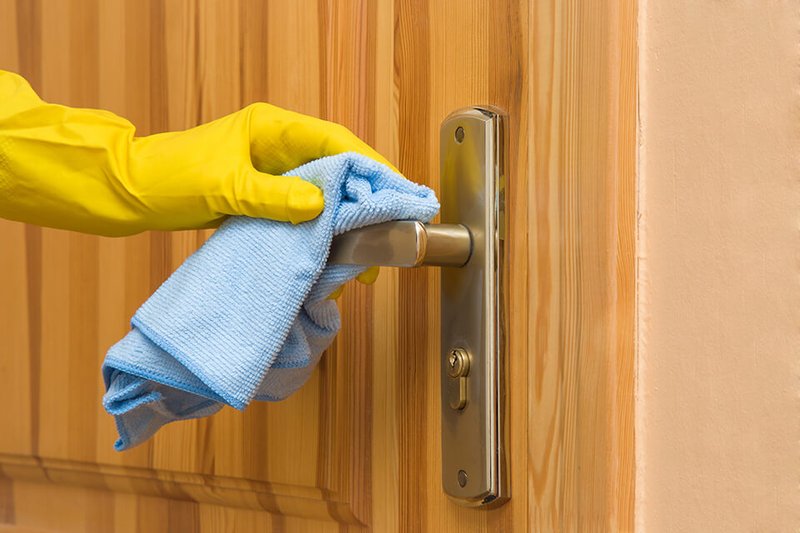
- Wipe down exterior hardware every few weeks with a dry or slightly damp cloth. This keeps dust and debris from sneaking inside.
- Use graphite powder or silicone lubricant once or twice a year, or anytime the lock feels stiff. That’s all most locks need.
- Check for signs of moisture or rust around the lock and door frame, especially after rain or during humid months. If you spot any, dry thoroughly and consider weatherproofing.
- Don’t force the key or handle if it’s sticking. Stop, clean, and lubricate—forcing it can break internal parts and turn a cheap fix into an expensive headache.
- Replace batteries in smart locks every 6–12 months, and never let dead batteries sit. Corrosion can sneak in fast.
Smart lock users: keep the firmware updated if your lock brand (like Schlage or Kwikset) offers this option. Updates can fix weird syncing and pairing issues that cleaning alone can’t solve.
When To Call a Locksmith Instead
Honestly, not every lock should be a DIY project. Some signs mean it’s time to get a pro involved:
- If you spot broken springs, rusted-out internals, or pieces that don’t fit back together, don’t try to force anything. A locksmith can replace or repair damaged parts without risking further damage.
- If your electronic or smart lock refuses to sync, reset, or accept new batteries after cleaning, there might be deeper issues with the internal code or wiring.
- Antique or high-security locks are trickier than standard models. If you’re unsure, play it safe and ask for help—you’ll avoid expensive mistakes in the long run.
Locksmiths have the right tools and years of experience. Sometimes, that’s worth every penny, especially for doors you really can’t afford to get stuck.
Closing Thoughts
Keeping the internal housing of your door lock clean isn’t just one of those “nice to do” things—it’s how you make sure your home stays secure and your day stays on track. The process may feel a bit fiddly at first, but once you’ve gone through it, you’ll realize it’s a lot less mysterious than it sounds. Armed with some basic tools, a little know-how, and a healthy respect for the tiny parts inside, you can handle regular cleaning with confidence—whether your lock is old-school mechanical or full of digital features. Give your locks a little care once in a while, and they’ll reward you with years of smooth, secure service.
