Let me explain why the right cleaning approach matters. Each brand’s keypad is a mix of electronic sensors, plastic or glass overlays, and, under the surface, a delicate circuit board. Clean it well, and your smart lock responds quickly every time you tap. But use the wrong cleaner, or let moisture seep in, and suddenly you could be searching for the backup key—or worse, stuck troubleshooting error codes or needing a full reset. So, if you want to keep those digits glowing and your door answering every tap, it’s worth learning a few best practices for cleaning smart lock keypads without damage.
Why Smart Lock Keypads Are So Sensitive
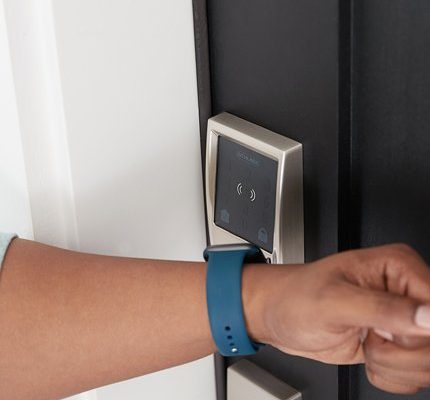
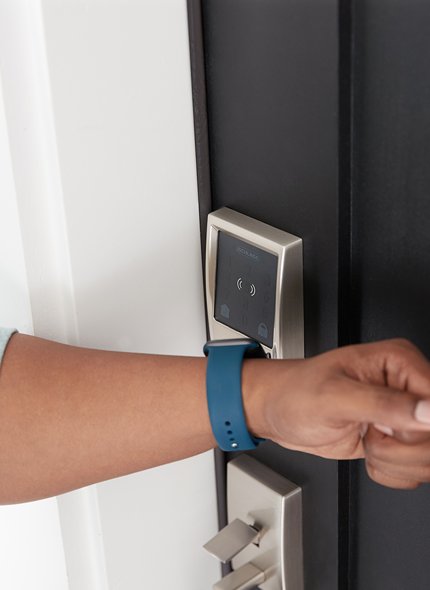
You might be wondering why you can’t just wipe these with anything handy, like the kitchen sponge or a squirt of window cleaner. Well, smart lock keypads aren’t like the rest of the hardware on your front door. Most models use capacitive touch technology (similar to your phone) or small, pressure-sensitive buttons. That means they rely on a thin, sealed layer—sometimes plastic, sometimes glass—to register your touch and keep away rain, dirt, and the occasional curious insect.
Here’s the catch: while these layers are built to handle some weather, they don’t love harsh chemicals or water getting inside. The tiniest break in that seal can let in moisture, which can cause everything from sticky buttons to full-blown circuit board corrosion. And if you’re dealing with models that have illuminated panels or fingerprint scanners, even an invisible residue can make them glitchy or slow to respond.
Think of it like this: you wouldn’t clean your smartphone by dunking it in a bucket, right? Smart lock keypads need the same gentle approach. Scratches, chemical burns, and “invisible” grime can all mess with their sensitivity, sync issues, or even block signals from the remote or app you use to unlock the door. So, best practice is to treat these touch panels with the same care you’d give any other smart gadget.
What Cleaning Products Are Safe For Smart Lock Keypads?
Honestly, the safest cleaners for smart lock keypads are likely already in your house—just not the ones you’d grab for the bathroom tile. The goal is to avoid anything corrosive, abrasive, or heavy on moisture, since these can break down the keypad’s finish, seep under buttons, or short out the electronics.
- Microfiber cloths—soft, lint-free, and gentle. This is your main tool for most cleaning.
- Distilled water—if you must use water, go for the purest you can find. Tap water sometimes leaves behind minerals or streaks.
- Isopropyl alcohol (70% or less)—great for sanitizing and breaking down greasy fingerprints, but always dilute it further with water (1:1) and make sure the cloth is only slightly damp.
- Mild liquid soap—a tiny drop mixed with distilled water can help with stubborn grime, but avoid anything with bleach, ammonia, or solvents.
Never spray anything directly onto the keypad. Instead, apply it to your cloth, wring out any excess, and then gently clean. Harsh wipes, bleach-based sprays, rough sponges, or chemical glass cleaners (like Windex) are a no-go—they can cloud plastics, strip coatings, and leave the keypad vulnerable to future damage. When in doubt, less is more. The simpler and drier your approach, the better for your smart lock’s long-term health.
Step-By-Step: How To Clean A Smart Lock Keypad Without Damage
Let’s break down the safest cleaning method, whether you’re working with a Schlage, Yale, August, or any other smart lock keypad. Slow and steady wins the race here—you want to clean, not flood, zap, or scratch.
- Turn off the lock (if possible). If your model lets you disable the keypad or put it in “cleaning mode,” do that. Some Yale and Schlage smart locks offer this setting to prevent accidental code entry.
- Dust and dry-wipe first. Use a dry microfiber cloth to gently remove loose dirt, dust, and fingerprint marks. Don’t press too hard—just enough to clear the surface.
- Dampen, don’t drench. If you need a deeper clean, lightly dampen one corner of the microfiber cloth with your diluted alcohol or soapy water solution. Wring it thoroughly so it’s just barely moist.
- Wipe gently in circles. Clean the keypad in soft, circular motions. Focus on one section at a time, especially if the numbers are sticky or have caked-on grime. For edges and seams, wrap the cloth around your fingertip or a cotton swab.
- Dry immediately. Use a fresh, dry part of your microfiber cloth to wipe away any dampness left behind. Never let moisture sit—it can sneak under the keypad’s frame and cause internal problems or battery corrosion.
If any stubborn spots remain, repeat the process, but resist the urge to scrub harder or add more cleaner. If you ever spot liquid seeping into the gaps or under the buttons, stop cleaning, dry everything off, and check your lock’s troubleshooting guide. Moisture inside is the fast track to needing a reset or repair.
What To Avoid: Mistakes That Can Wreck Your Keypad
You’d be surprised by how many smart locks wind up on the fritz because of well-meaning cleaning mistakes. Some of these might seem like “common sense,” but honestly, I’ve seen even tech-savvy friends forget and grab the wrong spray when they’re in a hurry.
- Never soak or spray directly. Spraying directly onto the keypad almost guarantees liquid seeping into tiny seams or the battery compartment.
- No harsh chemicals or abrasive pads. Even paper towels can scratch delicate surfaces and leave micro-abrasions that blur numbers or mess with sensors.
- Don’t use compressed air inside the cracks. It might blow dust deeper into the circuit board or disrupt seals meant to keep the lock weatherproof.
- Avoid using acetone, bleach, or glass cleaner. These can dissolve the touch-sensitive layer or discolor the finish.
If you ever spot ghost inputs (numbers lighting up without touch), syncing or pairing errors with your remote, or a sudden battery drain after a sloppy cleaning, it’s likely moisture or chemical residue sneaked in. In that case, you may need to reset or troubleshoot your lock—or in the worst cases, replace it. So, always pause before reaching for whatever’s under the sink.
How Often Should You Clean Your Smart Lock Keypad?
How often you need to clean your smart lock keypad really depends on your home’s traffic and the local weather. Got kids with sticky hands, frequent visitors, or a lot of dust blowing around? You’ll want to wipe it down weekly. If it mostly just handles adults and stays sheltered, a once-a-month cleaning should be plenty.
Here’s a quick rule of thumb: if the numbers look cloudy, sticky, or you notice missed taps or slower response, it’s time for a gentle clean. Don’t let dirt build up, since that can force you to scrub harder and risk scratching or damaging the surface. Some folks even add it to their regular door or doorknob cleaning routine—just remember that the products you use for the rest of the door might not be safe for the keypad.
And if your lock starts showing error codes, trouble syncing with your app, or battery warnings after a clean, take a closer look for signs of moisture or residue. Sometimes, a quick battery check or soft reset solves it, but if not, check the brand’s troubleshooting guide for next steps.
Battery Safety and Cleaning: Why It Matters
You might not think much about the smart lock’s battery when you’re wiping down the keypad, but moisture and batteries are a risky mix. If dampness sneaks inside—even a little—it can trigger corrosion, weird power errors, or a sudden need to reset or repair your lock.
Whenever you clean your keypad, check for:
- Battery compartment seals—make sure they’re tight and undamaged after cleaning.
- No condensation inside the battery tray.
- No sticky residue near the seams, since this can attract grime and eat away at battery contacts over time.
If you ever spot a low-battery warning or syncing trouble after a cleaning session, open the battery compartment (after drying the surface), pop out the batteries, and look for signs of corrosion or moisture. A clean, dry, and well-sealed keypad not only keeps the electronics happy; it helps your smart lock last for years without surprise troubleshooting.
Insight: Treat the keypad as the lock’s “face.” A well-cleaned face means smoother operation, longer battery life, fewer reset headaches, and less risk of expensive repairs.
Comparing Keypad Finishes: Plastic, Glass, and Beyond
Not all smart lock keypads are made equal. Some Schlage and Kwikset models use hard plastic overlays. Others, like August or some Yale models, use glass panels that look sleek but are prone to fingerprints. The cleaning process is similar, but you might need to adjust your approach based on the material.
- Plastic keypads are a bit more forgiving but can scratch easily. Use only microfiber and gentle cleaners—never scrub or use paper towels.
- Glass keypads resist scratches better but show streaks and prints. A diluted alcohol solution (on a barely damp cloth) works best for a streak-free shine.
- Metal trims or buttons (sometimes found around the keypad) can tarnish with harsh cleaners. Stick with water and dry quickly.
If you’re unsure what finish your keypad uses, check the manual or look up your brand’s model number online. The wrong cleaner for the surface can cause weird glare, faded numbers, or even sensor errors that mess with code entry or pairing with your remote or phone.
What To Do If Cleaning Causes Problems
Every now and then, even if you follow all the best practices, you might run into a problem—maybe the keypad stops responding, or you get an error code right after cleaning. Don’t panic. Most issues are fixable if you act right away.
- Remove the batteries immediately if you think moisture got in. Let the lock dry out (door open if possible) for several hours before reinserting.
- Try a soft reset according to your brand’s instructions. For some, this means holding the reset button or entering a code. Always check the manual.
- Inspect the seams for hidden residue or debris. Sometimes a second, even gentler cleaning is needed with a dry cloth.
- If all else fails, check with support. Most brands will help you troubleshoot or send replacement parts if your lock is still under warranty.
Remember, proper cleaning rarely causes serious damage. It’s usually when shortcuts are taken or cleaning is too aggressive that issues show up. When in doubt, go slow, use less moisture, and focus on keeping everything dry.
Closing Thoughts: Gentle Hands Keep Smart Locks Happy
Smart lock keypads are the gatekeepers to your home, blending high-tech security with everyday convenience. Keeping them clean isn’t rocket science—but it does take a gentle hand and a little know-how. Using mild cleaners, soft cloths, and a patient touch means you’ll avoid most common problems, from sticky buttons to short circuits.
The next time you see fingerprints or grime, reach for a microfiber cloth and skip the harsh sprays. Take a moment to check for battery safety and make sure everything’s dry before locking up. By treating your smart lock keypad with the same care you’d give a favorite gadget, you’ll keep it working smoothly—and avoid unwelcome troubleshooting sessions down the road. After all, a keyless entry should mean less hassle, not more.