
Think of a door closer mechanism as a shock absorber for your door. It controls the speed and strength with which the door closes, using a mix of springs, valves, and oil. Just like a car, it needs regular checks and maintenance. Cleaning and oiling might seem intimidating if you’re new to it, but it’s actually simple—like giving your bike chain a bit of lube or cleaning out a coffee maker. You don’t need to be a locksmith or a pro handyman; you just need a little patience and the right approach.
What Is an Exterior Door Closer Mechanism?
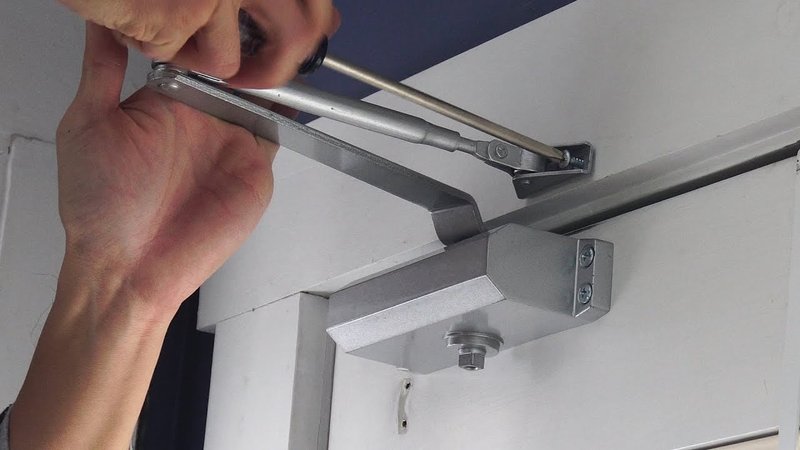
A door closer mechanism is a hydraulic or pneumatic device attached above your door that manages how the door shuts after you open it. If you’ve ever noticed a door in a school, office, or apartment building that closes gently behind you instead of smashing your heels, you’ve met one. Most common brands, like Dorma, Norton, or even budget picks from hardware stores, work on the same principles—even if their finishes look different.
These mechanisms use a sealed chamber filled with oil and a spring-loaded piston to slow and control the closing action. When you open the door, the spring compresses and oil flows through tiny valves. As the door swings shut, the spring pushes back, and the oil resists, smoothing out the motion. Honestly, it’s a clever bit of engineering that works silently—until it doesn’t.
Exterior door closers have it rougher than indoor ones. They face rain, dirt, temperature swings, and sometimes vandalism. This hard life is why regular cleaning, oiling, and inspection matter more for your exterior doors than those inside your house or building.
Why Cleaning and Oiling Matters for Door Closers
Ignoring your door closer isn’t just noisy; it can lead to real problems. Dirt and grit wear down moving parts, gunk up the mechanism, and make the door harder to open or close. Worse, if oil leaks out or dries up, the closer can’t regulate speed, making the door slam or refuse to shut at all. That’s not just annoying—it’s a safety and security risk, especially for busy buildings or households with kids and pets.
Think of oil in your door closer like the blood in your veins: it lets things move without grinding or seizing up. If the oil level drops or gets contaminated, metal starts scraping metal, and parts overheat and wear out faster. Cleaning out the dust and giving it a few drops of the right oil can easily double the lifespan of even a budget closer.
Regular maintenance can save you from expensive repairs or replacements later on. It also keeps the door working smoothly, so you’re not constantly nagging someone to “hold the door” or cringing at every slam. Plus, if your closer has a door position hold or speed adjustment function, keeping it clean makes those features far more reliable.
What You Need: Tools and Supplies for the Job
You don’t need a ton of fancy tools to get your exterior door closer back in shape. Here’s what most people can grab from a garage or local hardware store:
- Screwdriver set (Phillips and flat-head for covers and adjustments)
- Soft rags or microfiber towels
- Mild soap and water (for surface cleaning)
- Small brush (old toothbrushes work great for corners)
- Silicone spray or light machine oil (like 3-in-1 oil; avoid WD-40 as it isn’t a true lubricant for closers)
- Step ladder (if your door is tall or the closer is mounted high)
- Paper towels or drop cloth (to catch drips)
A quick note on oil: most exterior door closers are sealed, so you can’t “top up” the internal oil reservoir. However, you can (and should) lightly oil the moving pivot points and exposed arms. If your closer is leaking oil, it may need to be replaced—but cleaning and lubricating the linkage arms still helps.
How to Safely Clean Your Door Closer Mechanism
Let me explain how I tackle this, step by step, without making a mess or damaging the closer.
- Clear the area. Prop the door open if needed and make sure nothing is in the way. Have your supplies within reach and, if the closer is up high, use a sturdy step ladder.
- Remove surface dirt. Wipe off dust, cobwebs, and grit with a dry rag. Use a small brush to get into the corners and around the mounting bracket.
- Clean the closer body. Dampen a rag with a bit of soapy water and wipe down the metal housing and arms. Don’t soak it; just enough to lift grime. Use a toothbrush to gently scrub around any moving joints or pivots.
- Dry thoroughly. Wipe everything dry with a clean towel. You want zero moisture left, especially if your climate gets cold (water can freeze up the works).
Insight: If you spot any rust, use a tiny bit of fine steel wool to gently buff it off. Don’t go overboard—most closers have protective coatings and you don’t want to scratch them up.
A little patience here pays off. Don’t rush—the cleaner the mechanism, the better your oil will work later, and the longer your door closer will last.
Step-by-Step Guide to Oiling Exterior Door Closers
This is where a lot of people get nervous. You might be wondering, “Will I ruin the closer if I oil the wrong part?” The answer is: not if you avoid the internal oil fill port (if it even has one) and focus on the external moving parts.
- Find the pivot points and moving joints. Usually, this means where the closer arm attaches to the door and the main body, plus any exposed springs or linkages.
- Apply a drop or two of oil. Use light machine oil or silicone spray. Don’t drown it—just enough to wet the hinge or pivot. Wipe up any drips with a paper towel.
- Work the mechanism. Open and close the door several times. This helps the oil spread out and reveals any squeaks you missed.
- Repeat if needed. If you still hear grinding or squealing, add another drop to the trouble spot and cycle the door again.
Pro tip: Never try to inject oil into the sealed body of a hydraulic closer. If it’s leaking from the main barrel, it’s time for a replacement, not a repair.
It’s surprising how big a difference a few drops of oil make. The door will glide instead of thunking shut, and you’ll be less likely to “troubleshoot” a stuck door in the rain or dark.
Fixing Common Problems: When Cleaning and Oiling Isn’t Enough
Honestly, sometimes door closers develop issues that cleaning and oiling can’t fix—especially after years outside. Here’s what to watch for:
- Leaking oil from the closer body: If you see oily drips on the door or ground, the internal seals are worn. Most brands don’t sell seal kits, so replacement is your best bet.
- Door slams or won’t latch: If adjusting the closer speed screw doesn’t help, and lubrication makes no difference, the internal valve might be clogged or worn out.
- Stiff, bent, or broken arms: Over time, the metal linkages can bend or snap—especially in heavy-use areas. Light oil helps for squeaks, but if anything looks obviously warped, it’s time to swap the part out.
- Incorrect installation or loose mounting: If the closer wiggles or the arm pops loose, check the screws and mounting plate. Tighten them if needed, and consider thread-locking compound for stubborn screws.
Insight: Sometimes, an old closer simply isn’t up to the job—especially if you’ve upgraded to a heavier storm door or added weatherstripping. Don’t be afraid to compare brands or upgrade to a beefier model if you’re always troubleshooting.
Choosing the Right Lubricant for Your Door Closer
You might be tempted to grab that multi-purpose spray from under the sink—but it’s not always the right choice. Here’s the thing: WD-40 is great for breaking rust loose or displacing water, but it doesn’t last as a lubricant on its own. For exterior door closers, a little extra care choosing your oil can save you a headache later.
- Light machine oil: Classic 3-in-1 or sewing machine oil works for most moving pivots.
- Silicone spray: Safe on plastics and metal, doesn’t attract dirt, and won’t freeze up in winter.
- Never use grease: It can gum up the works, especially in cold climates, and attract way more dirt than oil.
- Check the brand’s manual: Some brands like LCN or Norton give specific lubricant recommendations for warranty reasons.
If your closer is still under warranty, using the manufacturer’s suggested lubes can be important. Otherwise, just avoid anything thick or sticky, and steer clear of anything that sounds like “penetrating oil”—that’s for loosening, not lasting lubrication.
How Often Should You Clean and Oil Your Door Closer?
Let’s be honest—not everyone wants to put “oil the door closer” on their calendar. But if you want your door to work as it should, a loose schedule really does help. For most homes and small businesses:
- Check for dirt and oil moving parts every 6 months.
- Oil pivots and arms once a year (or if they squeak).
- Wipe down and inspect after big storms, snow, or if you notice odd noises.
If you’re in a dusty or coastal area, or if your closer gets a ton of use (think apartment building or school), bump this up to every 3 months. It only takes about 10 minutes, and you’ll get more years out of your closer—and avoid that last-minute troubleshooting when the door starts misbehaving.
When to Replace, Not Repair, an Exterior Door Closer
Sometimes, no amount of cleaning, oiling, or code tweaks (yes, some newer closers have digital bits!) can rescue a worn-out mechanism. Here’s how I decide:
- Visible oil leaks from the main body—the internal seals are gone.
- Door refuses to close smoothly, even after speed adjustments and regular care.
- Rust or corrosion has eaten through the housing or arm.
- Adjustment screws are stripped or don’t respond anymore.
If your closer checks one or more of these boxes, it’s time to shop for a replacement. Most brands—Norton, Dorma, LCN—make models specifically for exterior use, with extra weather seals and finishes. Universal fit closers are handy, but always check that the size and closing force match your door’s weight and width. Swapping a closer isn’t much harder than replacing batteries in a remote—just be sure to follow the step-by-step instructions that come with the new model, and you’ll be back in business.
Final Thoughts: Keep Your Exterior Doors Running Smoothly
Taking care of your exterior door closer mechanism isn’t rocket science, but it does take a bit of attention now and then. A clean, well-oiled closer keeps your door working quietly, protects your home from the elements, and saves you from annoying troubleshooting or sudden repairs. Whether you’re using a name-brand closer like Norton or a universal fit from the hardware store, the basics stay the same: keep it clean, oil the moving parts, check for problems, and don’t ignore leaks or big issues.
Honestly, a little effort goes a long way. The next time you walk through your front door and it shuts behind you with a smooth, solid click, you’ll know your quick maintenance made all the difference.