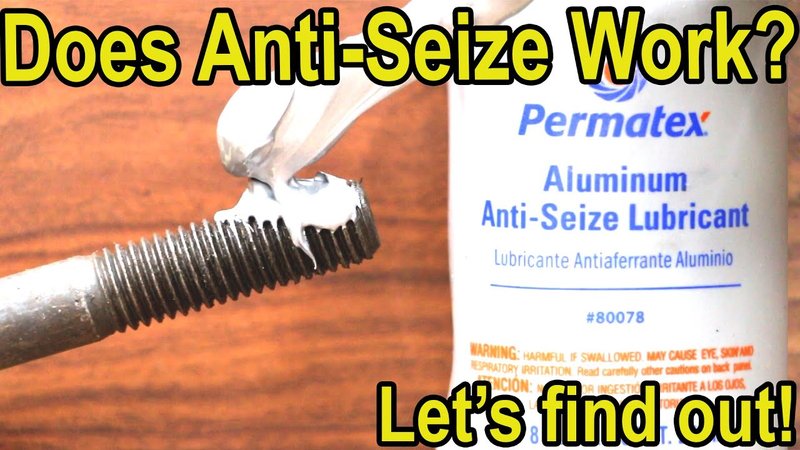
Here’s the thing: applying anti-seize compound to hinge pins is a simple, affordable fix that can save your sanity now and your hardware later. If you’ve ever felt overwhelmed by all the different products—nickel-based, copper, graphite, you name it—or wondered if you’re even applying it right, you’re not alone. Even seasoned DIYers get tripped up! But with the right approach, a good anti-seize compound (like Permatex or Loctite, just to name a couple of trusted brands) can make your hinge pins move like new for years.
Let me walk you through what you need to know. Whether you’re dealing with a stubborn car door, a rusty gate, or your front door at home, these best practices for applying anti-seize compound to hinge pins will help you get the smooth, quiet swing every time.
Why Use Anti-Seize Compound On Hinge Pins?
You might be wondering, “Is anti-seize really necessary, or can’t I just spray a little WD-40 and call it a day?” Let’s break it down. Hinge pins—those thin rods that hold your hinges together—are constantly under friction. Every time the door moves, those surfaces rub against each other. Without some sort of protection, metal-on-metal contact eventually leads to *wear*, *corrosion*, and those infuriating squeaks.
Anti-seize compound is designed to step in where regular oil or lubricant falls short. It’s not just about quieting noise; it creates a lasting shield between the metals. This matters more than you might think, especially for doors exposed to rain, salty air, or huge swings in temperature. Over time, untreated hinge pins can seize up entirely—making it impossible to open the door, or worse, snapping the pin.
Another thing to consider: anti-seize is formulated to stick around. While spray lubricants might make things slippery for a while, they often drip away or evaporate, especially outside. Anti-seize is thick, a bit sticky, and loaded with particles like copper or graphite. It clings to the hinge and keeps doing its job, even if you forget about it for years.
So, think of anti-seize as insurance against both short-term headaches (the squeak) and long-term disasters (a frozen door). It’s a little messier than a quick spray, but the payoff is huge.
Choosing The Right Anti-Seize Compound For Hinge Pins
Not all anti-seize compounds are created equal, and grabbing the first tube on the shelf isn’t always the best move. Different compounds are blended for different environments and metal types. Here’s what you need to know:
- Copper-based anti-seize: Excellent for most steel or iron hinge pins, especially for typical household doors or gates. It holds up well to heat and moisture, and it’s the classic go-to.
- Nickel-based anti-seize: If you’re dealing with stainless steel or hinges exposed to super-high temperatures (think industrial or automotive), nickel is a top choice. It fights off galling (when metals fuse together) better than copper.
- Graphite or aluminum anti-seize: Good for lighter-duty jobs, or where you want less mess and are less worried about extreme conditions.
Here’s a quick comparison:
| Compound Type | Best For | Special Notes |
| Copper-based | Standard home/car hinges, iron or steel | Great all-rounder, good for most climates |
| Nickel-based | Stainless hinges, very high heat or corrosion | Resists extreme temps, industrial-grade |
| Graphite/aluminum | Light-duty, minimal mess | Lower temp, not for heavy weather |
Pro tip: If you’re ever in doubt, check the manufacturer’s instructions or ask at your local hardware store. Most people end up with Permatex or Loctite out of habit—they’re both solid, reliable brands for most hinge pin jobs.
How To Prepare Hinge Pins Before Applying Anti-Seize
Honestly, the number one mistake people make is just slapping anti-seize onto a dirty hinge. Here’s why that’s a problem: dirt, rust, and old grease can turn your carefully-applied compound into a gritty mess—kind of like mixing sand into peanut butter and expecting it to taste good. If you want the compound to do its job, you have to prep.
- Remove the hinge pin: Use a flathead screwdriver and a hammer to gently tap the pin out. For doors that haven’t moved in decades, you might need a little extra elbow grease—but trust me, it’s worth it.
- Clean the pin and hinge: Wipe off any old grease, dust, or rust flakes. If there’s real buildup, use steel wool or a wire brush to scrub it clean. For rust, a bit of penetrating oil can work wonders—just don’t leave it on, as oil and anti-seize don’t always play nice.
- Dry everything: Any water or leftover cleaner will dilute the anti-seize. Give the parts a thorough wipe-down with a clean, dry rag.
If you’re the type who likes to go the extra mile, some folks even sand their pins lightly for a super-smooth finish before reassembling. Is it necessary? Not always, but it sure feels good.
Taking a few extra minutes for preparation makes the difference between a fix that lasts a season and a fix that lasts for years.
Step-By-Step: How To Apply Anti-Seize Compound To Hinge Pins
Here’s the main event! Applying anti-seize is straightforward, but there are some little tricks that make it a lot cleaner and more effective.
- Glove up: This stuff is messy, and it can stain your clothes and skin. Nitrile gloves are cheap and save you some grief at cleanup time.
- Dab, don’t glob: Using a small brush, cotton swab, or just your gloved finger, scoop a pea-sized blob of anti-seize onto the hinge pin, focusing on the sections that sit inside the barrel. Spread it evenly—you’re aiming for a thin, slick coating, not a sticky mess.
- Don’t forget the barrel: If the inside of the hinge barrel is accessible, swipe a little anti-seize compound inside as well.
- Reinsert the pin: Slide the pin back into the hinge, working it up and down a few times. This helps spread the compound around and ensures a smooth motion.
- Wipe away excess: Any ooze-out around the edges? Wipe it away with a rag. Excess compound just attracts dirt.
You might feel tempted to really load up the pin—after all, more is better, right? Not in this case. A thin, even coat does the trick. Too much, and you’ll just wind up with a sticky, gunky mess.
Common Mistakes To Avoid When Using Anti-Seize On Hinge Pins
Let me explain: as simple as this job looks, it’s easy to take a wrong turn, especially if you’re in a hurry or new to DIY projects. Here are a few classic blunders I’ve seen (and yes, made myself):
- Using too much compound: People often slap on a thick layer, thinking it’ll last longer. But honestly, all that extra goop just squeezes out and collects dust.
- Skipping the cleaning step: If you don’t remove old dirt or rust, you’re just sealing it in. The result? Eventually, you’ll get the same squeak—or worse, a stuck pin.
- Mixing lubricants: Sometimes, there’s old oil or grease on the hinge. Mixing chemicals can break down the anti-seize or make it less effective. Start fresh!
- Ignoring the weather: If you’re working outside, do this on a dry day. Rain or humidity can mess with how the compound sticks and sets up.
- Using the wrong compound: Using copper-based compound on stainless steel can sometimes cause tiny bits of corrosion over the long term. Always double-check compatibility, especially on specialty doors and gates.
Even if things don’t go perfectly, most mistakes are easy to fix. Just clean off the hinge and try again—no harm, no foul.
How Often Should You Apply Anti-Seize Compound?
You might be asking, “Does this last forever, or is it another job to add to my list every spring?” Here’s the answer: how often you need to reapply anti-seize compound to hinge pins depends mostly on *where* the hinge lives and *how much* it moves.
- Indoor doors: Once every few years is usually plenty—unless you notice things getting noisy or stiff again.
- Outdoor gates or exposed hinges: Check them yearly. Rain, snow, and mud can wear away even the stickiest compound eventually.
- High-use mechanical hinges (like car doors): These are a little trickier, since they get more action and more exposure to grime. If you’re ever doing a code or battery reset on your car, it’s a perfect time to check your hinges and reapply if needed.
One thing I’ve noticed: when you use a quality brand like Permatex or Loctite and prep the hinge right, you’ll be shocked at how long a single application can last. The key is just to listen to your door. When it starts talking (or squeaking), it’s time.
Troubleshooting: What If Your Hinge Is Still Squeaky Or Stiff?
You followed the steps, and your door still gives you the metallic “yowl” every time it moves? Don’t worry, it happens. Here’s what you might be dealing with:
- Hidden rust or pitting: Sometimes rust goes deeper than you can see. Try removing the hinge pin completely for a better look. If the metal is heavily pitted or worn, you might need to replace the pin altogether.
- Compound not spreading evenly: If you only dabbed anti-seize on one area, parts of the pin might still be bare. Pull it again, and make sure to coat the entire surface.
- Non-metallic hinges: Some modern doors use nylon or plastic bushings inside. Anti-seize isn’t designed for these—even Permatex or Loctite recommend checking compatibility. For these, a silicone-based lubricant might work better.
- Damage beyond the pin: If your hinge barrel is bent or out of alignment, lubrication won’t help much. You may need to repair or replace the hinge itself.
Last tip: if you recently washed your remote garage door or gate (maybe during a code reset or battery swap), make sure water didn’t sneak into the hinge and flush out your hard work.
Alternatives To Anti-Seize Compound For Hinge Pins
You might be thinking, “Is anti-seize my only option? What about regular grease or oil?” Here’s the deal: you *can* use other lubricants, but each comes with trade-offs.
- Household oil: Works great for a quick fix. It’s easy to use, but it doesn’t last and attracts dust like crazy.
- White lithium grease: Another solid choice for hinges, especially if you don’t have anti-seize handy. It’s thick, stays put, and does a decent job against weather. The downside? Needs more frequent reapplication outdoors.
- Silicone sprays: Perfect for non-metallic hinges or where you want minimal mess. But on heavy metal hinge pins, it won’t last as long as anti-seize in harsh weather.
If you decide to go the universal remote route—mixing and matching lubricants—just be aware of compatibility issues. Some products don’t play well together and can “reset” or weaken the protection you worked to create.
For most folks, anti-seize compound is the gold standard for a reason—it’s designed to handle the worst that doors, gates, and garages can throw at it.
Wrapping Up: Smoother Doors, Fewer Headaches
If you’ve made it this far, you know more about anti-seize compound and hinge pins than most people ever will. But here’s the heart of it: a little patience, the right preparation, and the right compound (Permatex, Loctite, or your trusted favorite) keep your doors swinging smoothly and quietly. You don’t need fancy tools or a mechanic’s touch—just a steady hand, a little know-how, and a willingness to get your fingers dirty.
So next time your door protests with a creak, you’ll know exactly what to do. Follow these best practices, and you’ll save not just your ears, but your hinges, from years of unnecessary wear. And honestly? There’s something deeply satisfying about a door that swings open in silence—proof that sometimes, the simplest fixes make the biggest difference.
