Here’s the thing: Door hardware is a lot like the remote to your garage or the “universal remote” for your TV—everyone touches it, but almost nobody thinks about how to protect it. Honestly, a little bit of prevention can save you from a lot of frustration (and extra cleaning). The right *clear coat* acts like a shield, blocking out grime, salt, water spots, and sun damage. Whether your handles are fancy brass, slick stainless steel, or even painted, clear coats can help keep them looking new—without making them slippery or changing their color.
So, what are the options for paint protection on exterior door hardware, and which clear coats actually work? Let’s break it all down, step by step.
Why Door Hardware Needs Paint Protection
Exterior door hardware deals with a lot. Sun, rain, snow, salty air, and everyday use can wear down even the toughest finishes. You might not think about it much, but hardware is one of the first things people see and touch when visiting your home. Over time, those little annoyances—like fading, fingerprints, or tarnish—can add up, making your entryway look neglected.
Think of door hardware as the “front line” in your home’s battle against the elements. Just like you’d put a case on your phone, adding a clear coat is a smart, simple layer of protection.
Here’s why that matters:
- Weather Resistance: Rain, snow, and humidity all speed up rust and tarnish.
- UV Protection: Sunlight can fade and weaken finishes, especially painted or coated handles.
- Fingerprints & Oils: Everyday use leaves behind oils that can dull or even corrode metal over time.
- Salt & Road Chemicals: If you live near the coast or in snowy areas, your hardware takes a real beating from salt in the air or on your shoes.
Even the best brands—like Kwikset, Schlage, Baldwin, or Emtek—can only do so much with their factory finishes. So, whether your hardware is classic brass, brushed nickel, or black matte, a clear coat acts as an insurance policy against the elements.
How Clear Coats Protect Exterior Door Hardware
Clear coats work like an invisible shield. They form a thin, durable layer over your hardware, creating a barrier between the metal (or painted surface) and the outside world. You might be wondering, “Does a clear coat really make that much difference?” Honestly, yes—when applied correctly.
Here’s how a clear coat helps:
- Seals Out Moisture: Stops water from seeping into tiny cracks, which almost always leads to rust or peeling paint.
- Blocks UV Rays: Quality clear coats have UV-resistant properties, so your finish won’t fade or discolor quickly.
- Makes Cleaning Easier: Dust, dirt, and oily fingerprints wipe off more easily, so you don’t have to scrub and risk scratching.
- Prevents Chemical Damage: Acts as a buffer against harsh winter salts or accidental cleaning spills.
Let me explain with a simple analogy: Imagine your favorite remote control. If you cover it with a clear, flexible case, it stays clean and doesn’t get scratched, right? A clear coat does the same thing for your door hardware—but you don’t see or feel it once it’s dry.
The biggest trick is picking the right kind of clear coat (not just any old spray from your garage) and applying it the right way.
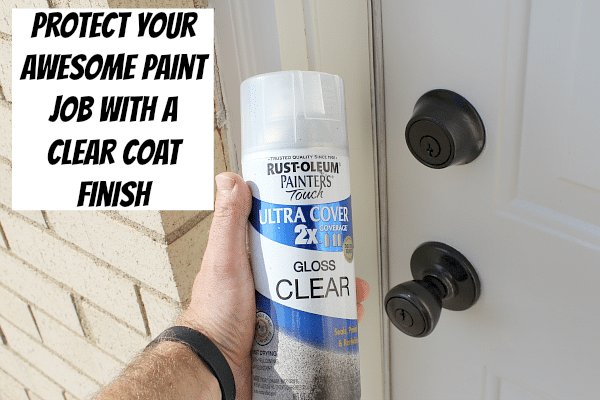
Types of Clear Coats: Which One Should You Use?
Choosing the best paint protection for exterior door hardware isn’t a one-size-fits-all decision. Different materials and finishes need different coating types to really last.
Here are the main options:
- Spray Acrylic Clear Coat: Fast-drying and easy to use. Great for most metals and painted handles, but may need touch-ups every year or two.
- Polyurethane Clear Coat: Super tough, especially the oil-based kind. Slower to dry but extremely durable, even in rough weather.
- Clear Epoxy: Gives a thick, ultra-protective layer. Best for extreme environments or heavy use, but can be tricky to apply and sometimes yellows over time.
- Lacquer Finish: Classic choice for brass or vintage hardware. Dries hard and glossy but can chip if knocked around.
You might be tempted to just grab the clearest, cheapest spray from the hardware store, but here’s the thing: Some sprays don’t bond well with certain metals or factory finishes. For brands like Schlage or Emtek, check if they recommend a specific topcoat. For painted handles, always test a small spot—some clear coats can create a cloudy look or cause bubbling.
Always read the label. If it says “not for exterior use,” skip it. Outdoor hardware really takes a beating, and not all clear coats can handle the sun, rain, and freezing temperatures.
Step-by-Step: Applying a Clear Coat on Door Hardware
If you’re thinking, “Can I really do this myself?”—yes! Honestly, it’s not much harder than painting your nails (except you’ll want to do it outside or in a well-ventilated garage). Here’s a friendly walkthrough:
What you’ll need:
- Your preferred clear coat (spray or brush-on)
- Painter’s tape
- Fine-grit sandpaper (400–800 grit)
- Microfiber cloth
- Mask or gloves (optional, but prevents mess)
How to apply:
- Clean the hardware: Wipe away dust, grease, or fingerprints. Any residue will get sealed in if you skip this step.
- Sand lightly (if needed): For a painted or glossy surface, gently buff with fine-grit sandpaper so the clear coat sticks better.
- Mask off the area: Use painter’s tape to protect the door and surrounding trim from overspray or drips.
- Apply the clear coat:
- Spray: Hold the can about 8–10 inches from the surface. Use light, even passes—better to do two thin coats than one thick one.
- Brush: Use a high-quality synthetic brush and avoid heavy, drippy strokes.
- Let it dry: Follow the product instructions, but most need at least 2–4 hours between coats. Don’t touch the handle until it’s fully cured (anywhere from 12 hours to overnight).
After it’s dry, you’re done! Your hardware will feel the same—just better protected from pretty much anything Mother Nature throws at it.
Common Problems and How to Avoid Them
You might be worried about ruining the look of your expensive hardware. That’s a fair concern. Here are a few hiccups people often run into, plus some ways to sidestep them:
- Cloudy or Streaky Finish: Usually happens if you spray too close, use too much, or apply in humid weather. Always spray in light coats and give each one time to dry.
- Yellowing Over Time: Some clear coats, especially older polyurethane and epoxy formulas, can yellow with age. If your hardware is polished nickel or chrome, look for a non-yellowing or “UV-stable” product.
- Peeling or Bubbling: Applying a clear coat over dirt, oil, or loose paint almost guarantees failure. Clean and sand first, and always check that your chosen clear coat plays nice with the existing finish.
- Grip or Feel Changes: The last thing you want is a slippery or sticky handle. Test your clear coat on a spare piece of metal or an inside closet knob first to check the feel before you commit.
Pro tip: If you ever need to reset, sync, or re-paint your hardware (maybe after switching brands), you can remove most clear coats with a solvent, re-prep the surface, and reapply.
Comparing Factory Finishes vs. Aftermarket Clear Coats
Most big brands (think Kwikset, Schlage, Baldwin) offer their hardware with factory-applied finishes—sometimes even a “lifetime” warranty against tarnish or corrosion. Sounds bulletproof, right? Not quite. Factory finishes use advanced methods like electroplating or powder coating, which are tough but not invincible.
Why bother with a clear coat? Because real life is messy:
- Factory finishes wear down faster on the sunniest or saltiest doors in your house.
- Some brands don’t cover fading from UV or chemical exposure.
- Visible spots, scratches, and stains can still happen—no matter what the box said.
*Aftermarket clear coats* let you add a layer of insurance, especially if your hardware is expensive or sentimental. They’re also handy if you’ve re-painted a handle or installed budget hardware that didn’t come with much protection to begin with.
Just remember, clear coats aren’t “universal remote”-style magic fixes—you still want to follow the right prep and use the right formula for your finish.
Alternatives to Clear Coats (And When To Use Them)
Clear coats are great, but they’re not your only choice for protecting exterior door hardware. Here are some alternatives (and when they might make more sense):
- Wax Polishes: Easy to apply, give a subtle shine, and add a bit of moisture resistance. Perfect for vintage brass or bronze, but need repeating every few months.
- Protective Films: Clear stick-on films, like the kind used for car doors, can work in a pinch. Not as durable but removable and fast.
- Powder Coating: Only practical if you’re refinishing hardware from scratch. Incredibly tough but requires removing and professionally treating the handle.
- Matte or Satin Sprays: If you want less shine, some clear coats come in matte or satin finishes, so you get protection without the gloss.
If you rent or plan to swap out hardware soon, you might skip a clear coat entirely and just use a quick wax now and then. But for most homeowners, a quality clear coat is the best paint protection for exterior door hardware by a mile.
How Long Does Paint Protection Last?
You might be wondering if you’re signing up for a paint-sync routine every month, like changing batteries in your remotes. The good news: Most high-quality clear coats last anywhere from 1–5 years, depending on weather and traffic.
*Average lifespan for clear coats:*
| Spray Acrylic | 1–2 years |
| Oil-based Polyurethane | 3–5 years |
| Epoxy | 3–5 years (can last longer if applied thickly) |
| Lacquer | 2–4 years |
| Wax Polish | 3–6 months |
If you live near the ocean, on a busy street, or in a spot with blazing sun, expect the shorter end of the range. It’s smart to check your hardware every spring for chips, scratches, or fading—catching problems early makes all the difference. Just like you’d reset or troubleshoot a stubborn remote, a quick touch-up coat can keep things looking great for years to come.
Final Thoughts: Choosing and Using the Best Paint Protection
Exterior door hardware gets a lot of attention, even if we usually don’t notice it until there’s a problem. Adding clear coat protection is a bit like setting up a backup for your most-used remote: It only takes a little work, but it pays off big in appearance and peace of mind.
The key takeaways: Take your time prepping and cleaning, pick a clear coat that matches your material and climate, and don’t rush the drying process. Whether you choose a spray acrylic for quick shine, an oil-based polyurethane for max durability, or even a clever alternative like wax, you’ll give your hardware the fighting chance it deserves.
So, the next time you unlock your door and notice how sharp that handle looks, you’ll know you made the right call—and you won’t have to worry about fading, fingerprints, or surprise rust anytime soon. Here’s to hardware that stays as fresh and welcoming as the day you installed it!