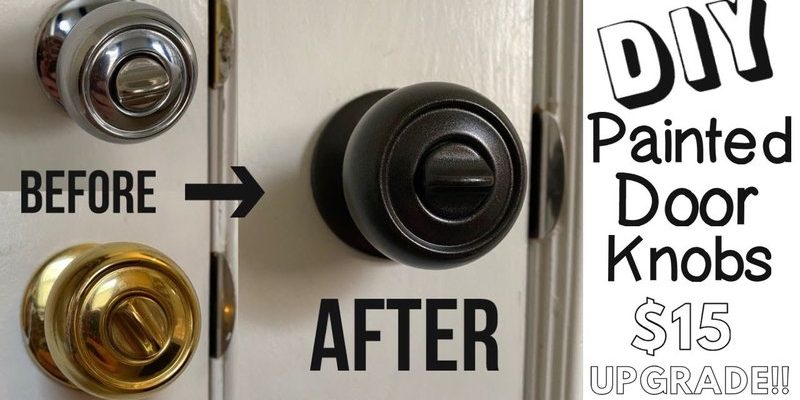
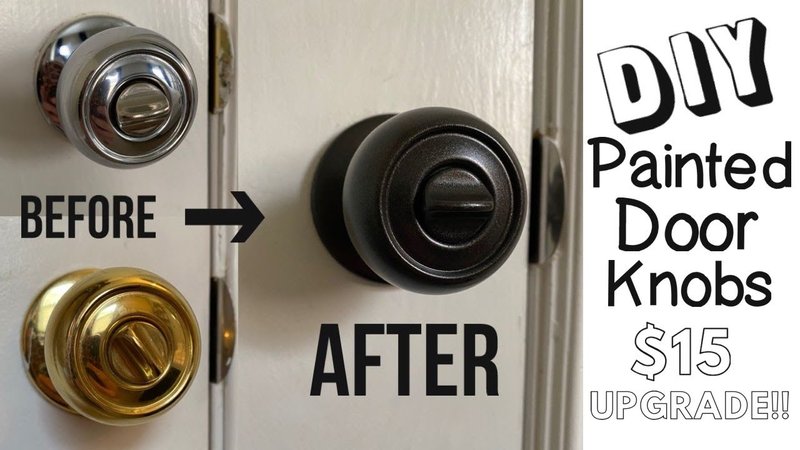
Imagine giving your doorknobs a fresh coat of paint, transforming them from drab to fab with just a few supplies. This isn’t just about looks, though. A well-done paint job can also add a protective layer to those knobs, helping them withstand daily wear and tear. The good news? Painting door knobs isn’t complicated, and I’m here to guide you through the best methods to do it effectively.
Choosing the Right Paint for Durability
The first step in your door knob makeover is selecting the right paint. Honestly, not all paints are created equal. For door knobs, you’ll want a paint that withstands frequent use and holds up against scratches. Here are some options to consider:
- Acrylic Enamel Paint: This type of paint provides a hard finish and is great for metal surfaces. It also comes in various colors and dries quickly.
- Spray Paints: If you’re looking for an even finish, spray paint designed for metal can be a fantastic choice. Just ensure it’s labeled as suitable for high-traffic areas.
- Oil-Based Paint: This is another durable option, perfect for high-use items, but you’ll need to prepare for a longer drying time and more potent fumes.
You might be wondering how to decide. Think about the finish you want; glossy finishes tend to be more durable but can show fingerprints easily. If aesthetics matter, choose a finish that complements your overall decor.
Preparing the Door Knobs for Painting
Before diving in, preparation is key. Just like a painter wouldn’t start on a canvas without a clean surface, you shouldn’t paint doorknobs without proper prep. Here’s how you can get them ready:
1. Remove the Knobs: Use a screwdriver to take the knobs off their hinges. This step ensures you can paint without missing spots and eliminates the risk of paint getting on your door or hardware.
2. Clean the Surface: Dirt and oils can interfere with paint adhesion. Clean the doorknobs thoroughly with soapy water and dry them completely. If they’re particularly tarnished, a bit of rubbing alcohol can help.
3. Sand for Better Adhesion: Lightly sanding the surface helps the paint stick better. Use fine-grit sandpaper and give the knobs a quick scuff before wiping them down again to remove dust.
Taking these steps might feel tedious, but a little effort in preparation will pay off in the durability of your finished product.
Best Painting Techniques for a Smooth Finish
Now it’s time for the fun part: painting! Depending on your chosen paint type, you’ll have different techniques to consider. Let’s break them down.
For Spray Paint:
– Even Coating: Holding the can about 6-12 inches away from the knob, spray in light, sweeping motions. This reduces the risk of drips.
– Multiple Coats: It’s often better to do several thin coats rather than one thick one. Allow each coat to dry fully before adding another (check the paint instructions for drying times).
For Brush-On Paint:
– Use a Good Brush: A small brush or foam applicator works best for door knobs. Apply thin layers, starting at one side and moving to the other.
– Watch for Drips: Keep an eye out for drips or pooling paint, which can ruin a smooth finish. If you see any, quickly brush them out.
Whichever method you choose, take your time. Rushing this step might result in a less-than-perfect finish.
Sealing and Protecting Your Painted Knobs
After your paint has dried completely, it’s essential to seal your work. This step enhances durability and gives your knobs an extra layer of protection against scratches and wear. Two popular sealing options are:
1. Clear Coat Sealant: A clear acrylic or polyurethane seal can add a glossy finish and protect the paint. Just apply it with a clean brush, following the same techniques as when you painted.
2. Topcoat Spray Sealants: For spray-paint projects, you can find clear spray topcoats designed for metal—apply this in light layers, just like the paint.
Let the sealant dry completely as noted on the product instructions. This added step will ensure your hard work pays off in longevity.
Reinstalling Your Door Knobs
With your knobs now beautifully painted and sealed, it’s time to put them back on. This process is straightforward but requires a bit of care to avoid chipping the new finish. Here’s how to reinstall them:
– Align the Knob Properly: Match the holes with the screws in the door. If it doesn’t align perfectly, don’t force it—make adjustments as needed.
– Tighten Up: Once aligned, gently screw the knob back into place. Don’t over-tighten, as this can lead to chipping or cracking.
Stand back and admire your handiwork! Your newly painted knobs should feel smooth and look stunning.
Maintaining Your Painted Door Knobs
The last thing to consider is how to keep those doorknobs looking fresh. Regular maintenance ensures their longevity and protects your investment. Here are a few tips:
– Wipe Down Regularly: Use a soft cloth to clean away dust and fingerprints. Avoid harsh chemicals, as they can wear down the paint.
– Touch Up as Needed: If you notice a scratch or chip, a quick touch-up can keep the knobs looking new. Just sand the area lightly, repaint, and seal it again.
With a little love and attention, your painted door knobs will maintain their beauty for a long time.
Painting interior door knobs is more than just a trendy DIY project; it’s a way to refresh your home and add a personal touch. By choosing the right paint, preparing properly, employing good techniques, and maintaining your work, you can achieve a durable, attractive finish. So, grab your supplies and get started! Transforming your doorknobs is easier than you think—and the results can be incredibly satisfying. Happy painting!