Frankly, there are more choices out there than you’d expect. Some adhesives work best for wood-on-wood connections, while others are made for jobs where water or temperature swings are an issue. Brands like Loctite PL Premium, Liquid Nails, and Gorilla Construction Adhesive pop up everywhere when you start searching, each with their own fans and specific uses. The challenge is matching the right product to your unique door, subfloor, and climate—so you end up with a solid, weatherproof threshold that doesn’t budge.
Why Adhesive Choice Matters For Exterior Door Thresholds
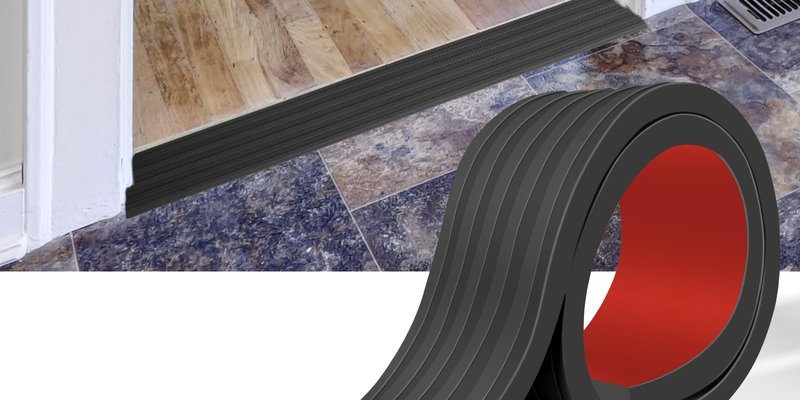
When you’re dealing with exterior door thresholds, you’re not just filling a gap or holding two pieces of material together. The threshold is a front-line defender against rain, dirt, bugs, and even temperature changes. If the adhesive fails, it’s not just the wood or metal that comes loose—it can mean leaks, drafts, and warped flooring (seriously, nobody wants to deal with that).
Here’s the thing: unlike inside your house, *outdoor thresholds* are exposed to all kinds of conditions. The adhesive you use has to cope with:
- Moisture and water seepage—from rain, snow, or even mopping
- Temperature swings—hot summers, freezing winters, sometimes both in a single week
- Frequent movement—every time the door opens or closes, or when people step in and out
If you use a weak adhesive, or the wrong type, it can break down or lose grip over time. That’s why pros almost always recommend construction adhesives over simple wood glue or caulk. These heavy-duty products are made to stay flexible, hold strong, and handle both movement and weather like a champ.
Types Of Adhesives You Can Use For Thresholds
You might be wondering: “What kinds of adhesives actually work here?” It boils down to three main types that most folks (and pros) talk about.
- Polyurethane Construction Adhesive: This is the rock star of threshold jobs. Brands like Loctite PL Premium or Gorilla Construction Adhesive get a lot of love because they stick to just about anything—wood, metal, concrete, you name it. Polyurethane stays a bit flexible after curing, which is perfect for thresholds that expand or contract with the weather. It’s also highly water-resistant, making it a top pick for exterior jobs.
- Silicone-Based Adhesive: Silicone is best known for its waterproof sealant abilities. It’s not as strong as polyurethane, but it’s extremely good at keeping out water and air. Some folks use a bead of silicone underneath thresholds mainly for extra waterproofing, then back it up with a stronger adhesive product.
- Hybrid Polymer Adhesives: These are newer blends that combine the best features of silicone and polyurethane. Products like Sikaflex or certain Liquid Nails lines claim incredible strength and flexibility, and they stick to tough surfaces like stone or metal. They can be pricier, but often worth it for tricky installs.
Each adhesive type has its own quirks. Polyurethane can be messy and expand as it cures, so you need to apply it carefully. Silicone is neat and easy to tool but not meant for weight-bearing. Hybrid adhesives split the difference and are a good call if your setup isn’t textbook perfect.
Popular Brands And What Sets Them Apart
Let me break down some of the brands that show up when people talk about the best adhesives for securing a new exterior door threshold.
- Loctite PL Premium: This is the go-to recommendation from a lot of pros. It’s a polyurethane adhesive, super strong, and bonds to so many different materials. It’s waterproof and cures tough, but stays slightly flexible, which is perfect for exterior threshold installations. It can expand while curing, so don’t go overboard with the application.
- Liquid Nails: An old favorite. There are several formulas, but their “Heavy Duty Construction Adhesive” or “Fuze*It All Surface” lines are often used for thresholds. They’re a bit easier to handle than some other polyurethanes, and the All Surface version can even bond in damp conditions.
- Gorilla Construction Adhesive: Known for its strong initial grab, this adhesive is ideal if you need things to stay put right away (like if you can’t or don’t want to use screws). It’s also weatherproof and can handle a bit of surface irregularity.
- Sikaflex: A favorite for areas with serious temperature changes. Sikaflex remains flexible for decades, resists cracking, and bonds to tricky surfaces like concrete or stone. It’s often used in commercial or high-traffic areas.
Honestly, most big-box hardware stores will have at least two of these brands. If you’re in doubt, check the back of the tube—most list “thresholds” right in their suggested applications.
How To Apply Adhesive To A New Door Threshold
Applying adhesive for a threshold isn’t rocket science, but there’s a right way and a wrong way. Here’s what works best if you want the threshold to stay put for the long haul.
If you rush this part or try to cut corners, you’ll probably end up doing it all over again in a couple of years. Save yourself the headache and go slow.
- Prep the surface: Both the subfloor (or concrete) and the bottom of your threshold should be clean and dry. Use a vacuum or brush to remove dust, grit, or old glue. If there’s any old caulk or debris, scrape it away. A clean surface helps the adhesive grip for the long haul.
- Dry-fit your threshold: Before you open the adhesive, pop the threshold into place to make sure it fits tight against the door frame and floor. You don’t want surprises once the glue is on.
- Apply the adhesive: Cut the tip of the adhesive tube at a 45-degree angle. Run a zigzag bead across the entire underside of the threshold. If you’re using a particularly heavy threshold or uneven subfloor, add more beads as needed. Don’t be stingy, but don’t go crazy either—most adhesives expand a bit as they cure.
- Set and secure: Press the threshold firmly into place. If your threshold is designed for screws, drive them in now, but follow the manufacturer’s recommendations. The screws aren’t always required with a strong adhesive, but they do help hold things while the glue cures.
- Clean up excess: Use a damp rag to wipe away any squeeze-out immediately. Once polyurethane adhesives dry, they’re tough to remove.
- Let it cure: Check the label, but most adhesives need at least 24 hours to fully cure. Don’t walk on or stress the threshold until then.
Doing a little extra here saves hours of troubleshooting later—like trying to reset a loose threshold or patch up leaks.
Common Problems With Door Threshold Adhesives (And How To Avoid Them)
No one wants that sinking feeling when you hear a “crack” underfoot or spot water creeping in after a rainy day. Honest truth: most issues with exterior thresholds come from the wrong adhesive, or sloppy prep.
- Poor surface prep: If dust, old glue, or moisture is present, even the best adhesive can’t bond well. Always clean thoroughly and let surfaces dry before applying glue.
- Using the wrong adhesive: Not all “construction adhesive” is created equal. Make sure the product is rated for exterior use, and will bond to the materials you’re working with (wood, metal, concrete, etc.). Read the tube—don’t just trust the name.
- Skipping screws or fasteners: Some thresholds benefit from extra mechanical support. If the manufacturer suggests using screws in addition to adhesive, follow that advice. The combo prevents shifting and squeaks.
- Ignoring the cure time: It’s tempting to use the doorway right after installation. Resist! Give the adhesive time to fully bond, or you risk having to troubleshoot a messy re-do.
If you do get leaks or movement after installation, check for gaps along the edges. Sometimes a quick bead of exterior-grade silicone can sync everything back up, sealing off trouble spots.
Comparing Adhesive To Traditional Fasteners: Is Glue Alone Enough?
You might be thinking, “Can I just use adhesive, or do I need to screw the threshold down too?” Here’s the honest answer: industry best practice usually calls for both. Adhesive provides a weatherproof, gap-free bond, while screws add extra security.
- Adhesive only: Works well if the subfloor is perfectly flat, and the threshold fits snugly. Some modern adhesives are strong enough to hold on their own, especially for thresholds that aren’t stepped on much.
- Screws only: Not ideal. Over time, vibrations and temperature swings can loosen fasteners, letting water in. Plus, screws alone don’t seal cracks and gaps against drafts.
- Adhesive + screws: The gold standard for exterior doors. You get the strength and weather resistance of the adhesive, with the mechanical hold of screws. Most new builds and renovations use this method, especially in areas with lots of rain or snow.
If your threshold is metal or heavy-duty, or if your subfloor isn’t perfectly level, you’ll almost always want both. That way, you don’t have to reset or repair the threshold just a season or two down the road.
Weather And Surface Considerations: Don’t Overlook The Details
It’s easy to think one adhesive fits all, but real-world conditions matter—a lot. If you live somewhere with harsh winters, extreme humidity, or constant rain, don’t just grab the cheapest tube. Choose products specifically rated for your climate and surface materials.
- Concrete vs. wood subfloors: Polyurethane adhesives are great for both, but some hybrids are even better for tricky materials like stone or tile. Always double check compatibility if your doorway is unique.
- Cold weather installs: Some adhesives won’t cure well below a certain temperature. Liquid Nails Fuze*It All Surface and Sikaflex are both known for working in cooler conditions, but always read the label. If it’s too cold, you might need to warm the area or wait for a warmer day to get a strong bond.
- Moist or humid environments: Polyurethane adhesives actually react well to a little moisture in the air, but the surfaces themselves must still be dry. Too much wetness can prevent bonding or trap moisture under the threshold, which leads to rot or rust down the road.
Paying attention to these little details can mean the difference between a threshold that lasts for decades, and one that needs constant troubleshooting or a full reset.
Tips For Long-Lasting, Professional Results
If you want your new exterior door threshold to look good and perform even better, here are a few tips the pros swear by:
- Read the instructions: Every adhesive brand is a little different. Make sure you follow the label for curing times, clean-up, and application temperatures.
- Don’t skimp on caulking: After your adhesive sets, run a bead of high-quality exterior caulk along the edges. This stops water from sneaking in where the threshold meets the floor or door frame.
- Check for level and fit: Use a spirit level and adjust as needed before the adhesive sets. Uneven thresholds cause door problems and water pooling—easier to fix before everything dries solid.
- Double-check for gaps: Gaps invite trouble—dirt, bugs, water, and air. Use extra adhesive or caulk to seal any problem spots while everything’s still wet.
- Let it dry fully: Even “fast grab” adhesives need cure time. Plan your installation on a day when you can leave the doorway alone, and avoid walking on the threshold until you’re sure it’s fully set.
It’s easy to get impatient and rush, but a bit of extra attention now means you’re far less likely to do a messy code-red troubleshooting job next winter.
Final Thoughts: Choosing The Right Adhesive For Your New Door Threshold
Securing a new exterior door threshold isn’t the flashiest home project, but getting it right makes a world of difference in comfort, energy savings, and keeping things dry. Stick with a top-rated, weather-resistant construction adhesive like Loctite PL Premium, Gorilla Construction Adhesive, or a hybrid from Liquid Nails or Sikaflex. Match the product to your materials, climate, and install method—don’t just grab whatever’s cheapest or on hand. And remember: a clean surface, careful application, and letting it cure fully are just as important as the glue itself.
If you put in the effort up front, you’ll enjoy years of squeak-free, water-tight entryways—without those annoying troubleshooting sessions or emergency resets. Honestly, a little patience and the right adhesive really do go a long way in making your door threshold last.