Imagine your bi-fold doors are like a set of concertina-style curtains at a theater—when they’re perfectly aligned, they open and close effortlessly. But when something’s off, the performance can fall flat. This guide will take you through the steps of adjusting those hinges to ensure your doors work just as they should, whether you’re dealing with issues from a specific brand or just general wear and tear.
Understanding the Basics of Bi-Fold Doors
Bi-fold doors consist of multiple panels that are hinged together. When you pull on the handle, the panels fold in on each other, allowing for a wide opening. Each of these panels pivots on hinges attached to the door frame and sometimes to the floor. If you notice that your doors aren’t folding or closing properly, it’s often due to misaligned hinges.
Most bi-fold doors will have two types of hinges: the top hinge and the bottom hinge. The top hinge supports the weight of the door and allows it to swing open and closed, while the bottom hinge provides stability. If either is off-kilter, you’ll notice problems.
So, why does proper alignment matter? Misalignment can lead to gaps, uneven closures, and even damage to the door or frame over time. You want your bi-fold doors to open smoothly, just like a well-rehearsed dance routine.
Gathering Your Tools for the Task
Before you dive in, make sure you have everything you need. Here’s a quick list of tools you’ll want on hand:
- Flathead screwdriver
- Phillips screwdriver
- Level
- Measuring tape
- Wood shims (if needed)
Having the right tools makes the job much easier and allows you to work more efficiently. When gathering your tools, think of it as prepping for a fun DIY session. If you have everything laid out, you can focus more on the task instead of running back and forth looking for that missing screwdriver.
Assessing the Current Alignment of Your Doors
Understanding the current alignment of your bi-fold doors is crucial before making any adjustments. Start by fully opening the doors. Stand back and take a good look at how the panels stack against each other. Are they flush, or is there a noticeable gap?
You might be wondering how to check. Grab your level and place it on each of the panels. If the bubble is off-center, you have an alignment issue. This is a common problem, especially in homes where the foundation may shift over time.
If you spot any gaps, don’t worry. This is where the real work begins! Knowing where the issues lie allows you to pinpoint the adjustments needed, ultimately leading to a more functional door.
Making Adjustments to the Hinges
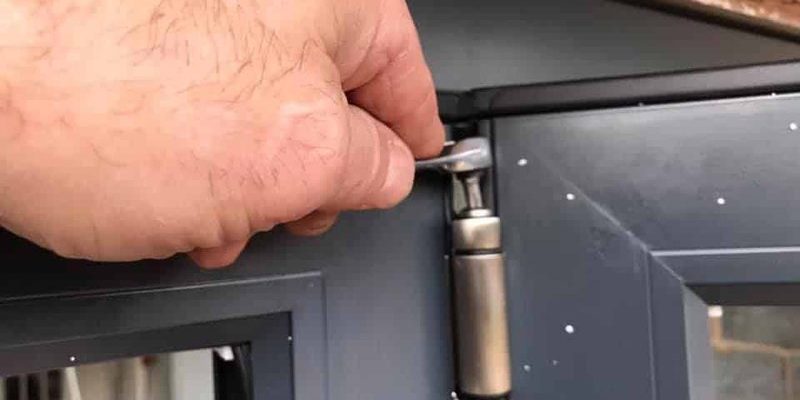
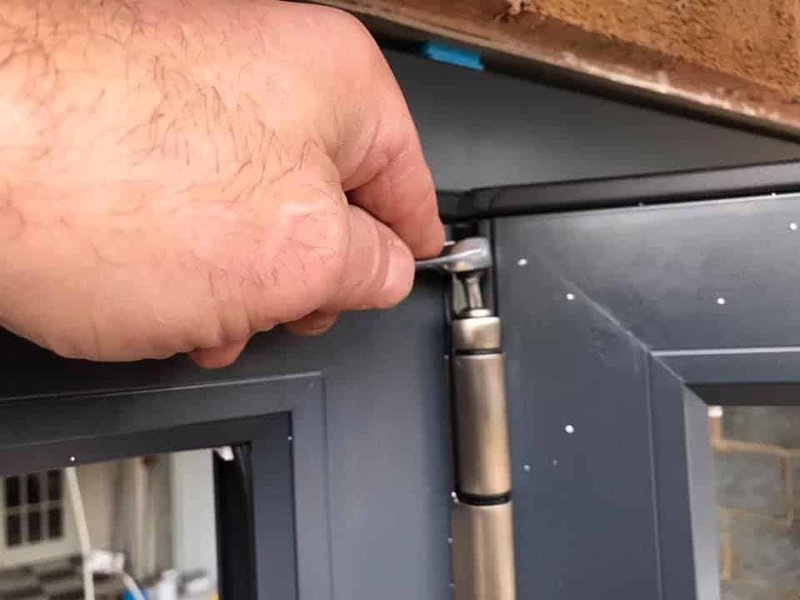
Now it’s time to adjust the hinges. Start with the top hinge. Using your flathead screwdriver, gently loosen the screws on the hinge slightly, but don’t remove them completely. With the screws loosened, you can shift the door slightly up or down as needed. You may want to tap gently with a hammer and a wood block to help guide it.
Once you get the top hinge in a better position, it’s time to check the bottom hinge. The bottom hinge often needs adjustments to ensure the door is straight and aligned.
After adjusting both hinges, it’s essential to tighten the screws while holding the door in place. This may sound simple, but if you rush, the door can slip back into the misaligned position.
Using Wood Shims for Extra Support
If after adjusting the hinges, your panel still isn’t quite right, you might want to consider using wood shims for extra support. Shimming is like giving your door a little boost to help it stand tall and proud.
To use shims, simply slide them under the bottom hinge if the door is sagging. This will create a temporary lift. Once you have the door in a stable position, you can secure the hinge screws again.
Don’t forget to trim any excess shim sticking out. An uneven door isn’t just unsightly; it can also cause further wear over time.
Testing the Adjustments
After making your adjustments, it’s time to test them out. Close and open the doors a few times. This is your chance to see if they’re behaving better. Look for any gaps and listen for any unusual sounds like squeaking or grinding—that often indicates that something still isn’t right.
Keep the level handy. Place it on every panel to make sure they’re aligned correctly. If everything checks out and your doors feel smooth when operating, congratulations! You’ve successfully adjusted your bi-fold door hinges for proper panel alignment.
Common Problems and Troubleshooting Tips
Even after your best efforts, you might run into some problems. Here are a few common issues and how to tackle them:
1. Doors Still Won’t Close Properly: If the doors are still misaligned, check that the hinges are not worn down or misshapen. If they are, it might be time to replace them.
2. Squeaking Noises: Squeaks can be a sign that the hinges need lubrication. Use a silicone spray on the hinges to keep them moving smoothly.
3. Panels Overlapping: If one panel overlaps the other, it might mean the adjustments were too drastic. Double-check the measurements and try adjusting the hinges again gently.
You might also consider regular maintenance for your bi-fold doors, like cleaning the tracks and lubricating the hinges to avoid issues down the road.
Adjusting the hinges on your bi-fold doors isn’t just about fixing a minor nuisance; it’s about maintaining the flow and functionality of your home. A properly aligned door enhances both the aesthetic appeal and the ease of use. Plus, knowing how to troubleshoot these issues gives you more confidence in handling home repairs.
So, whether you’re letting in the sunshine or enjoying a nice breeze, properly adjusted bi-fold doors can elevate your space. With a little patience and practice, you can master this process and keep your doors in tip-top shape. Here’s to enjoying those beautiful bi-fold doors, aligned perfectly for years to come!