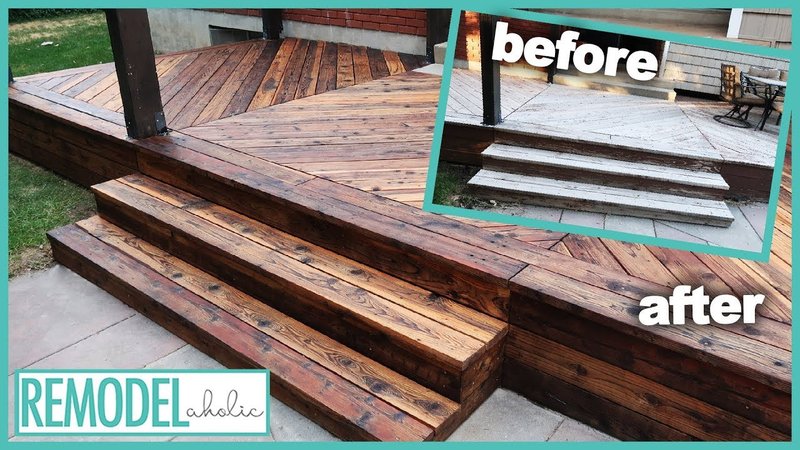
Here’s the thing: whether your threshold is made of oak, maple, or even that mysterious “engineered wood” the builder used, a protective oil treatment is what keeps it from drying out, cracking, or turning into a warped mess. Most folks reach for brands like Watco, Rubio, or Osmo because they’re reliable, easy to find, and designed specifically for wood surfaces that see a lot of action. Let’s walk through the best ways to re-oil your wood threshold for lasting protection—no prior experience needed.
Why You Need To Re-Oil A Wood Threshold
The wooden threshold at your door isn’t just a strip of wood you step over. It’s a high-traffic, hardworking part of your entryway that does more than you might realize. First off, it acts as a buffer between your home’s interior and the outdoors, catching dirt, water, and all sorts of debris before they make their way inside. Over time, that constant exposure takes a toll—think scuffs, scratches, and moisture damage, the kind that can turn a pretty threshold into a warped, splintery trip hazard.
Here’s why a regular oil treatment matters: Wood is a natural, porous material that loves to soak up moisture. Without protection, water seeps in, swelling the fibers and making the wood swell or even rot. At the same time, sun and wind can dry it out, which leads to splits and cracks. Oiling keeps the wood conditioned, prevents it from drying out, and creates a subtle barrier against spills and stains.
You might be wondering, “Why not just slap on a coat of polyurethane and be done with it?” Polyurethanes are fine for some projects, but for thresholds, which flex and move with weather changes, a penetrating oil is usually better. It soaks into the wood rather than sitting on top, so it won’t crack or peel as the wood expands and contracts. Plus, it’s much easier to top up an oil finish than to sand off a flaking, plastic-like coat. In short, oiling is simple, forgiving, and keeps your entry looking sharp.
Choosing The Right Oil For Threshold Protection
Standing in the hardware store aisle, staring at shelves loaded with oil finishes, it’s easy to get overwhelmed. The trick is knowing what each type actually does—and which one’s best for the beating your threshold takes. The big names you’ll see, like Watco Danish Oil, Rubio Monocoat, and Osmo Polyx-Oil, are all solid choices, but there are a few types of oil to consider:
- Tung Oil: A natural oil that dries hard and gives great water resistance. It soaks in deep and brings out a warm, rich color.
- Linseed Oil (Boiled): Classic and inexpensive. It’s easy to use, but dries a bit slower and can yellow slightly over time.
- Hardwax Oils: Like Osmo or Rubio, these mix oil with wax for a surface that’s extra durable but still looks natural. They’re pricier but excellent for high-traffic areas.
Let me explain: If your threshold gets direct sun or serious puddles, go with a hardwax oil or tung oil; they last longer and stand up to abuse. For thresholds that see less weather, a basic boiled linseed oil or Danish oil is just fine—and they’re both affordable and easy to find. Honestly, the best oil is one you’ll actually use and reapply as needed, so don’t stress over brand names too much. Read the label; look for oils designed for floors or exterior thresholds, and check if they need a specific type of prep or maintenance.
How To Prep Your Threshold Before Oiling
Before you start splashing oil around, a bit of prep work makes all the difference. This isn’t just busywork—if you rush, you’ll trap dirt, moisture, or old finish under the new oil, and your beautiful wood won’t get the protection it needs. Here’s the best way to prep:
First, sweep and vacuum the area thoroughly. You don’t want to grind grit into the wood with sandpaper. Next, check for old layers of finish—if you see cracked varnish or flaky paint, you’ll need to sand those off so the oil can soak in. Use a medium-grit sandpaper (around 120–150 grit) and sand with the grain until the surface feels smooth and looks clean. For thresholds that haven’t been oiled in years, it’s worth doing this right, even if it’s a bit of a workout.
Don’t forget about cleaning. Wipe the sanded threshold with a barely damp rag to pick up dust—then let it dry fully. If you see any mildew or mold, scrub those spots lightly with diluted vinegar and let dry again. And if your threshold is especially dry, consider “wetting” the surface with a little mineral spirits (use a cloth, not a bucket), which helps open the pores and get an even oil finish.
If you skip prep, you risk uneven color, rough spots, or—worse—a finish that peels right off in a few months. Take your time here. It’s worth it.
Step-By-Step: How To Re-Oil A Wood Threshold
This is the heart of the job, and honestly, it’s the most satisfying part. You see that tired wood start to glow, and suddenly your entryway looks ten times better. Here’s my go-to method:
- Apply the oil: Use a clean, lint-free cloth or a natural bristle brush. Dip it in the oil (don’t soak it), then work it into the wood along the grain. Cover the entire surface—they key is to get even coverage, but avoid puddling or dripping.
- Let it soak: Most oils need 15–30 minutes to penetrate. If it looks dry, add a little more. Don’t rush it, but don’t let the oil sit so long it gets sticky.
- Wipe excess away: After the soak, take a clean rag and gently buff off any standing oil. You want the threshold to look rich, not shiny or greasy.
- Repeat as needed: For a deep finish, apply a second or even third coat (let each dry fully—check the bottle for timing, but usually a few hours to overnight).
If you’re using a two-part product like Rubio Monocoat, you’ll need to mix the oil with its hardener. Follow the instructions closely—these products cure quickly for outstanding protection. For regular oils, patience is key. Let each layer dry fully before walking on it or closing the door.
How Long Does It Take To Dry? What To Expect
This is the part where most people get antsy. You’ve oiled the threshold, it looks gorgeous, and you want to see the finished result. But wood oil is a little like hair dye: it needs time to cure so it can really protect the wood.
Typical drying times:
- Tung oil: 24–48 hours per coat.
- Boiled linseed oil: 12–24 hours per coat.
- Hardwax oils: Some dry to the touch in under 8 hours but may need a full day to fully harden.
Weather makes a difference, too. Humid or cold days will slow things down. If you can, plan to oil your threshold when you don’t need to walk on it for a day or two. And don’t put down rugs or let pets crawl over it until it’s truly dry. If you rush this part, you end up with oily footprints or lint stuck in your nice new finish.
If you’re ever unsure, the trick is to touch a corner with a fingertip. If it feels tacky or leaves a mark, give it more time. It’s better to wait than have to re-sand and start over.
Common Problems And How To Fix Them
Even if you follow every step, sometimes things go sideways. Maybe the finish looks blotchy, or it’s sticky a day later, or you spot cloudy patches. Don’t panic—these are all fixable, and usually easy to address at home.
Sticky or tacky surface? That usually means too much oil was left on the wood. Give it another 12–24 hours. If it’s still tacky, wipe it down with a rag lightly dampened in mineral spirits to lift off the excess. Next time, buff off more oil after the soak.
Patches look dull or uneven? The wood probably soaked up more oil in some areas than others. Just apply a thin touch-up coat to the dull spots, let it soak for 10–15 minutes, and buff again. It’ll even out over time.
Mold or mildew after oiling? Oiling traps moisture, so if the threshold wasn’t fully dry before you started, you may see gray or black spots appear. Treat affected areas with diluted vinegar, allow the threshold to dry completely, then re-oil just those spots.
- If you’re worried about color matching, test oil on a hidden part of the threshold first.
- Always dispose of oily rags safely—they can spontaneously combust! Lay them out flat until they’re dry, then toss them properly.
How Often Should You Re-Oil A Wood Threshold?
You might be thinking, “Once I oil it, am I set for life?” Not quite. Wood thresholds need regular care to stay protected and beautiful. How often you re-oil depends on foot traffic, weather, and the type of oil you use.
For most homes, re-oiling once or twice a year does the trick. If your threshold is constantly exposed to rain, snow, or direct sun, check it every few months. If the wood looks dry, dull, or starts to feel rough, it’s time for a touch-up. Hardwax oils tend to last the longest—sometimes up to a year or more—while basic oils may need reapplying a little sooner.
There’s no shame in a quick refresher, even if you “just did it.” Honestly, it’s like moisturizing your skin: a little effort now saves you from bigger repairs down the line. A re-oiled threshold resists mud, moisture, and scuffs, and keeps your entryway welcoming.
Is Oiling Better Than Other Finishes?
Let me break it down. When you’re protecting wood, you’ve got choices: oil, varnish, polyurethane, or even paint. Each has its pros and cons, but for thresholds, I’m convinced oil is toughest to beat.
- Oils penetrate deep, so you get inside-out protection. They won’t peel or crack in fluctuating temps.
- Polyurethane and varnish form a hard, glossy shell. Great for indoor floors, but they can trap moisture in thresholds and crack over time.
- Paint is the ultimate barrier but hides the natural beauty of the wood—and chips once the threshold flexes.
Here’s the thing: Oiled thresholds are easier to maintain. If you get a scratch or scuff, you don’t need to sand the whole thing—just touch up the bad spot. With varnish or paint, repairs are messier. The main trade-off is that oil finishes aren’t as glossy, and they need a refresh now and then. But for most folks, the beauty and simplicity of oil win out.
Wrap-up: Keeping Your Threshold Looking Great For Years
Re-oiling a wood threshold isn’t tricky—it’s mostly patience, elbow grease, and a little know-how. By choosing the right oil (Watco, Rubio, Osmo, or even a basic tung oil), prepping the wood, and following a few simple steps, you can protect that hardworking strip of wood for years. Remember to check on it every season, keep an eye out for dry spots, and don’t be afraid to reapply oil sooner than you thought. With this habit, you’ll keep your entryway strong, handsome, and ready for whatever life (or muddy boots) throws at it.
