Most major brands—like Schlage, Yale, or Kwikset—use tough materials, but even they aren’t immune to years of sunlight, oily fingers, or the occasional jab from car keys. I’ve seen plenty of keypad locks where some numbers are just a faint ghost of what they used to be. If you want to avoid paying for a whole new remote or keypad panel, there’s good news: you can refinish the numbers yourself with a little patience and the right approach. Let’s walk through how this works so you can keep your lock looking sharp and working smoothly, without getting locked out or losing your mind.
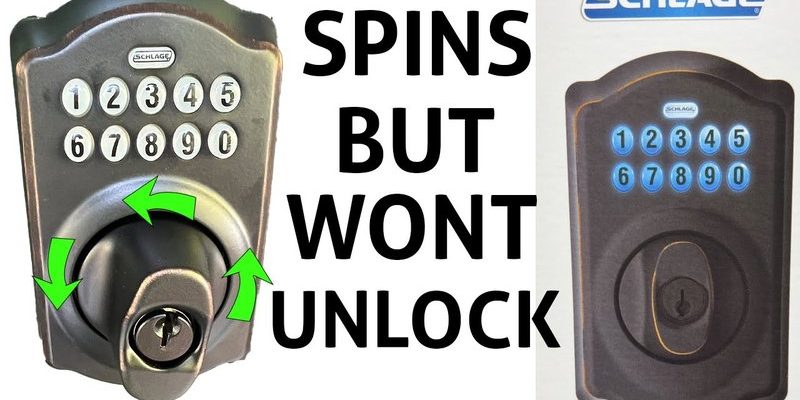
Why Do Smart Lock Keypad Numbers Fade or Scratch?
Here’s the thing—smart lock keypads might seem durable, but the numbers are just printed or painted on top of tough plastic or glass. Every time you type in your entry code, you’re applying pressure and friction to those tiny digits. Over months or years, that wear adds up, especially on frequently used numbers (usually the ones in your code). UV light from the sun fades the paint, the oils from your fingers break down the finish, and, frankly, daily life just takes its toll.
This isn’t just a cosmetic problem. When numbers are scratched or missing, you can struggle to punch in your code correctly. Some people even worry about security—if only a few numbers are worn, it might be easier for someone to “guess” your code. So, a scratched keypad isn’t just ugly, it can mess with both your convenience and your peace of mind.
You might be wondering if this is covered under warranty. Most brands only cover mechanical or electronic failures, not basic wear and tear like this. So, unless you want to keep replacing the whole keypad or pay for a new remote every couple of years, learning how to *refinish* those numbers yourself is a smart move.
What You’ll Need to Refinish Scratched Keypad Numbers
Honestly, you don’t need a pile of fancy tools to tackle this. Most of what you’ll need can be found at a hardware store or even your junk drawer. Here’s a straightforward list:
- Fine-tip permanent marker or paint pen: Black or white, depending on your keypad’s color.
- Clear nail polish or acrylic sealer: This protects your fresh numbers from more wear.
- Cotton swabs and rubbing alcohol: For cleaning the surface before you start.
- Masking tape: Helps you keep your lines clean and prevents accidents.
- Magnifying glass (optional): For extra precision on tiny keypads.
If you’re dealing with a backlit keypad (like some Yale or Schlage remotes), check if the numbers are just surface paint or if they’re translucent plastic. For translucent keypads, you’ll want to use translucent paint or markers so the backlight still shows through after your repair. Taking a moment to check this before you start makes a huge difference.
Step-By-Step Guide: DIY Refinish for Your Smart Lock Keypad
Let me explain the process in a way that’s easy to follow, even if you’ve never done a DIY project in your life. Go slow, take your time, and you’ll end up with a keypad that looks almost new.
1. Power Off and Prep Your Lock
First, you want to make sure your lock is powered off, especially if it’s hardwired or has backup batteries. Why? Accidentally pressing buttons while working could trigger a code reset or sync problem—no one wants to mess up their lock settings mid-project. Remove batteries if possible, or flip the power switch if your model has one.
Next, wipe the keypad clean. Use a cotton swab dipped in rubbing alcohol and gently clean each number area. This removes oils and old dirt, giving your marker or paint a solid surface to stick to. Let it dry completely before moving on.
2. Mask Around the Numbers
Grab masking tape and carefully tape around each number you plan to refinish. This gives you a crisp edge and protects the rest of your keypad. Don’t rush this part—getting a clean line now saves a lot of cleanup later.
If some numbers are just faded (not missing), you might be able to trace over them. For totally scratched-off numbers, use a printed photo or look up your lock’s original keypad layout online to make sure you put the numbers back in the right spot.
3. Redraw the Numbers
Hold your breath and go for it—using your fine-tip permanent marker or paint pen, redraw each number slowly and steadily. For best results, go over each number twice, letting the first layer dry before applying a second. If your keypad is backlit, make sure to use a *light* touch with translucent paint so you don’t block the light.
If you make a mistake, don’t panic. Use a fresh cotton swab with a bit of alcohol to gently wipe off the error and try again.
4. Seal and Protect Your Work
Once the new numbers are fully dry, brush on a thin layer of clear nail polish or acrylic sealer. This creates a hard, protective shell over the numbers so they won’t rub off as easily next time. Let the sealer dry completely (usually an hour or so) before using the keypad again or reinstalling the batteries.
Remove the masking tape carefully, and voilà—your smart lock keypad should look sharp and be totally readable again.
Refinishing your keypad doesn’t just save you money—it gives your lock a fresh start and keeps things running smoothly, without having to reprogram codes, pair a new remote, or mess with sync issues.
Common Smart Lock Keypad Materials (and What to Watch For)
You might be thinking, “Does it matter what my keypad is made of?” Absolutely. Most keypads are plastic or glass, sometimes silicone-coated for water resistance. Here’s what to know about each type:
- Plastic keypads: Most Schlage and Kwikset models use hard plastic. Easy to clean and refinish, but be gentle—too much pressure with the marker can dig grooves into the surface.
- Glass or touch screens: Some newer Yale and August smart locks use glass panels or touch sensors. Use only special paint pens or markers meant for glass so your refinished numbers don’t flake right off.
- Silicone-coated: You’ll find this on some weatherproof outdoor locks. Paint sticks less well to silicone, so you might need a flexible acrylic marker or touch-up paint designed for rubberized surfaces.
Always test your marker or paint on a tiny, hidden spot first. Some cleaners or solvents can fog up plastic or remove built-in anti-glare coatings.
When Should You Replace Your Smart Lock Keypad Instead?
Refinishing scratched numbers is a tidy little hack, but sometimes, a keypad is too far gone. If big chunks of the surface have chipped away, or if your buttons are sticking and the lock is missing inputs, a DIY refinish probably won’t help.
Here’s when you should consider a replacement:
- Deep scratches or cracks in the keypad surface that go past the numbers.
- Non-working buttons: If some numbers don’t register even after cleaning and refinishing.
- Battery issues: If your lock keeps dying or resetting after refinishing, the problem might be deeper than the keypad.
Some brands sell replacement keypad panels or “remote” modules separately, so you don’t have to buy a whole new lock. For universal smart locks, you might even find compatible keypad overlays online, usually at a lower price.
Tips to Prevent Scratched Keypad Numbers in the Future
Once you’ve fixed up your numbers, keeping them from fading again is a lot easier than you might think.
- Wipe your keypad lightly every few weeks with a damp, soft cloth to remove oils and dirt. Don’t use harsh cleaners.
- Set up a keypad cover if your lock gets lots of direct sunlight or rain. Some companies sell slim plastic shields that snap right on.
- Use a glove or stylus to punch in your code if you’re really worried about wear (hey, some folks do it!).
- Rotate your lock code every once in a while. Not only does this help with security, but it also spreads wear across different numbers.
Honestly, a little routine care goes a long way—even just keeping the keypad clean can help your refinish job last much longer.
What If You Mess Up? Troubleshooting DIY Keypad Repairs
You might worry about making things worse, but most mistakes are easy to fix.
- If the numbers look crooked or messy, remove your marker or paint right away with alcohol, then start again.
- If the keypad won’t register presses after your repair, double-check you haven’t accidentally let any sealer drip into the button seams. Gently clean around the edges with a dry cotton swab.
- If the lock won’t sync or reset codes after you finish, check the batteries and power. Sometimes, removing and reinserting them helps “reboot” the keypad logic, especially on brands like Yale or August.
Everyone makes a few errors the first time. Don’t get discouraged—DIY repairs are all about learning as you go. If you run into issues, most brands have online troubleshooting guides or customer support that can walk you through basic resets and sync steps.
Closing Thoughts—Keeping Your Smart Lock Keypad Sharp
It’s amazing how such a tiny detail—a few scratched numbers on your smart lock keypad—can throw off your whole day. With a little effort and the right supplies, you can refinish those worn digits, skip expensive replacements, and give your lock a solid “second wind.”
Not only does this help you keep your code clear and secure, but it also feels good to fix something yourself without needing a pro every time. So next time you walk up to your Schlage or Yale remote and see those numbers starting to fade, remember: you’ve got all the tools to bring them back to life, one careful stroke at a time.