You don’t need to be a master carpenter to install one of these kits, but the right gear makes all the difference. The process usually involves drilling, measuring, holding hardware steady, and tightening specialty screws. Mess up any of these, and your new security investment could end up less effective than you hoped. Let me walk you through *the best tools for installing a secure door reinforcer kit* and why each one matters—whether you’re DIY-ing for the first time, or you just want to make sure you’re truly locking things down.
Why Upgrading Your Door Security Matters
Let’s be real: most standard front doors aren’t built with hardcore security in mind. Builders want to keep costs low, so the hardware they install—deadbolts, strike plates, and even the door frames—are often only strong enough to stop a gentle push. That might work against the wind, but it won’t do much if someone actually wants in. That’s where a door reinforcer kit comes into play.
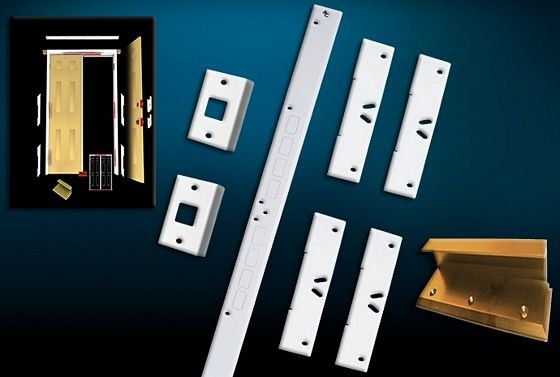
A good kit usually includes a wraparound steel plate, longer screws, and sometimes a reinforced strike plate. These parts work together to spread out force, so a burglar’s best kick or the leverage from a crowbar just isn’t enough. But, and it’s a big but, you’ll only get that level of security if you install the hardware squarely and tightly. That’s why choosing the right tools is so important. The right drill, the correct bits, a sturdy screwdriver, and a few measuring tools make your job way easier—and your door way tougher.
Honestly, if you’ve ever tried to install something heavy-duty with only a butter knife and a prayer, you know how frustrating it can be. In the next sections, I’ll break down each tool you’ll want in your toolbox for this job and share a few small stories from folks who got it right (and a couple who learned the hard way).
Picking the Right Drill and Drill Bits
Your drill is the workhorse for this project. Hand tools alone aren’t going to cut it—literally or figuratively. Most secure door reinforcer kits require you to drill precise holes for longer screws, sometimes into tough materials like hardwood or even metal. If your drill is underpowered, it might stall out or strip screws, making your job nearly impossible.
You want a cordless drill with adjustable torque settings. Think of torque as the “oomph” behind each turn—it helps drive screws into thick wood without splitting or stripping anything. For most homes, a 12V or 18V drill is more than enough. As for drill bits, you’ll need ones that match the screws in your kit, but it’s smart to keep a variety on hand. Look for high-speed steel (HSS) bits for wood and metal, and make sure they’re sharp. Dull bits can wander off-mark, making sloppy holes that hurt your door’s strength.
Here’s the thing: if you use the wrong bit—or worse, an old one with a chipped tip—you could end up making extra work for yourself. I helped a neighbor once who tried to use a single, generic bit for everything. It overheated, the hole came out crooked, and he had to redo half the job. Having the right drill and bits from the start? Total game changer.
You Really Need a Quality Screwdriver
It seems basic, but a sturdy screwdriver (preferably a ratcheting one) can save your hands and your patience. Most door reinforcer kits come with extra-long or hardened screws that need to be sunk deep into the door and frame. If you try doing this with a wobbly tool or one with a short handle, you’re bound to slip or strip the screw heads.
Go for a screwdriver with a solid grip and a magnetic tip—it keeps the screws from falling as you work, especially when you’re reaching around awkward corners. Ratcheting models move faster but stay tight. A screwdriver set with both Phillips and flathead tips is ideal since some kits mix fastener types. I’ve met folks who tried to use an old, tiny screwdriver from a kitchen drawer. They ended up with blisters and half-driven screws sticking out from the strike plate. Trust me, you want a full-sized, comfortable handle for this job.
If you’re using a drill with a screwdriver bit, don’t crank the torque up too high. It’s easy to overtighten and split the wood, which makes the reinforcer less secure. Sometimes, finishing the last few turns by hand gives you more control and a stronger final result.
Don’t Skip the Tape Measure and Pencil
It might sound boring, but measuring tools are the real unsung heroes here. Lining up a door reinforcer kit isn’t just about eyeballing it and hoping for the best. Even a half-inch mistake can leave your deadbolt misaligned or your plate off-center, making the lock hard to use—or worse, leaving gaps an intruder could pry open.
A basic tape measure is all you need, but make sure it’s easy to read. Mark your drill points lightly with a pencil (not a pen or marker, which can stain the door), and double-check every measurement. Take your time here; there’s no rush. It’s much easier to correct a pencil line than patch a crooked hole. A small combination square or speed square helps check corners, especially if you’re trying to keep the plate straight on the edge of the door.
I’ve seen people try to skip this step, figuring “it’s close enough,” but that almost never works out. One friend of mine drilled just a quarter inch off, and suddenly, the strike plate wouldn’t line up. It took an extra hour to adjust because he had to fill in the old hole and start over. Marking carefully from the start is always worth it.
Clamps Make Installation Easier and Safer
If you’ve never used clamps while installing door hardware, you’re in for a treat. Clamping the reinforcer kit snugly to your door before you drill or screw in hardware keeps everything rock-steady. You’ll avoid shifting, slipping, and “oops” moments that can leave your plate crooked or your drill bit wandering.
Small bar clamps or quick-release clamps work perfectly. Just squeeze them gently around the door edge and the kit’s wraparound plate. Cushion the jaws with a little cardboard or tape so you don’t ding the door’s finish. With everything held still, you can focus on driving screws straight and tight, not on juggling three things with two hands.
Let me explain: a neighbor of mine tried this job solo, without clamps, and ended up with the plate askew because it slipped mid-drill. We had to remove it and start over, filling the holes so they wouldn’t weaken the wood. Clamps might not be strictly required, but they make the install so much smoother—especially if you’re working alone or new to the project.
A Utility Knife for a Perfect Fit
Sometimes the best tool is the simplest one. A sharp utility knife is incredibly handy for trimming small bits of wood, old paint, or gasket material so your reinforcer kit fits perfectly flush. Door edges aren’t always uniform—especially in older homes—so a quick trim here or there can make all the difference.
You might be wondering if this is just overkill, but a rough edge can prevent the steel plate from sitting flat. Even a tiny bump can create a gap that weakens the whole system. With a utility knife, you can shave off small irregularities without damaging the wood or making a mess. Just keep your fingers clear—those blades are sharp for a reason.
Here’s a quick tip: if you run into old weatherstripping or a paint drip, score around it with your knife before you try to install the plate. It’ll save you time and frustration, and your reinforcer will look—and work—a lot better.
Making Sure the Screws Go Deep: Pilot Hole Bits
Here’s something that trips up a lot of DIYers: driving those beefy, 3-inch security screws straight into hardwood can split the door or frame unless you drill a pilot hole first. Pilot hole bits are just slim drill bits, slightly thinner than your screws, that make a path for the threads. This step makes the screws much easier to drive, reduces splintering, and helps everything sit tight and flush.
Match your pilot bit to your screw size (the kit instructions usually tell you), and mark the depth with a little tape so you don’t drill too deep. This detail matters: go too shallow, and you’re still fighting the wood; too deep, and the screw won’t grip as well.
I once skipped this step, thinking “the screw will just push through.” Big mistake. The wood split, and I had to fill and re-drill—adding an hour to an otherwise quick job. Pilot holes are one of those tiny details that make a huge difference in how secure your new hardware will be.
Safety Glasses and Cleanup Supplies
Now, nobody ever says they’re excited about wearing safety glasses, but trust me, you need them. Drilling into steel, wood, or even fiberglass creates flying chips and metal shavings. Get something in your eye, and you’ll wish you’d taken the extra 10 seconds to put on protection.
Have a dustpan, broom, and maybe a handheld vacuum nearby. You’ll be surprised how much debris comes off one simple job, especially if you’re drilling new holes for longer screws or trimming old hardware. Clean up as you go—it keeps your workspace safe and saves you from tracking sawdust through the house.
And honestly, if you’re anything like me, cleaning as you go just feels less overwhelming. At the end, you can step back, admire your work, and know the area’s safe for bare feet and pets. A little attention to cleanup is the difference between a project that feels finished and a lingering mess.
Alternatives and “Good Enough” Options
You might be wondering if you really need all these tools. Could you get away with just a basic drill and screwdriver? Sure, in a pinch. Universal kits are meant to be flexible, and most come with all the screws you need. If you’re only doing one door and you’re careful, you might get by with a smaller toolkit.
But here’s what I’ve seen: investing in the right setup—drill, bits, pilot hole tools, clamps—means the job takes half as long, with no surprises. If you don’t have everything, consider borrowing or renting. Some hardware stores even offer tool rentals for specialty jobs like this. And if you don’t feel comfortable doing the work, hiring a handyman might be worth the peace of mind.
Universal door reinforcer kits work on most doors, but if you have a brand-specific lock (like Schlage or Kwikset), check compatibility before you buy. Sometimes you need their matching hardware or extra-long screws—just something to double-check before you start drilling.
Security really comes down to details—the right tools, the right install, and a bit of patience. There’s no shortcut to a truly reinforced door, but with the right gear, you’re well on your way.
Wrapping Up: Why the Right Tools Make All the Difference
Installing a secure door reinforcer kit is one of the best upgrades you can make for your home’s security, but only if you take your time and use the right tools. A good drill, sharp bits, sturdy screwdrivers, measuring gear, clamps, and a little attention to detail are what separate a solid, pro-level job from a “good enough” fix.
It’s a quick project, but it matters. When you open and close your door, you’ll know it’s anchored tight—harder to force, tougher to break, and safer for everyone inside. And honestly, there’s a small satisfaction every time you turn the key, knowing you did it right. If you’re on the fence, gather up the tools, take it slow, and give your door the upgrade it deserves. Your peace of mind is worth every minute.