That’s where two-part epoxy filler comes in. Think of it like a wood surgeon’s secret weapon—a way to rebuild broken fibers, lock in screws, and leave the repair stronger than the original. You don’t need a shop full of tools or years of carpentry under your belt. With a little patience, a simple kit, and the right technique, repairing a damaged mortise with two-part epoxy filler is something almost anyone can handle. So, if you’re sick of circling the hardware aisle trying to find a “miracle fix,” let me walk you through a method that actually works.
What Causes Mortise Damage, Anyway?
You might be wondering if your mortise really needs help, or if you’re just being picky. Here’s the thing: mortises take a beating. Most people assume wood is tough enough to handle a loose doorknob, but repeated stress can do a number on these joints.
When screws pull out of a mortise, it’s often because the wood fibers have been stripped or splintered. Maybe someone overtightened the screws, or maybe a tiny bit of water got inside and softened things up. Sometimes, damage happens slowly—a little looseness here, a small crack there—until one day the hardware pulls free, and you’re staring at a mess.
If you’re looking at a mortise with rounded-out screw holes, splintered edges, or entire pieces missing, you’ve got classic mortise damage. The usual fixes—like wood glue, toothpicks, or even bigger screws—rarely last. Honestly, unless you rebuild the damaged area, you’ll be fixing it again soon. That’s why two-part epoxy filler is such a game-changer. It lets you restore the wood to a state that can actually stand up to regular use.
Why Choose Two-Part Epoxy Filler Over Other Wood Fillers?
Let me explain: wood fillers come in all shapes and sizes, but not all are made equal. Traditional options like putty or premixed filler might do the trick for shallow scratches or dents. But when you’re dealing with deep damage—especially where screws need to grip tightly—nothing beats a two-part epoxy filler.
Here’s why:
- Strength: Two-part epoxy cures hard as a rock. Once it’s set, it bonds tightly to both wood and metal, so you don’t get that crumbly, flaky texture some other fillers leave behind.
- Versatility: Epoxy is great for everything from stripped screw holes to filling in entire missing corners of the mortise.
- Workability: You can sand, drill, and even stain or paint over it once it’s dry. It basically becomes part of the wood.
- Quick Results: Most two-part epoxies are ready for sanding and finishing within a few hours—no need to wait for days like some old-school fillers.
You get the idea. If you want a mortise repair that genuinely lasts, and you’re tired of patch jobs that fail the next time someone slams the door, step up to two-part epoxy. Brands like J-B Weld or PC-Woody are popular picks—both available at most big box hardware stores.
What You’ll Need For The Job
Before you start, it helps to gather everything you’ll need. Trust me, there’s nothing worse than mixing your epoxy only to realize you don’t have a clean putty knife.
Here’s a basic list:
- Two-part epoxy filler (like J-B Weld or PC-Woody)
- Disposable mixing tray and stick (an old plastic lid and a chopstick work fine)
- Putty knife or small spatula
- Sandpaper (medium and fine grit, like 120 and 220)
- Drill and screws (if you’re reinstalling hardware)
- Painter’s tape (optional, for neat edges)
- Latex gloves (epoxy is sticky stuff)
You might also want a utility knife to trim away splinters, or a small vacuum to keep things tidy. Not every mortise needs a total rebuild—sometimes, all you need is a strong base for new screws.
Step-by-Step: Repairing A Damaged Mortise With Two-Part Epoxy Filler
Let’s go through the process, one step at a time. I’ll outline the basics, but also share little tips that make things easier.
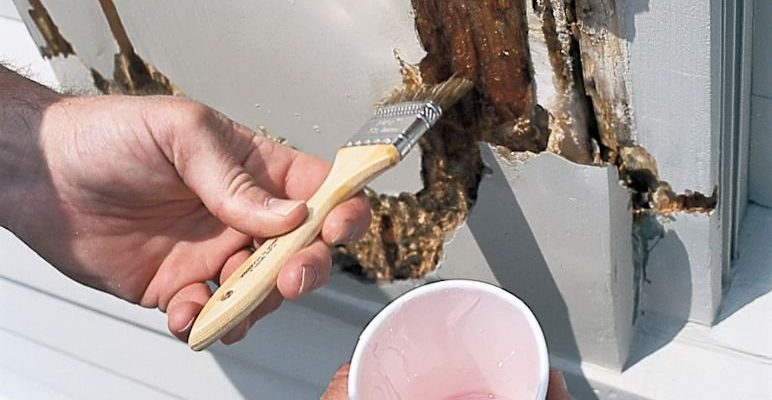
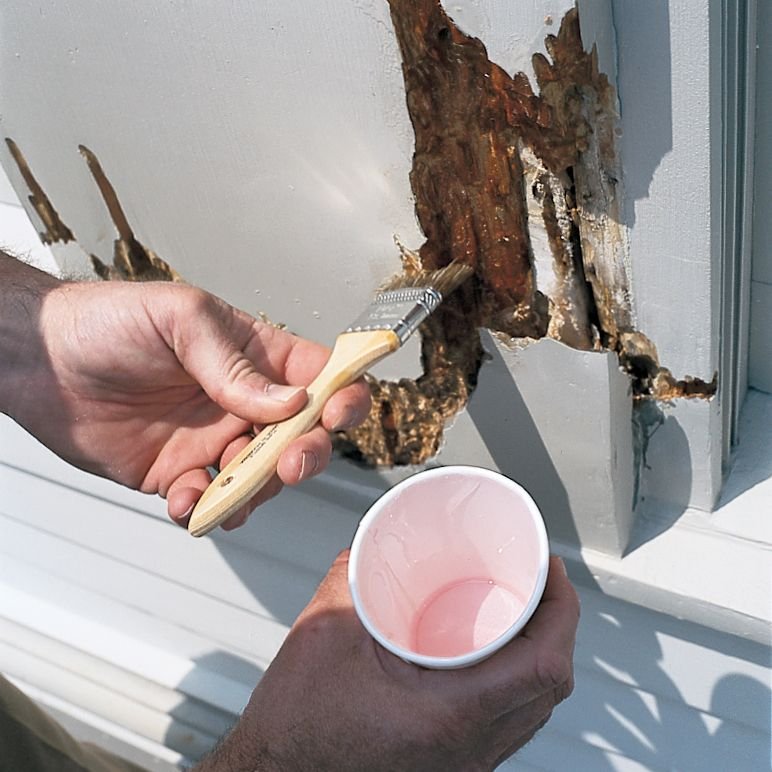
1. Clean Up The Damaged Area
First, get rid of any loose or broken wood. Use a utility knife or small chisel to trim away splinters, dust, and old filler. You want a clean, solid surface for the epoxy to bond.
Tip: Vacuum out the mortise or brush away debris so nothing gets trapped inside your repair.
2. Prepare The Two-Part Epoxy Filler
Every brand is a little different, but the general idea is the same: mix equal parts resin and hardener until the color is uniform. You’ve got about 10 minutes of workable time before it starts to set, so don’t dawdle once it’s mixed.
Pro tip: Mix small batches. It’s better to mix more than rush and waste it.
3. Pack The Epoxy Into The Mortise
Using a putty knife, push the mixed epoxy deep into all the cavities of the damaged mortise. Fill any stripped screw holes as well. Press firmly to avoid air pockets.
If you want a perfectly crisp repair, you can use painter’s tape to mask the edges. Don’t worry about small imperfections—a little sanding later will smooth things out.
4. Shape, Wait, Then Sand
Level off the surface with your putty knife. Let the epoxy cure fully (usually at least one hour, but check your product’s directions). Once it’s hard, sand the repair flush with the surrounding wood. Use medium grit first, then fine grit for a smooth finish.
Here’s the thing: don’t rush the sanding. A smooth, level repair will make reinstalling hardware much easier.
5. Drill Pilot Holes & Reinstall Hardware
Once you’re happy with the finish, drill new pilot holes right into the hardened epoxy. It’s tough stuff—it’ll hold screws better than the original wood. Reinstall your latch, lock, or hinge, and tighten the screws snug (but not too tight!).
That’s it. Your mortise is stronger than ever and ready for regular use.
How Does The Epoxy Filler Hold Up Over Time?
You might be skeptical—can a little putty really rescue a chewed-up mortise for good? Honestly, two-part epoxy filler is the real deal. Unlike quick-fix wood glue or those little screw anchors, the repair isn’t just a patch; it’s a full structural rebuild.
After the epoxy cures, it bonds so tightly to the surrounding wood that it resists pulling, flexing, and even a few accidental bumps. I’ve fixed a door frame in a rental apartment that survived years of hard use (and at least one moving day) thanks to a solid epoxy repair.
Keep in mind, though, that epoxy isn’t totally indestructible. If the surrounding wood is rotten or full of moisture, it could eventually fail. But for most everyday wear and tear, a two-part epoxy repair outlasts old-school solutions by years.
Alternatives To Two-Part Epoxy For Mortise Repair
Let’s say you can’t get your hands on a two-part epoxy filler, or you’re just curious about other options. Here are a few, with their pros and cons:
- Wood Glue & Toothpicks: Cheap, easy, but weak. Works for a quick fix on very minor damage, but won’t last with everyday use or heavy hardware.
- Premixed Wood Filler: Good for shallow gaps or cosmetic fixes. Not strong enough for screw holes or serious structural problems.
- Wooden Dowels & Glue: Insert dowels into oversized holes, glue them in, then drill new holes. Stronger than fillers, but more work and not as seamless for large or awkward gaps.
- Full Mortise Replacement: For totally destroyed mortises, you might need to cut out a section of wood and graft in a new piece. This is a big project usually best left to a pro.
Honestly, when it comes to cost, speed, strength, and appearance, a two-part epoxy filler wins for most at-home repairs.
Finishing Your Repair: Paint, Stain, & Blending
One question I always hear: “Will the repair look obvious?” Here’s the good news—modern two-part epoxy fillers can be sanded, painted, and even stained to match your trim or door. For a seamless look, spend a little extra time prepping the surface and matching colors.
- For painted trim: Sand the repair smooth, prime it, then apply touch-up paint. Nobody will ever know there was a repair hidden underneath.
- For stained wood: Some epoxy fillers can be tinted before they set. If not, try blending stains on top, or use a wood-toned marker to blend the patch’s edges.
- For heavy-use areas: Add a dab of wood sealer or clear coat over the repair to help it resist moisture and wear.
Small imperfections add character, but a well-done repair will be nearly invisible after finishing.
Wrapping Up: When To Call It Fixed
Repairing a damaged mortise with a two-part epoxy filler isn’t rocket science, but it does take a little patience. The end result? Hardware that feels brand new, minus all the creaks, wobbles, and worries about pulling out the screws again. This isn’t one of those “it’ll do in a pinch” kinds of fixes—it’s a genuine upgrade that can outlast the original wood.
If you’ve been putting off that loose strike plate or sagging door because you thought repair would be too hard, give two-part epoxy a try. The process is straightforward, the materials are easy to find, and the finished result is seriously satisfying. It’s one of those rare home repair hacks that actually lives up to the promise.