Here’s the thing: even though the weatherstripping material often looks sturdy, the repeated closing of a heavy steel door can wear it down, making it brittle, torn, or smooshed flat. Maybe you’re dealing with a worn-out seal on an entryway, patio, or even a garage door from brands like Therma-Tru or Masonite (the type doesn’t matter; the problem is the same). Before you run to a handyman or shell out for a whole new door, you can absolutely tackle weatherstripping repair yourself—even if you’ve never touched a caulking gun or power drill before.
Let me explain what’s going on, why it happens, and step-by-step, what you can do about it—so your steel door seals like new, and your energy bill finally breathes a sigh of relief.
Why Steel Door Edges Damage Weatherstripping
Steel doors are built tough—no surprise there. They’re designed to keep your home secure and stand up to everything from rowdy kids to wild weather. But that thick, unforgiving edge? It’s a different story when it comes in contact with the soft, flexible material of weatherstripping. Over time, the metal edge can act almost like sandpaper, wearing away at the seal every time you open and close the door.
Weatherstripping is usually made from rubber, foam, or vinyl, which gives it the flexibility to compress and fill gaps. But as the door swings shut, if the edge is even slightly misaligned or the weatherstripping is just a bit too thick, you get pinching, tearing, or flattening. Small nicks can become huge tears, especially on commonly used doors—front, back, or even the steel entry door to your garage.
If your weatherstripping is getting regular abuse from a steel edge, you’ll probably notice:
- Drafts or cold spots by the door
- Daylight peeking through the seal
- A visible gap or damaged rubber strip
- Worn spots that look flaky, crushed, or ragged
Honestly, if you leave it too long, you might even see pests sneaking in. Even the best brands, like Schlage or Pella, can’t make door seals that last forever against the repeated punishment of a steel edge.
Common Types of Weatherstripping and How Damage Shows Up
There are a few different kinds of weatherstripping, and it’s worth figuring out which one your steel door uses. The most common types are:
- Foam tape: Simple sticky-backed foam, easy to install but easily squashed.
- Rubber or vinyl bulb: A flexible, tube-like strip that compresses when the door closes.
- Magnetic strips: Often seen on steel doors like exterior entries or garage doors, designed to “catch” and seal shut.
- Metal V-strips: Flexible but more rigid, used for tighter seals.
You might be wondering if the type really matters. It honestly does, because not every repair method fits every kind. If you’ve got a foam tape, the problem is usually flattening or peeling. Bulb seals tend to tear or split along the point where the steel door edge hits. Magnetic weatherstripping can get demagnetized or lose its flexibility. And V-strips, while sturdier, can warp or bend out of place.
The first step in a good repair job is to figure out exactly what you’re working with—and the kind of damage you’re up against. A gentle tug and close look will usually tell you if the strip is glued, nailed, or slipped into a slot in the frame. If it moves or pops out easily, odds are you’ve got a replaceable insert, not a permanent fixture.
Tools and Materials You’ll Need for Repair
Before you dive in, gather your tools. Having the right stuff on hand makes the whole process a breeze, especially if you want to sync up your repair skills with top-tier results.
Here’s what you’ll likely need:
- Replacement weatherstripping (make sure it matches your current style and thickness)
- Utility knife or scissors (for trimming rubber or foam strips)
- Flathead screwdriver or small pry bar (to remove old weatherstripping)
- Measuring tape (to ensure your new strip fits perfectly)
- Adhesive remover or rubbing alcohol (for cleaning sticky residue)
- Caulk or weatherproof sealant (optional, for sealing gaps)
- Hammer and finishing nails (for metal or V-strips)
Don’t forget to check the packaging on your replacement weatherstripping. Brands like MD Building Products and Frost King often include step-by-step code diagrams or quick-start instructions if you’re unsure about fitting.
Honestly, if you’re replacing a magnetic or specialized brand remote-controlled seal (yes, those exist!), double-check you’ve got a compatible replacement, or you might end up making things worse instead of better.
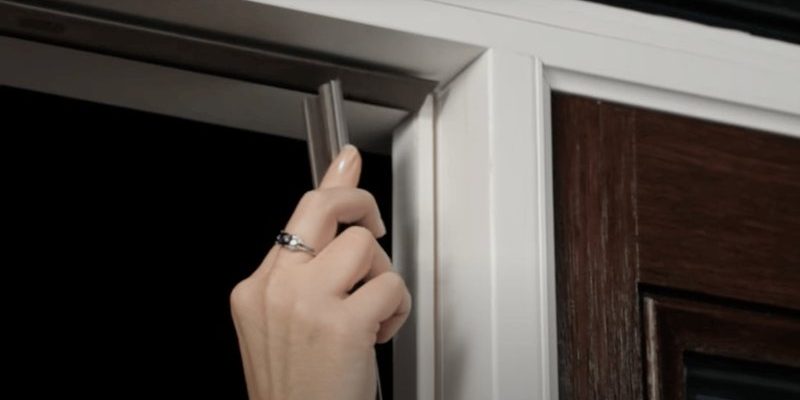
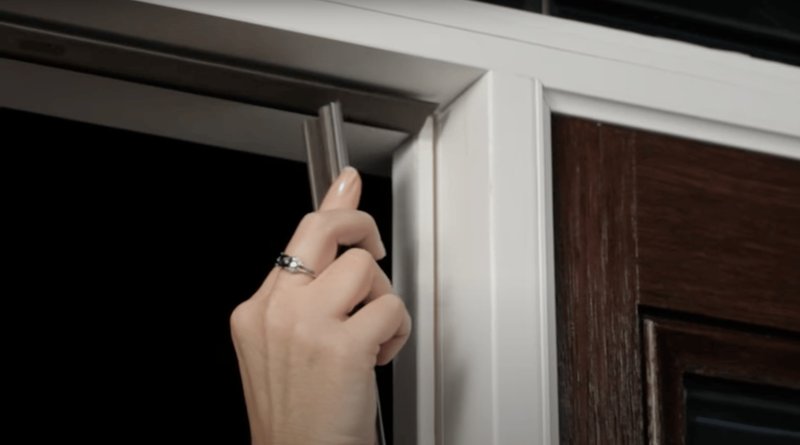
Removing Damaged Weatherstripping From a Steel Door
Let me walk you through taking off the old, damaged seal. This is the most hands-on part, but it’s not nearly as hard as it sounds.
- Start by opening your door all the way—prop it open if you can. You’ll want good access and light.
- If the weatherstripping is glued or taped, gently pry it off with your fingers, a screwdriver, or a plastic putty knife. Don’t yank; slow, steady pressure works best.
- For strips that slide into a groove, just pull from one end and slide it out. You might need to wiggle it a bit if it’s stuck or torn.
- If there’s any leftover sticky stuff, use adhesive remover or rubbing alcohol to clean it away. A clean edge is key for your new strip to stick or slot in properly.
- Inspect the metal edge of the door frame for dents, warping, or sharp spots. If you notice a burred steel edge, sand it down lightly with fine sandpaper—otherwise, your new weatherstripping will get shredded too.
Removing the old weatherstripping is like taking off a stubborn band-aid. Patience helps—pull gently, and get all the sticky bits, or your new seal won’t stick and could fall off the first time you slam the door.
Choosing and Cutting New Weatherstripping for a Steel Door
New weatherstripping should always fit snug but not tight. If it’s too loose, you’ll still get drafts and bugs sneaking in. If it’s too thick, you might have trouble closing your door, or the weatherstripping will crush again fast.
Here’s how to get the size right:
- Measure the length of the frame where the strip will sit. Write it down, or snap a quick photo for reference.
- For bulb or magnetic strips, measure the width and depth of the channel or groove, too, so you can sync up the new seal’s profile with the old one.
- Cut your new strip with a utility knife or scissors. Some people like to cut it a little long and trim after a test fit—it’s easier to shorten than to magically add length back.
- When dealing with brand-specific frames, like Therma-Tru or Masonite, check if you need a universal weatherstripping kit or if your door needs a custom brand code model. Universal strips are great, but sometimes branded ones snap into proprietary grooves more securely.
If you’re not sure, take the old strip to your hardware store and ask for a match. Salespeople see this stuff all the time—they’ll know if you need to pair with a specific brand or can go with a universal, off-the-shelf option.
Installing Replacement Weatherstripping and Troubleshooting Fit Issues
With your new strip cut to size, it’s installation time. Here’s a simple breakdown for most standard types:
- Foam tape: Peel off the adhesive backing, line it up, and press it firmly onto the clean door edge or frame. Run your finger along the length to make sure there are no air bubbles or gaps.
- Slot-in bulb/vinyl: Angle the end of the new strip into the groove and slide it along. You might need to reset and wiggle it until it fits properly.
- Magnetic weatherstripping: These usually pop right into a groove or slot. Make sure the magnet faces the steel door’s edge. Test the door’s closure before trimming any excess.
- Metal V-strip: Set it in the groove and secure with a hammer and finishing nails or supplied screws. Don’t overtighten, or you’ll warp the seal.
If the door won’t close or the new weatherstripping bunches up, don’t panic. You might need to trim a little more, or—especially with older steel doors—reset the strip and test a few times until it pairs up perfectly with the edge. It’s a bit of trial and error, but you’ll get the hang of it quickly.
When troubleshooting, check for corners or bends that might keep the strip from sitting flat. If you notice daylight at the bottom but not the top, focus your reset efforts there. Sometimes, a dab of caulk helps seal stubborn spots.
How to Extend the Life of Your New Weatherstripping
You might be wondering how long your DIY fix will last—or if there’s a secret to making weatherstripping outlive the door itself. Honestly, it comes down to a few common-sense habits.
- Inspect the seal every few months. Look for early signs of wear—cracking, flattening, or peeling—so you can swap out sections before they become a problem.
- Keep the steel door edge clean. Dirt and grit act like sandpaper and speed up damage. Wipe down the edge and the weatherstripping when you do regular cleaning.
- Lubricate rubber or vinyl strips with a little silicone spray. This keeps them flexible and less likely to crack or split.
- Check your door alignment. If the steel door is sagging or not closing smoothly, the edge might be pinching your new weatherstripping over and over. Adjust the hinges if needed—many brands include instructions for basic hinge resets.
Just like syncing a remote or replacing a battery, routine upkeep saves a ton of headache down the road. Plus, a well-sealed door makes your home quieter and more energy-efficient—wins all around.
When Should You Call a Pro (or Consider an Upgrade)?
For most people, replacing damaged weatherstripping is a straightforward DIY job. But sometimes, you’ll hit a snag that a little troubleshooting can’t fix.
- If the steel door edge is seriously dented, warped, or rusted, it could slice right through any new weatherstripping you install. In that case, it’s worth having a pro look at the frame or door for repair or replacement.
- If your door frame is out of sync—meaning you’ve got big gaps at the top or bottom, or the door won’t close evenly—adjusting or resetting the hinges may be necessary. This can usually be done at home, but if it feels overwhelming, don’t hesitate to call a handyman.
- If you’re dealing with a magnetic or specialty weatherstripping setup, and your remote or automatic “seal” isn’t working, you may need manufacturer support or a more technical fix.
- If you keep having to replace weatherstripping every few months, consider upgrading to a more durable material—like heavy-duty silicone or a commercial-grade bulb seal. Brands now offer “high-abuse” options designed just for steel doors that get slammed all day.
Occasionally, the issue isn’t the weatherstripping—it’s the door itself. Don’t sink endless time or money into temporary fixes if the steel edge is the real culprit.
Wrapping Up: Weatherstripping Repair Is a Manageable Home Fix
Repairing weatherstripping that’s been damaged by a steel door’s edge might sound intimidating at first, but most people find it’s one of those home fixes that’s well within reach. Whether you’ve got a basic foam tape seal or a trickier magnetic strip, tackling the repair with the right tools, a little patience, and attention to the details—like cutting to the right size and cleaning off old adhesive—sets you up for success.
If you run into problems, troubleshooting things like door alignment, material compatibility, or stubborn steel edges will usually get you back on track. And if things get out of sync or the damage is too severe, there’s no shame in calling a pro or considering a sturdier replacement. The goal is a quieter, cozier, more energy-efficient home—without the endless draft or the worry that critters might slip in. So grab that replacement strip and make your steel door (and your wallet) happy again.