
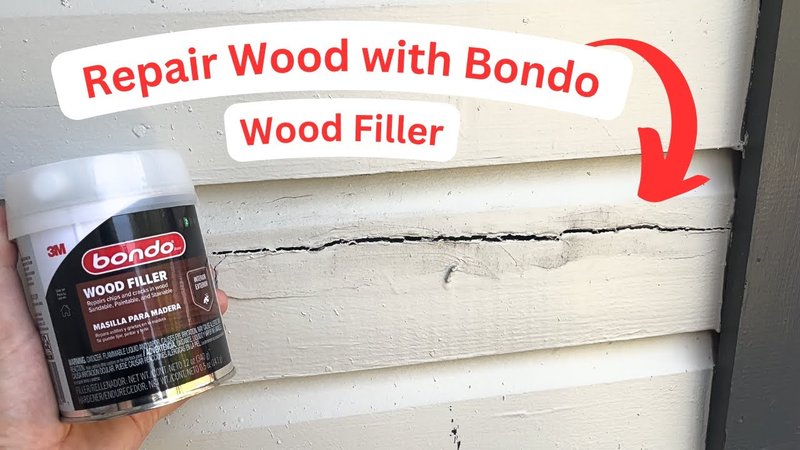
Here’s the thing: not all wood fillers are created equal. For high-traffic and weather-exposed jobs like a door threshold, you want a strong, durable product like Minwax High Performance Wood Filler or Bondo Wood Filler. These brands are popular for a reason—they stand up to the elements, bond tightly, and can actually save you from a much costlier full replacement. So, if you’ve got a damaged threshold and want a fix that will last, let’s break down exactly how to get it done.
What Makes Exterior Grade Wood Filler Different?
You might be wondering, “Can’t I just use whatever wood filler is in the garage?” I get it—sometimes it feels like a sticky paste is a sticky paste. But exterior grade wood filler isn’t just marketing. It’s a tough-as-nails formula built to hold up against weather, temperature swings, and even a bit of flexing under pressure.
Here’s why it matters. Ordinary interior fillers can dry out, crack, or crumble when exposed to rain or sun. That might work for a baseboard in your hallway but will fall apart fast on a doorstep. Exterior fillers (like Minwax or Bondo) contain special binders and hardeners—think of them as superglue for wood. They’re designed to:
- Resist moisture that would normally seep in and cause swelling or rot
- Stand up to UV rays so they don’t fade or get brittle over summer
- Bond tightly to old wood, even when the surface isn’t perfect
So if you want this repair to last more than a season, reach for a proper exterior grade filler. Your threshold (and your future self) will thank you.
Prepping The Damaged Threshold For Repair
Before you grab that tub of wood filler, there’s some prep work to tackle. Honestly, this is where most folks trip up. If you slap filler onto a dirty or loose surface, even the best brand can’t save you from a bad result. Think of it like painting a wall: the smoother the base, the smoother the finish.
Start with a thorough cleaning. Use a stiff brush to sweep away dirt, dust, and any loose splinters. If the threshold is particularly grimy, a little soap and water (followed by plenty of drying time) won’t hurt. For deep cracks or rot, use a utility knife or chisel to gently carve out all the soft, crumbling wood until you’re left with solid material.
Next, check for old paint or finish. Filler sticks best to raw wood, so it helps to use sandpaper (medium grit, like 80 or 100) to rough up the area. Wipe off the sanding dust with a damp rag.
If you skip this step, the filler might just flake off later—super annoying after all that work.
If there are any deep voids or holes, don’t panic. Exterior grade filler was made for this exact scenario—it can handle gaps up to a few inches wide. If the damage is more than halfway through the thickness of the threshold, though, you might need to reinforce the area before filling (more on that soon).
Mixing And Applying Exterior Grade Wood Filler
With the threshold ready, it’s time for the main event. Most exterior grade wood fillers like Bondo or Minwax come as a two-part system: a base and a hardener. The clock starts ticking once you mix them—so get everything in place before you begin.
Here’s a basic step-by-step:
- Scoop out the base using a putty knife and place it on a disposable board (like a scrap of cardboard).
- Add the hardener according to the manufacturer’s instructions. Usually, it’s a small ribbon of hardener blended with a golf-ball sized dollop of filler.
- Mix thoroughly—seriously, mix until the color is uniform. If you see streaks, keep stirring.
- Apply quickly. You typically have about 5–10 minutes before the filler sets. Press it firmly into the damaged area, smoothing with your putty knife. Overfill the area slightly because you’ll sand it flush later.
Be generous but don’t go wild. For deep holes or missing chunks, build up the repair in layers, letting each layer dry if needed (some brands allow this, others want you to fill all at once).
The trick is to work fast and neat—like icing a cupcake before it hardens.
Shaping And Smoothing The Repair
Once the filler sets, it’s as hard as wood—maybe even harder. But now you’ll want to sculpt it to match the original shape of your threshold. If you’ve overfilled (which is smart), that’s perfect. You want a little extra to sand down so the finished patch sits flush with the surrounding surface.
Start with coarse sandpaper (60–80 grit) to knock down the roughest spots, then switch to finer grits (120–150) for a smooth finish. Wrap the sandpaper around a sanding block or a small piece of wood—this helps you keep flat, crisp edges.
Take your time here. If you rush, you might create dips or ridges that’ll stand out once painted. Run your hand along the repair. It should feel perfectly level, with no edges you can catch a fingernail on.
Here’s a little trick: shine a flashlight at a low angle across the patch. Any bumps or dips will cast shadows, showing you exactly what needs more sanding.
After sanding, wipe the area with a damp cloth to remove dust. If you find small pinholes or tiny cracks, go ahead and fill those with a bit more filler, let dry, and sand again.
Priming And Painting The Patched Threshold
Great news: you’re almost done! But without a protective finish, even the toughest filler will eventually weather and discolor. That’s why priming and painting are so important—they seal the repair and help it blend with the rest of your trim.
Choose a high-quality exterior primer that’s made for wood. Apply a thin, even coat over both the patch and a few inches of the surrounding area. This helps hide the repair and preps everything for paint.
Let the primer dry fully—check the can for timing, but don’t rush it. Then follow up with an exterior-grade paint matched to your home’s trim or door color. Use a small brush for control.
- If your threshold gets a lot of sun or moisture, consider using a paint with added UV protection.
- For extra durability, a second thin coat never hurts.
Don’t worry if the patch looks a little obvious right after you prime—it almost always blends in after a couple of paint coats.
Troubleshooting: Common Wood Filler Problems And Solutions
You might be worried about what could go wrong. Honestly, most wood filler mishaps come down to prep or timing. If your patch crumbles, flakes, or won’t bond, here’s what might have happened—and how to fix it.
- Poor adhesion: Check if there was old paint, dirt, or rotten wood under the patch. Sand back to solid wood and start again.
- Filler sets before you finish: Only mix as much as you can use in 5–10 minutes. If you need to fill a big spot, mix and apply in several small batches instead of one huge load.
- Uneven or lumpy surface: Don’t panic—you can always sand down lumps. For deep gouges, build up the patch gradually so it cures flat.
- Pinhole bubbles: These are common and easy to fix. Add a second, thin skim of filler over the area, then sand smooth again.
If the threshold is badly rotten or the filler keeps popping loose, it may be time for a bigger repair—sometimes a full board replacement is the only way. But for everyday nicks, cracks, and gouges, these steps should cover you.
When To Use Wood Filler Versus Other Repair Options
Let’s be honest—wood filler is a lifesaver for *most* minor threshold damage, but it isn’t always the answer. Here’s when to use it, and when to consider something else.
Choose exterior grade wood filler if:
- The damage is mostly on the surface (up to half the wood’s thickness).
- The threshold is structurally sound (no large, soft, spongy, or crumbling sections).
- You want a fast, affordable fix that blends with existing paint or stain.
Consider a different approach if:
- The rot or damage goes deep—especially through the whole board.
- The threshold flexes, shifts, or seems loose (you might need to reset or replace it).
- You’re worried about future leaks or want a perfect, good-as-new look.
In those cases, a replacement threshold or an epoxy wood repair might be better. Both options take more time and skill but offer more long-term strength for extreme cases.
How Long Will A Threshold Repair With Wood Filler Last?
“Will this repair really hold up?” That’s a fair question. In my experience, a threshold fixed with a high-quality exterior grade wood filler and properly finished with paint can last for years—even in tough climates.
Here are a few things that help maximize the repair’s lifespan:
- Prep the surface well—clean, dry, and sanded wood are key
- Use the right filler (don’t skimp on quality or use interior products outside)
- Seal and paint carefully for extra weather protection
- Check your repair once or twice a year and touch up paint or caulk if needed
If you notice any cracks or peeling after a few seasons, sanding and reapplying paint is usually all it takes to keep things looking sharp.
Care for your threshold like you would your car or windows—a little attention now and then beats a huge repair bill later.
Wrapping Up: A Threshold That’s Strong, Smooth, And Weatherproof
Fixing a damaged threshold with exterior grade wood filler might sound intimidating, but it’s surprisingly doable—even for a beginner. With a bit of prep, the right tools, and a solid product (like Minwax or Bondo), you can go from splintered eyesore to smooth, sturdy entryway in an afternoon.
You don’t need to be a pro or buy fancy equipment. Just take it step by step—clean, prep, fill, shape, and seal. Your front door will look great, stand up to the elements, and welcome guests for years to come. So next time you spot damage, skip the dread. You’ve got this.