Let me explain: fixing an exterior door after a break-in or forced entry isn’t just about cosmetic repairs or swapping out a lock. You need to get hands-on with real hardware, sometimes replacing parts, sometimes repairing splintered wood, and always double-checking that the door will actually keep you safe next time. Whether you’re dealing with a standard steel door, a classic wooden entrance, or even a newer fiberglass model, the main repair challenges are surprisingly similar. In fact, the basic steps for fixing a forced exterior door on brands like Masonite, Jeld-Wen, or Pella are almost universal. But each door can throw you a curveball, so let’s walk through what actually works.
Spotting the Real Damage After a Forced Entry
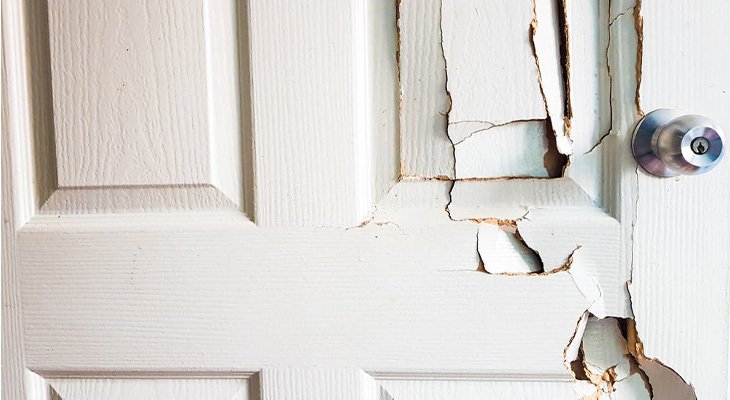
When a door’s been forced open, the damage isn’t always obvious at first glance. Sure, you might see a splintered door jamb or a bent deadbolt, but honestly, the pain points usually hide in the details. First, always check the strike plate, which is the metal piece on the frame where your latch or deadbolt goes into. If the plate is bent, missing, or pulled out with the screws only half-holding on, that’s a clear sign the force transferred straight through the hardware.
Next, take a slow look at the lock and latch hardware. Many times, the lock cylinder itself will twist or the screws will have pulled loose. The door edge might also be cracked or split around the latch area—especially on older wooden doors.
Don’t forget to inspect the hinges. Sometimes the force is enough to pop hinge screws out of the frame or even bend the hinge itself. If you see any part of the door no longer lining up with the frame, you’ve likely got hidden damage beneath the surface. You might be wondering, “Does it really matter if the frame looks a little rough?” The answer is yes. Even small splits or wobbly hardware can leave your door an easy target again. So, take your time, and make a list of everything you find—no detail is too small.
What Tools and Materials You’ll Need for a Solid Repair
Before you grab your drill or start tearing things apart, let’s get organized. Fixing an exterior door after it’s been forced open means you’ll need more than just a new lock. Here’s a simple checklist:
- Screwdrivers (Phillips and flathead)
- Power drill and drill bits
- Wood glue (for repairing splits in the frame or door edge)
- Wood filler or epoxy (for filling deep gouges or holes)
- Replacement hardware—think new deadbolts, strike plates, hinges, or longer screws
- Chisel and hammer (for cleaning out splintered wood or resetting hardware locations)
- Sandpaper and a putty knife
- Paint or stain to match your door after patching
You don’t have to own a full contractor’s setup, but these basics will help you handle 90% of door hardware repairs. And here’s the thing: choosing the right hardware isn’t about brand loyalty. Jeld-Wen, Masonite, Pella—they all use pretty standard latch and hinge designs. Just double-check sizing and finish to keep the look consistent. If your repair spot is looking rough, don’t be afraid to upgrade to a security strike plate or longer screws—these little tweaks pay off in strength.
Step-by-Step: How to Remove and Replace Damaged Door Hardware
Let’s get down to business. If you’re new to door repairs, don’t rush. Here’s a simple sequence to get your exterior door hardware swapped out safely:
- Remove the old hardware. Start by unscrewing the deadbolt, latch, and any ruined strike plate. If any screws spin in place or won’t come out, use a pair of pliers to work them free, or drill them out if they’re stripped.
- Inspect for hidden splinters or cracks. Look especially at the screw holes and the wood around where the lock sat. Any soft or crumbling wood should be chiseled out and patched with wood filler or epoxy. Let it dry fully before moving on.
- Realign or reinforce the hardware area. For splits or cracks, squeeze in wood glue, clamp the area if possible, and let it set for several hours. If the frame feels loose, reinforce with new, longer screws angled into the solid framing behind the jamb.
- Install new hardware. Put in the replacement lock, latch, and strike plate, following the instructions for your brand of door. If you’re not sure which side is up, look for markings on the hardware or refer to the packaging for clues.
- Test everything before painting or patching. Open and close the door several times to make sure all parts line up smoothly and the lock engages cleanly. Only then should you patch, sand, and paint the repair spots.
You might be tempted to reuse old strike plates or hinges, but honestly, if they’ve been bent or pulled loose, it’s worth going new. It’s a small cost for peace of mind.
Fixing Split Wood and Stripped Screw Holes
One of the most frustrating parts of a forced door is dealing with split wood or screw holes that just won’t hold. Here’s what works:
Start by cleaning out any loose wood chips with a chisel or flathead screwdriver. If you see a hairline crack, drip some strong wood glue deep inside, then clamp the area tight until it dries. For a deeper split—like around the deadbolt hole—pack it with a high-strength wood filler or even a two-part epoxy. Let it set fully (this can take a few hours, so patience pays off).
For screw holes that are stripped out and can’t grip new screws, you’ve got a few options. The quick fix? Toothpicks and wood glue, packed tightly into the hole, then snap off the excess and screw right in. For a longer-lasting repair, fill the hole with epoxy and re-drill a pilot hole once it’s dry.
The goal here isn’t just to “patch” the damage—it’s to restore the wood to a condition where it’ll actually hold hardware under stress. Don’t rush it. A secure door is always worth a little extra drying time.
Choosing Stronger Replacement Hardware for Next Time
After a break-in or forced entry, it makes sense to upgrade your door’s defenses. Not all hardware is equal, and even the fanciest Jeld-Wen or Pella exterior door comes with pretty basic locks out of the box. Here’s what I recommend:
- Heavy-duty strike plates: Look for ones with extra-long screws (at least 3 inches) that anchor directly into the wall framing, not just the door jamb.
- High-security deadbolts: Consider a deadbolt with a solid steel core, anti-pick features, and a reinforced mounting plate. Some brands offer “smart locks” that also allow for easy code resets and pairing, which is handy if you want to upgrade later.
- Hinge screws: Replace the short factory hinge screws with longer ones (again, 3 inches) to help keep the hinges from pulling loose next time.
Here’s the thing: You don’t have to go wild installing armored plates or over-the-top security gadgets unless you really want to. Most break-ins involve forced doors giving way at the weakest hardware point, so picking just a few well-made replacements can do wonders.
When to Replace the Whole Door Instead of Repairing
Sometimes, the damage goes further than you can fix with glue, filler, and new hardware. You might be wondering, “How do I know when it’s time for a new exterior door?” A few signs that repair just isn’t worth the effort:
- Large sections of the door or frame are splintered, cracked, or missing.
- The door won’t close or align, even after new hardware is installed.
- There’s warping or moisture damage from prolonged exposure post-break-in.
- Repair costs start creeping up close to the price of a new pre-hung door set.
A new exterior door—especially from brands like Masonite, Jeld-Wen, or Pella—often comes with reinforced hardware options and updated weather sealing. Plus, you’ll get peace of mind knowing everything is factory-fresh and ready to stand up to tough use.
Preventing Future Break-Ins: Simple Security Upgrades
Once you’ve repaired or replaced your forced exterior door, it’s smart to make a few quick improvements for next time. Even a little extra reinforcement can act as a big deterrent. Here’s what actually helps:
- Install a secondary security device, like a door chain or bar.
- Add a wide-angle peephole or security camera, so you can check who’s at the door without opening it.
- Upgrade exterior lighting near your entryway to make your home less attractive to intruders at night.
- Keep bushes or obstructions trimmed back, so there are no hiding spots right by the door.
Let me explain—most forced entries are crimes of opportunity. The harder your door looks to break through, the less likely a thief will bother trying.
Wrapping Up: Getting Back to Normal After Door Repair
Repairing an exterior door that’s been forced open can feel frustrating, but it doesn’t have to be overwhelming. Breaking down the job step-by-step—spotting the hardware damage, rounding up the right tools, making careful repairs, and upgrading what you can—makes a big difference. You don’t need a pro installer for most fixes, just a patient approach and a willingness to do things right.
And here’s the thing: even if your first attempt at fixing the lock or strike plate isn’t picture-perfect, remember that every improvement you make is a win for your home’s security. Whether you own a fancy new Masonite or a timeworn Jeld-Wen, the principles stay the same: solid hardware, careful repair, and a little extra reinforcement where it matters most. With a bit of patience, you’ll have your peace of mind—and your front door—back in action.