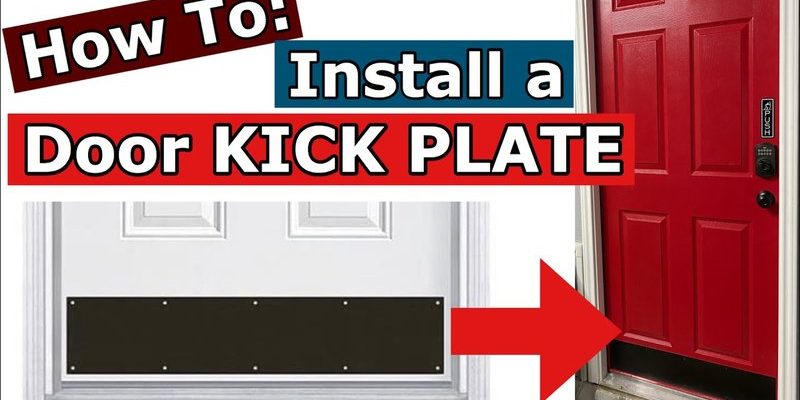
Honestly, adding a kick plate to your outswing Pella door isn’t rocket science, but it does have a few quirks compared to standard doors. This isn’t just slapping on a shiny strip; outswing doors open outward, so you have to be extra careful with placement, fit, and screw length. I’ll walk you through every step, explain why those details matter, and help you end up with a kick plate that looks like it came from the factory. Whether you’re freshening up your entryway or just sick of seeing new scratches on your beautiful Pella door, this guide will make the project painless—even if you’ve never touched a drill in your life.
Here’s the thing: if you follow the right steps and use the right tools, you’ll protect your outswing door *and* give it a bit of extra style. Let’s dig in.
Why Install a Kick Plate on a Pella Outswing Door?
It might be tempting to skip the extra hardware, but a kick plate isn’t just decorative—it’s practical. *Every time* you or your guests kick the door open, track in grit, or drag a suitcase across the threshold, you risk scratching the lower paint or even denting the metal. Pella outswing doors are known for their quality, but nothing’s totally immune to repeated abuse.
A kick plate acts like a shield, taking the brunt of the daily impacts. This helps keep the bottom of your door looking new, so you’re not stuck sanding, repainting, or replacing panels every year. If you have pets or kids, you know how quickly those little paws (and shoes) add up to big scratches. With a kick plate installed, those scuffs hit the metal instead—and wiping it down is as easy as cleaning your car bumper.
You might be wondering: does a kick plate mess with the way my Pella outswing door shuts or seals? Thankfully, when installed the right way, it won’t. These doors use weatherstripping and threshold seals that stay clear of the kick plate zone. Just make sure you buy a plate designed for outswing doors—there are subtle differences that actually matter.
You’ll also find kick plates add a nice bit of style, especially if you match the color or metal finish to your door hardware. It’s a small detail that can make your entryway feel more “finished”—and honestly, who doesn’t want a little extra curb appeal?
Choosing the Right Kick Plate for Your Pella Outswing Door
Not all kick plates are created equal, and if you’re working with a Pella outswing door, a few specs become *really* important. Let me break down what to look for before you buy anything.
First, measure your door’s width. Outswing doors often have slightly different outside edge dimensions compared to standard inswing doors, especially if they feature wide stiles or unique trim. Most Pella exterior doors are standard widths (30, 32, or 36 inches), but always double-check. You want your kick plate to run nearly the full width, minus about an eighth-inch on each side to avoid catching on the doorframe when swinging open.
Next, pay attention to kick plate height. Most plates come in 6-inch or 8-inch tall options, but on an outswing door, too tall can bump the threshold when you open the door. You don’t want anything scraping or interfering with the bottom weather seal. For Pella outswing doors, I recommend a 6-inch plate unless your threshold is unusually high.
Material also matters—go for solid brass, stainless steel, or a powder-coated aluminum if you’re worried about rust. Pella doors can last 20+ years, so it’s worth investing in a kick plate that will hold up just as long. Cheap, uncoated steel will eventually rust, especially in wet climates.
Here’s a tip: look for *pre-drilled holes* and included screws made for metal doors. The right hardware (like low-profile, flush screws) makes installation smoother and safer for your door. If you’re eyeing a universal kick plate, check reviews or the specs to make sure it’s “outswing compatible.” A little homework up front saves a lot of hassle.
How To Prep Your Pella Outswing Door Before Installing a Kick Plate
Prep may sound boring, but it’s the secret to a pro-looking job. Trust me, skipping these steps is how you end up with crooked plates, stripped screws, or—worse—accidentally drilling through a door component you didn’t mean to touch.
Start by swinging your Pella door open so you have clear access to the outside face. Clean the lower door thoroughly. Dirt, dust, and old scuff marks can mess with adhesive or make it hard to see your pencil marks for placement. Use a gentle cleaner and dry the area completely. If there’s old adhesive or sticky residue from previous hardware, scrape it off with a plastic putty knife.
Next, dry-fit your kick plate by holding it up against the door, centered horizontally and sitting about a quarter-inch above the bottom edge. You want the plate to clear the threshold when the door swings open—on outswing doors, this is absolutely critical. Check for any rub points as you gently open and close the door. If anything snags, adjust your placement now instead of later.
Mark the screw holes using a pencil or fine-tip marker through each pre-drilled hole on the plate. Double-check that all marks are level and straight—using a small level or measuring tape helps keep things square. If you’re anxious about drilling into your Pella door, I get it, but as long as you stick to the perimeter and avoid the weatherstripping area, you’re safe.
Pro tip: If your kick plate is a hair too wide, you can trim it down with metal snips or ask for a custom size—but *never* force it behind door trim or weatherstripping, or you risk leaks and damage.
Step-by-Step Installation: How to Attach the Kick Plate
Let’s get into the actual process so you know exactly what to expect—and don’t end up sweating through your shirt from frustration. This is where you’ll need a drill (cordless is easiest), the included screws, a screwdriver, and possibly a small amount of exterior-grade adhesive if your plate recommends it.
- Step 1: Pre-Drill Pilot Holes
Using a drill bit slightly smaller than your included screws, pre-drill each marked spot. Pella doors often use steel or fiberglass skins, so pre-drilling keeps the screw from wandering or stripping. Go slow and steady—don’t blast through the door. - Step 2: Apply Adhesive (Optional)
If your kick plate instructions suggest adhesive (some do for extra hold), run a small bead along the back of the plate. Don’t go crazy with glue—just enough for a little extra grip. This step is especially helpful if your kids are likely to karate kick the door. - Step 3: Screw the Plate In
Hold the plate in position (it’s easier with a second set of hands, but you can balance it yourself). Insert the screws into the pre-drilled holes and tighten until they’re snug. Don’t over-tighten—too much torque can strip the holes in a metal or fiberglass door. Go around and check that each screw is flush and that the plate sits tight against the door’s face. - Step 4: Test the Door
Open and close the door several times, watching for any catching or rubbing at the threshold. This is your chance to fix small problems before they become big annoyances.
If you want a little extra weather resistance, you can run a thin line of clear silicone caulk along the top edge of the plate. This helps keep rain from sneaking behind it—a nice trick for outswing doors facing the elements. Just don’t caulk the bottom or sides, which could trap moisture.
Common Mistakes to Avoid When Installing a Kick Plate
Even seasoned DIYers sometimes trip up here, so let me explain the biggest “gotchas” that can mess up your project—and how to avoid them.
First mistake: Placing the kick plate *too low* so it catches the outswing threshold. On Pella outswing doors, the weather seal sweeps slightly upward as the door opens. If your kick plate hangs below the bottom edge of the door, you’ll feel it grind or snag every time. Always keep the plate about 1/4″ above the lowest part—test the swing before you drill!
Second mistake: Using screws that are either too long or too short. Too-long screws can poke through the other side of the door, while short ones won’t hold well. Always use the screws included with your kick plate, and double-check their length against your door’s thickness.
Third mistake: Neglecting to check for electrical runs or sensors. Some high-security or smart Pella doors have sensors (for alarms or auto-locks) running near the bottom panel. If you suspect your door has extras like this, remove the interior panel and look before drilling.
Fourth mistake: Forgetting to clean up metal shavings or dust after drilling. These can scratch your door or even cause rust spots. A quick vacuum or wipe-down after you drill keeps everything tidy.
Honest advice: If you run into trouble or something just isn’t lining up, take a breather and double-check your steps. Rushing is the fastest way to end up with a lopsided plate—or a door you have to patch later.
Comparing Kick Plate Types: Universal vs. Pella-Specific Plates
You might be tempted to grab any old “universal” kick plate from the hardware store, but for a Pella outswing door, there are some real differences that make the brand-specific options worth considering.
Universal kick plates are fine in a pinch, but they’re sized for generic exterior doors, which means you might need to trim or drill extra holes. Sometimes the finish won’t match your Pella lockset or handle hardware, and you may end up with exposed screw heads that look, well, a little DIY.
Pella-branded kick plates, on the other hand, are made to match both the width and contour of Pella’s standard outswing doors. The screw holes usually line up perfectly, finishes are designed to complement Pella hardware, and you often get extras like color-matched screws or finishing caps. For anyone who wants a “built-in” look, these details matter.
That said, a universal kick plate can work perfectly well IF you’re comfortable with a little tweaking—like accurately marking and drilling your own holes, or trimming the sides with metal snips. Custom plates are also available from specialty shops if you want something truly unique (think etched designs or uncommon metals).
Bottom line: If you want easy installation and a perfect fit, go with a Pella kick plate. If you don’t mind a bit of tinkering, a universal one will save you a few bucks.
Troubleshooting: What To Do If Your Plate Doesn’t Fit
Sometimes, even with careful measuring, the kick plate you order just doesn’t play nice with your Pella outswing door. Here’s how to handle the most common hiccups without wasting a weekend—or your patience.
Problem: The plate is too wide for the door panel.
Solution: Measure how much overhang you have on each side, then use metal snips to trim down the plate carefully. For a super-clean cut, sand the edge with 220-grit sandpaper. Always wear gloves—freshly cut metal is sharp.
Problem: Pre-drilled holes don’t line up with the solid parts of your Pella door.
Solution: Mark your own holes using your pencil and a level, and drill new pilot holes in the plate. Don’t try to force a screw into a hollow or weak spot in the door; you’ll just strip it out.
Problem: You see gaps between the kick plate and the door surface.
Solution: Check for debris or bent metal along the back. If the door is slightly bowed, a bit of exterior-grade adhesive can help fill in and anchor the plate flush.
Problem: Plate is blocking the threshold or sticking on the weatherstripping.
Solution: Move the plate up in tiny increments and re-test the swing each time. Sometimes all you need is an eighth-inch shift to keep everything moving smoothly.
If you get stuck, don’t force anything. Sometimes the best fix is to take the plate off, rethink your placement, and start over. Your Pella outswing door is sturdy—but patience and precision always win the day.
Maintaining Your Kick Plate (and Outswing Door) for the Long Haul
Once your kick plate is in place, keeping it (and your door) looking sharp doesn’t take much effort. In fact, regular cleanups can double the life of both—and help you spot small issues before they become big headaches.
For everyday cleaning, just wipe the plate with a soft, damp cloth. For tougher spots (like muddy boot marks or salt stains), use a little mild soap and water. Avoid harsh chemicals or steel wool, which can scratch or discolor the surface—especially on brass or powder-coated plates.
If your Pella outswing door faces heavy rain, check the caulk bead at the top of the plate once or twice a year, especially after storms. If you notice peeling or gaps, reapply a fresh line of silicone to block out moisture. This simple step prevents water from sneaking behind the plate and rusting the screws or door skin underneath.
Take a look at the screw heads now and then. If you see rust or loosening, swap the screws with new stainless ones. It’s a five-minute fix that can save you from bigger corrosion problems down the line.
If you ever need to remove the plate (maybe you’re repainting the door or swapping for a new style), just unscrew it gently. Use a razor blade to lift any adhesive or caulk, being careful not to gouge the door surface. A little patience here means you’ll be able to reinstall or replace without hassle.
Here’s the thing: Just like with all home improvements, a tiny bit of maintenance goes a long way. Treat your Pella outswing door and kick plate with care, and you’ll enjoy the results for years.
Wrapping Up: Enjoy Your Protected (and Sharper) Entryway
By now, you’ve learned not just how to install a kick plate on your Pella outswing door, but why it matters, what mistakes to dodge, and how to keep everything looking clean for the long haul. Kick plates might seem like a small detail, but they seriously boost your door’s durability and style—especially when you take the time to install one the right way.
Remember, a little planning and patience pay off. Double-check your measurements, go slow with the drill, and don’t be afraid to ask for help if something feels off. Once your plate’s in place, you’ll have that extra bit of confidence every time you open your door—whether you’re hauling groceries, letting the dog out, or just admiring your handiwork. Here’s to a protected, polished entryway that stands up to whatever life throws at it.