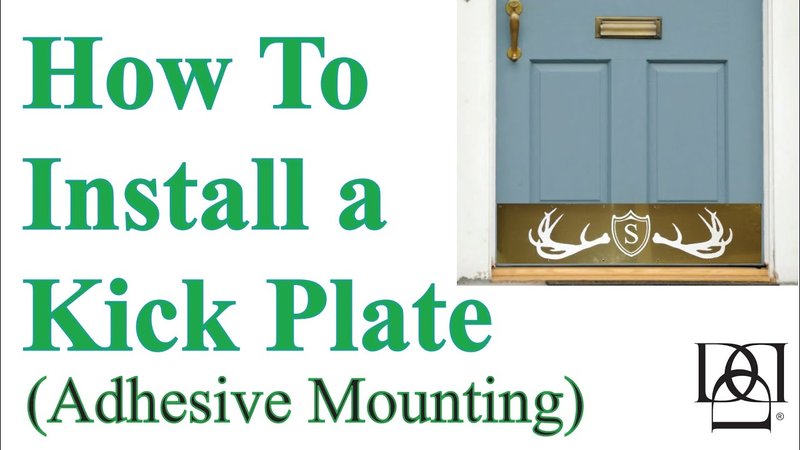
Here’s the thing: You don’t want to drill into a brand new door or use any glue that’s impossible to remove. It’s all about picking the *right* adhesive—strong enough to hold, but gentle when it comes time to peel it off. Honestly, choosing the best adhesive for temporary kick plate installation can feel like searching for a needle in a haystack. There are dozens of options out there, and it isn’t always clear which one will give you the stick without the stress.
Why Temporary Kick Plate Installation Matters During Construction
Let me explain why this is more than just a minor detail. When you’re working on a construction project, doors can take quite a beating. Workers move tools, materials, and ladders through narrow hallways. It’s easy for someone to accidentally give a door a good kick or swing a tool a little too close. A kick plate acts like a shield, protecting the lower part of the door from scratches, dents, and dirt.
Temporary installation means you can protect the doors while still allowing for easy removal later. Permanent adhesives or screws might seem secure, but they can leave lasting damage when you try to take them off. Using the right temporary adhesive lets you dodge that problem entirely. You get the protection when you need it—without any regrets (or repair bills) later.
In practice, this approach is a lifesaver for property owners and contractors alike. No one wants to see brand-new doors marred before handover. Plus, temporary solutions offer flexibility. If you need to swap plates around or adjust them for painting, it’s no big deal. Think of it as insurance for your doors—simple, affordable, and totally worth it.
Types of Adhesives Best Suited for Temporary Kick Plate Installation
There’s no shortage of adhesives out there, but not all are cut out for temporary kick plate installation. The goal is simple: hold the plate securely during construction, yet remove it cleanly when the job’s done. Here are the types that really stand out:
- Double-sided mounting tape: This is the classic go-to. It comes in several strengths; the trick is choosing one labeled as “removable” or “for temporary use.” Good brands (like 3M or Gorilla) offer heavy-duty mounting tapes that stick firm but don’t leave a mess behind. The tape rolls out in strips, so you can cut it to size for your kick plate.
- Removable construction adhesives: Products like Loctite Power Grab or DAP’s removable formulas are designed for moderate holding power. They’re not as aggressive as permanent construction adhesives, but they provide a good balance between grip and clean removal.
- Poster putty or removable mounting strips: For ultra-light, low-traffic situations, poster putty can work in a pinch. It’s easy to shape and remove, but honestly, it’s only practical for short-term protection or where minimal strength is needed (like interior kick plates on office doors).
Here’s what’s important: always double-check the label for “removable” or “temporary.” Even within a brand like 3M, there’s a world of difference between a product meant to hold mirrors and one meant for light-duty wall hooks. You want something designed for temporary use—not something that will require a chisel and solvents to take off.
How to Apply Temporary Adhesives for Kick Plate Installation
You might be wondering if applying these adhesives is complicated. Good news: it’s not rocket science, but following a few basic steps makes all the difference.
- Clean the surface: Start by wiping down the door where the kick plate will go. Use a damp cloth to remove dust, grime, and any oily residue. Dry thoroughly—any moisture under the adhesive can weaken the bond.
- Measure and test fit: Hold the kick plate against the door to check alignment. Mark light pencil lines if needed. You only get one shot with some tapes, so you don’t want to guess.
- Apply adhesive: For double-sided tape, cut strips and place them around the edges and a few spots in the center of the kick plate. For removable construction adhesives, squeeze a thin bead around the border. If you’re using putty, roll small balls and space them evenly.
- Press and hold: Position the plate and press firmly for 30 seconds to a minute. Some adhesives need a bit of pressure to really grip. Check the label for cure times—some tapes reach full strength after a few minutes, while others may take longer.
Most temporary adhesives don’t need any fancy tools. At worst, you’ll need scissors for tape or a caulk gun for certain construction adhesives. Just remember, more isn’t always better—a thin, even application prevents leaks and ooze.
Comparing the Top Brands for Temporary Adhesives
If you’ve ever stood in a hardware aisle feeling totally lost, you’re not alone. There are a handful of brands that consistently stand out when it comes to temporary kick plate installation—mainly because they’ve earned a reputation for easy use and reliable removal.
- 3M Command Strips: Best known for picture hanging, but the heavier-duty options work wonders for kick plates. They’re engineered to hold securely, yet peel off without damaging paint or leaving residue. For temporary setups, Command Strips are about as beginner-friendly as it gets.
- Gorilla Mounting Tape: If you’re worried about plates falling off in a high-traffic construction site, Gorilla’s removable mounting tape offers serious sticking power. It’s tough, flexible, and removes cleanly from most surfaces. Just be sure to pick the “removable” version for temporary installs.
- Scotch Removable Mounting Putty: While not as heavy-duty as tapes, this putty is a lifesaver for delicate surfaces or light aluminum plates. It shapes easily and works well for short-term jobs in offices or less chaotic construction zones.
- Loctite Power Grab Express: For situations where tape just won’t cut it (say, a textured door or a heavier steel plate), Loctite’s removable adhesives offer a middle ground between tape and permanent glue. They come off with a little effort and minimal scraping.
Selecting between these depends on your specific needs. For light-duty indoor doors, Command Strips or putty can be perfect. For rougher jobs (like exterior doors or areas with lots of foot traffic during construction), heavier mounting tape or a light construction adhesive makes sense. It’s all about matching the adhesive to the surface and abuse level.
What to Avoid: Adhesives That Cause Damage or Headaches
Let’s be honest, not every adhesive at the hardware store is your friend—especially when “temporary” is the goal. Some options will bond so tightly you end up peeling off paint, scratching the door, or leaving behind a sticky mess that’s nearly impossible to clean.
Steer clear of these for temporary kick plate installation:
- Permanent construction adhesives: These are meant for long-term projects—think drywall, tiles, or subflooring. They form a chemical bond so strong that removal usually damages the surface. Names like Liquid Nails, PL Premium, and classic Gorilla Glue are ones to skip here.
- Epoxies or super glues: These dry rock-hard and are designed for unbreakable bonds. If you use them on a kick plate, you’ll likely never get it off without major effort (and damage).
- Non-removable mounting tapes: Not all tapes are created equal. Some heavy-duty versions are made for permanent installations and can strip paint or leave chunks of adhesive behind. Always double-check the packaging for removal instructions.
It’s tempting to “play it safe” by using something super strong, but that usually backfires with temporary projects. Stick to products that advertise removability, and always test on a small area if you’re not sure.
How to Remove Temporary Adhesives Without Damaging Doors
Here’s a common worry: Will taking off the kick plate ruin the finish or leave sticky gunk behind? When you’re ready to remove your temporary kick plate installation, a gentle approach works best. Here’s what you’ll want to do:
- Peel slowly: For tapes and strips, start at one edge and gently lift. If it resists, try wiggling side-to-side to break the adhesive’s grip. Avoid ripping or yanking, which can pull off paint.
- Soften stubborn spots: If some adhesive stays behind, use a soft cloth with warm, soapy water or a little rubbing alcohol. For thicker glue spots, a plastic scraper (never metal) can help without scratching the surface.
- Patience pays off: The longer a temporary adhesive sits, the firmer it can grip. If you notice trouble spots, let the removal solvent sit for a few minutes before wiping again.
Most modern removable adhesives are designed to clean up with nothing more than a little elbow grease. Just remember not to rush—and never use harsh chemicals unless you’ve checked that they’re safe for the finish on your door.
Pro Tips for Stress-Free Temporary Kick Plate Installations
After seeing (and sometimes fixing) plenty of DIY missteps on job sites, here are some lessons learned the hard way:
- Test before you commit: Always test your adhesive on a small, hidden corner of the door first. Even so-called “removable” products can surprise you on unusual paint or finish types.
- Use enough, but not too much: You want even coverage, but more adhesive isn’t always better—especially with tapes. Too much can ooze out or make removal harder later.
- Keep spares handy: Construction zones are unpredictable. Keep extra strips or tape on hand in case a kick plate gets knocked loose by accident.
- Avoid direct sunlight or moisture: Some adhesives break down faster in harsh conditions. If possible, install plates once work is underway and keep moisture off the doors until the adhesive has cured.
The right adhesive turns kick plate installation from a potential headache into a fast, low-stress project. A little planning now saves hours of cleanup or repair down the road.
Alternatives to Adhesives: When Screws or Clips Make Sense
You might be scratching your head wondering if you have to use adhesives at all. Truth is, sometimes mechanical options like screws or snap-on clips are actually better—especially on heavy industrial doors, or where total removability isn’t as important.
- Temporary screws: Using small screws in pre-existing holes (or in areas that will be covered or painted later) gives you the security of a fixed plate with easy removal. Just be sure to avoid damaging visible finishes or drilling new holes unless absolutely necessary.
- Snap-on or magnetic kick plates: Some brands offer kick plates that grip the door with built-in magnets or friction fit. Installation takes seconds, and removal leaves the surface untouched. They’re a specialty item, but worth considering for short-term applications.
- Reusable adhesive strips: Some mounting strips are designed to be peeled and re-stuck multiple times. This is perfect if you need to move kick plates between different doors as work progresses.
While adhesives are the go-to for most temporary installs, knowing these alternatives can come in handy—especially if the situation calls for ultra-fast removal or reusability.
Wrapping Up: Choosing the Best Adhesive for Your Project
Finding the *best adhesive for temporary kick plate installation* is about balance—enough grip to last through the chaos of construction, but gentle enough to leave your doors perfect when it’s time to pack up. Whether you opt for a proven brand like 3M Command Strips, go with heavy-duty Gorilla tape, or try a removable construction adhesive, match your product to the job. Take a minute to test, prep your surfaces, and don’t rush the removal.
Temporary kick plates are the unsung heroes for protecting investments on any project. With the right adhesive, you’ll get the peace of mind that comes from knowing your doors will look just as good at the finish line as the day they were installed—no sticky mess, no paint damage, and no headaches. That’s the real win.
