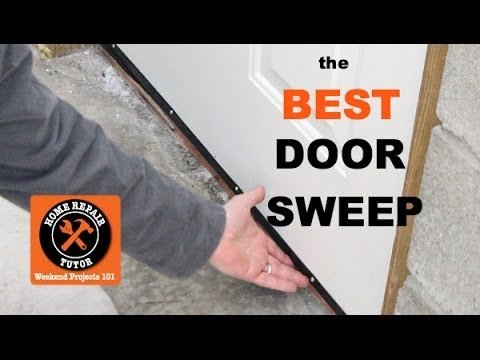
Door sweeps may look simple—just a long strip attached to the bottom of your door—but they do some heavy lifting. Brands like Pemko, M-D Building Products, and Frost King all promise a tight seal, but if your sweep isn’t sitting flush, even the best model can let you down. Let’s roll up our sleeves and get to the bottom of what’s causing your door sweep troubles and, step-by-step, fix that annoying gap for good.
Why Your Door Sweep Isn’t Sealing Properly
When you notice a door sweep not making full contact with the threshold, it feels like a tiny problem—but it’s a symptom of several possible issues. The sweep itself might be worn out, installed wrong, or just battling a quirky door frame. Here’s where things usually go sideways.
Over time, most sweeps—whether they’re vinyl, rubber, or bristle—start to break down. Repeated opening and closing, exposure to moisture, or even temperature swings can warp, crack, or harden the material. If you look closely, you might spot chunks missing or a curve where the sweep once sat straight. Sometimes, the sweep is just the wrong type for your specific threshold. For example, a brush-style sweep can struggle on uneven tile, while a heavy-duty rubber model might be too stiff for a lightweight interior door.
Another culprit? Poor installation. If the sweep wasn’t aligned properly or was screwed in while the door was open, it might float above the floor or drag too much. Hardware brands like M-D Building Products include adjustable screw slots for a reason, but if you skip this step or rush it, the sweep won’t pair up with the floor. And let’s not forget the “house settling” effect—over months or years, everything shifts and small gaps appear where none existed before.
Here’s the thing: You can’t fix what you haven’t diagnosed. Before reaching for your toolkit, take a minute to look closely at both the door and the sweep. Sometimes, just spotting a missing screw or a warped section tells you exactly where to start.
How a Door Sweep Should Sit: What “Full Contact” Really Means
You might be wondering what “full contact” actually looks and feels like. It’s not about smashing the sweep into the floor—if you do, your door might stick or the sweep could wear down in weeks. Instead, think of it like a gentle handshake between the sweep and the threshold: firm, continuous, but not forceful.
Imagine running your hand along the bottom of the closed door. You shouldn’t feel any air sneaking through, and the sweep should press evenly against the floor or threshold from end to end. If you step outside and look at the door from below, you shouldn’t see daylight peeking through. Honestly, if you slide a piece of paper under the door and it moves smoothly, but not freely, you’re in the right zone.
Different brands approach “full contact” with their own quirks. Pemko models use softer rubber that’s great for uneven surfaces, while Frost King’s bristle sweeps can fill small cracks but might let in more dust or noise. There’s no single “perfect” contact feel across all doors—what matters is a continuous, reliable seal that works for your specific setup.
If you notice the sweep only touches in the middle or at the edges, that’s a red flag. It usually means the sweep is bent, installed unevenly, or the door itself is slightly warped. Fixing this isn’t just about comfort—it’s about saving money, keeping critters out, and preventing water from sneaking inside.
Checking for Common Installation Mistakes
Let me explain—most door sweep problems come from the installation process. Even seasoned DIYers can get tripped up by small oversights. Here’s what to check if your sweep isn’t making full contact:
- Is the sweep mounted level? Use a bubble level if you have one. If the sweep tilts up or down, one end might float above the floor.
- Were the screws overtightened? Cranking things down can cause the sweep to bow, breaking that all-important seal in the middle.
- Is the door slightly warped? Houses settle, doors twist, and even a tiny curve can create a stubborn gap. Hold a straight edge against the door’s bottom to spot high or low spots.
You’d be surprised how often a sweep looks fine from a distance, but up close, it’s floating in places. If you have a sweep with slotted screw holes, loosen the screws, shut the door, and let the sweep “settle” into place against the threshold. Then, tighten the screws while the door stays closed. If the sweep still isn’t sitting flat, the material might be too stiff or already distorted and could need replacing.
A lot of folks forget to check whether the threshold itself is bent or sits higher in the middle. If that’s the case, you may need to adjust both sweep and threshold—sometimes a little at a time until the two fit together like puzzle pieces.
How to Adjust or Replace Your Door Sweep
If you’ve gone through the checklist and found the sweep just isn’t cooperating, it might be time for a tune-up—or a total swap. Honestly, this isn’t as intimidating as it sounds. Here’s how to get started:
- Remove the old sweep. Unscrew or slide it off, depending on your model. If the sweep is glued on, use a putty knife and work slowly.
- Clean the bottom of the door. Wipe away dust, adhesive, or any debris. A clean surface helps your new sweep sit flat and stay put.
- Fit the new sweep (or adjust the old one). Hold the sweep against the closed door and check for gaps. If it’s adjustable, slide it up or down until it just brushes the floor.
- Screw or snap it into place. Secure the middle first, then the ends. Check as you go—sometimes a small tweak at one end fixes the whole line.
Some sweeps, like those from M-D Building Products, can be cut to fit with a hacksaw. Just be sure to measure twice before trimming anything. If you’re dealing with an unusual threshold (like one that’s angled or too high), you might want to try a different sweep style. For example, a U-shaped under-door sweep can handle wigs and uneven floors better than a traditional strip.
If you’re always battling a stubborn gap, consider upgrading to an adjustable threshold. Pairing the right sweep and threshold lets you “dial in” that perfect seal without forcing one or the other to do all the work.
What to Do If Your Door or Threshold Is the Real Problem
Sometimes, the sweep gets blamed for gaps it can’t possibly close. If the door itself is twisted, or the threshold is worn down, even the best sweep on the market won’t save you. Here’s how to tell if you’re facing a bigger challenge:
Look for uneven wear on the floor or threshold—scratches, grooves, or shiny spots can reveal where the sweep has been dragging (or missing entirely). If the threshold is loose, bent, or made from soft wood that’s rotting, it won’t support a good seal. Similarly, a door that’s warped or swollen from humidity will never close evenly until the real damage is fixed.
In some cases, you might be able to shim the hinges or adjust the threshold height. Most adjustable thresholds have screws you can turn with a screwdriver to raise or lower the middle. If you’re dealing with a hollow-core door that’s bowed, sometimes replacing the door is easier than endless tweaking.
Think of the sweep as the finishing touch—not the main defense. If the underlying structure is off, everything else becomes a band-aid solution.
Comparing Types of Door Sweeps: Which One Works Best?
You might be stuck between options and wondering if the sweep itself is the weak link. Door sweeps come in a few main flavors, and choosing the right style can make all the difference.
- Vinyl and Rubber Strips: These are most common for exterior doors. They’re great at blocking drafts and water, especially paired with a smooth threshold. Brands like Frost King and Pemko offer several thicknesses. The downside? They can stiffen over time in very cold weather.
- Bristle Sweeps: These use dense nylon or polypropylene fibers. They handle uneven thresholds and rough floors better, but don’t always block as much air or water. Great for garages or utility doors, though.
- U-Shaped Under-Door Sweeps: These slip onto the bottom of the door and seal both sides. They’re easy to install, especially if you’re not handy with screws, and work well with slightly uneven surfaces, but can drag or bunch up if measurements aren’t just right.
- Automatic Door Bottoms: These are more expensive and use a mechanism to drop a seal when the door closes. Overkill for most homes, but unbeatable for soundproofing or if you absolutely need a perfect seal.
Matching the sweep to your exact door and threshold is honestly half the battle. If you’ve got a weird or worn-out surface, sometimes experimenting with a different style—or even a “universal” sweep—can solve problems you thought were permanent.
Seal the Deal: Testing and Maintaining Your Door Sweep
After all that work, don’t just cross your fingers and hope for the best. It’s worth putting your new or adjusted sweep through its paces. Here’s how I like to check for a tight seal:
First, close the door and turn off the lights on one side. If you can see light sneaking through at the bottom, that’s a clear sign your sweep isn’t making full contact. Next, pass your hand along the crack to feel for cold air or drafts. You can even hold a thin strip of tissue paper and see if it flutters.
Over time, regular use, pets, and even kids’ shoes can start to pull the sweep out of alignment. Make a habit of checking both the contact and the tightness of the screws every few months. If you spot any sagging or cracking, don’t wait—swap out the sweep while the fix is still simple.
Routine checks take just a few minutes but can save you hours of troubleshooting later—not to mention protecting your heating bills.
Even a high-quality sweep like those from M-D Building Products or Pemko can wear out after a tough season. Keeping a spare or knowing how to adjust your current sweep will help you stay ahead of the game.
Wrapping Up: Keeping the Outside Out and the Inside In
At the end of the day, troubleshooting a door sweep that’s not making full contact is part detective work, part patience, and part finding the right fit for your home. Whether you’re tackling a squeaky Frost King sweep or an adjustable Pemko model, remember that a perfect seal is possible—sometimes it just takes a little tinkering.
Take your time with each step: check the sweep, eye the door, trust your sense of touch, and don’t be afraid to try a new approach. Your home (and your toes) will thank you for sealing that gap once and for all.