A stubborn weatherstrip can let in chilly breezes, moisture, and even bugs, defeating its whole purpose. Whether you’ve freshly installed a M-D Building Products adhesive strip (a popular pick for steel doors), or you’re eyeing that rubber seal from Frost King that keeps drooping, the problem usually comes down to a few core culprits. Let’s break down why this sticky situation happens and how you can actually fix it—without losing your cool.
Understanding Why Weatherstripping Won’t Stick to Steel
Here’s the thing: adhesive weatherstrips can be picky about where they’ll stick. Steel doors, while sturdy and secure, pose some unique challenges for self-adhesive strips. The surface is hard, slick, and not as forgiving as wood, so if there’s any dust, oil, or old adhesive left behind, the new strip will struggle to grip.
You might be wondering if the actual material of the weatherstrip makes a difference. Honestly, it does. Some vinyl or foam strips don’t bond as well to metal surfaces, and cheaper brands tend to use low-quality adhesive. Meanwhile, heavy-duty brands like Thermwell or M-D Building Products usually perform better—but only if you prep the surface correctly.
Another sneaky culprit is temperature. Steel doors can be freezing cold or hot to the touch, depending on the season. Most adhesives need a surface temp between 50°F and 100°F to work properly. If you try to install a weatherstrip on a frosty door, no amount of pressing will make it stick.
How to Properly Clean a Steel Door for Weatherstripping
Before you reach for the weatherstrip, stop and check your door. Dirt, grease, or even leftover bits of the old strip can kill your chances of a good seal. Here’s how to prep your steel door for the best result:
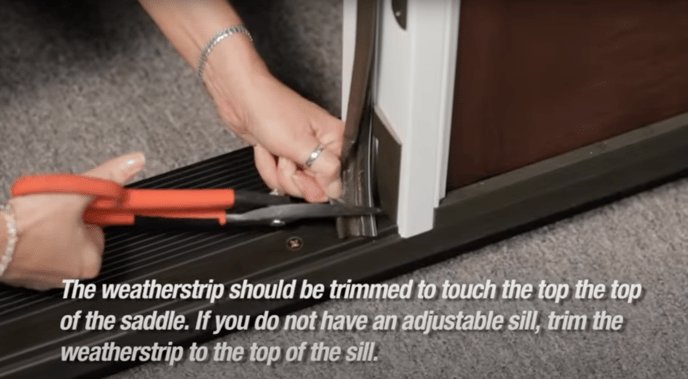
- Remove old adhesive with a plastic scraper. Stay gentle—steel doors can scratch easily.
- Scrub the area with warm, soapy water to cut through grime. Don’t use oil-based cleaners; they leave residue.
- After rinsing, wipe the door down with rubbing alcohol. This evaporates quickly and pulls up any invisible grease.
- Let the area air-dry completely. Moisture and sticky strips don’t mix.
Let me explain why this matters: If you skip cleaning, even the best weatherstrip might peel off in days. Think of it like painting a wall—if it’s dusty, the paint just flakes right off.
Getting the Temperature and Timing Right
You might be in a rush to seal that draft, but weatherstrip adhesives are fussy about timing. Most brands, like Frost King and M-D, recommend you install the strip when the door and surrounding air are in the right temperature range, usually between 50–100°F.
If it’s winter and the steel feels icy, the glue can’t cure properly. In the summer, a scorching hot door can cause the adhesive to go soft and slip. Sometimes, just waiting for a mild part of the day—or gently warming the door with a hairdryer—can make a big difference.
Don’t forget humidity. If it’s muggy and wet outside, consider waiting for a dry day, or keep the door open until everything’s bone dry after cleaning.
Choosing the Right Weatherstrip for Steel Doors
Not every weatherstrip is built for every job. Some are engineered for wood or fiberglass, and some specifically for steel. If you keep running into trouble, check the label—look for products made for “metal doors” or “steel frames.” Brands like M-D Building Products, Frost King, and Thermwell usually make versions that mention steel directly.
Here are the main types to consider:
- Vinyl or rubber adhesive strips: Easy to install, but only if the adhesive is strong enough for metal.
- Foam tape: Cheaper, but tends to lose stickiness fastest on steel. Good for short-term fixes.
- Magnetic strips: Some steel doors use these for a super-tight seal, but you’ll need a compatible door frame and strip.
- Metal-backed “sweep” strips: These might screw into the bottom of the door—a good option if adhesives keep failing.
If you’re on the fence, adhesive-backed vinyl is usually the most beginner-friendly. Just make sure it mentions steel doors on the package.
Fixing a Weatherstrip That Keeps Falling Off
Let’s say your new weatherstrip won’t stay put. Don’t panic—there are a few ways to boost its “stick” and make it last.
- Heat up the adhesive: Run a hairdryer on low over the strip just before pressing it down. The warmth helps activate the glue.
- Press and hold: Use firm, even pressure along the whole length for 30–60 seconds. Don’t be gentle here!
- Use extra support: For stubborn spots, add a few dabs of construction adhesive or caulk (just check it’s safe for steel and weatherstripping).
- Clamp or tape temporarily: Masking tape or painter’s tape can hold a wiggly strip while the adhesive sets up—usually a few hours.
If you notice the strip is falling off right away, it probably means the surface isn’t clean, or the door is too cold or too hot. Don’t waste time pushing it back over and over—fix the underlying problem, or the weatherstrip will keep letting you down.
Alternatives When Adhesive Weatherstripping Isn’t an Option
Sometimes, no matter how hard you try, self-adhesive strips just won’t cooperate. Maybe your steel door has an odd curve, or the existing paint is peeling. In those cases, think about switching to a different install method:
- Screw-on weatherstripping: Some kits use tiny screws or nails to hold the strip tight. Great for steel doors with solid edges.
- Slide-in gaskets: Many modern doors have a channel along the edge for a rubber or vinyl gasket. You just slide in a replacement, no sticky stuff required.
- Magnetic seals: Works if your steel door is smooth and flat—just check compatibility before buying.
These methods require a little more effort, but they tend to last longer and handle temperature swings better.
Common Mistakes to Avoid When Installing Weatherstripping
Honestly, most weatherstrip troubles are 100% avoidable with a little patience. Here’s what gets most people into trouble:
- Not cleaning the steel door thoroughly. Even invisible dust can interfere with the adhesive.
- Peeling all the backing off at once. Start at one end and pull as you go, or you’ll end up with a tangled mess and fingerprints on the sticky part.
- Not measuring first. If the strip is too short or overlaps past the edges, it’ll peel sooner than you think.
- Forgetting to check the door swing. Install with the door closed so you see exactly where the strip will press against the frame.
Take your time and double-check each step. Weatherstripping isn’t hard, but it rewards anyone who works slowly and carefully.
How to Know When to Replace vs. Repair Weatherstripping
If your weatherstrip keeps peeling, cracking, or feels stiff and brittle, it’s probably time to replace it. A good weatherstrip should press against the door frame with a slight give—but not feel squished or loose.
Here’s a quick way to check: Close the door and slip a piece of paper between the door and the frame (where the strip sits). If you can pull the paper out easily or see daylight, you need a new strip. If you’re patching up a single weak spot, a dab of glue might do the trick, but chronic problems usually need a full replacement.
Trust your instincts. If your house feels drafty, it’s time to stop patching and start fresh with quality weatherstripping made for steel doors.
Wrapping Up: Making Your Weatherstrip Stick—For Good
Dealing with a weatherstrip that won’t stick to your steel door can be weirdly frustrating, but it’s usually fixable with the right prep and product. Always start with a spotless surface and watch the temperature when you install. Pick a strip designed for metal, and don’t be afraid to swap out adhesive for screw-on or slide-in options if you keep having trouble.
Your door’s weatherstrip is the unsung hero of home comfort, blocking rain, cold, and summer heat with just a thin line of vinyl or foam. Take your time, follow these steps, and you’ll finally have the cozy, draft-free entryway you deserve. If all else fails, don’t hesitate to reach out to a window-and-door pro—they’ve seen every sticky (and not-so-sticky) situation there is.