Weatherstripping might seem like a humble strip of foam or rubber, but it plays a *huge* role in keeping out rain, cold air, pollen, and even bugs. When swelling wood starts smashing into it, that once-perfect seal ends up sagging, peeling, or coming completely unglued. Fixing it isn’t rocket science, but it does take a little know-how—especially if you want the repair to last longer than a single storm. If you’re dealing with sticky doors and battered weatherstripping (looking at you, drafty old craftsman or even newer models like a Pella or JELD-WEN), it helps to get clear about what’s happening and how to make it right.
Why Wood Doors Swell—and What It Does to Weatherstripping
Let’s start with the basics: *Why does this even happen?* Wood is a natural material, meaning it soaks up moisture from humid air or rainy days just like a sponge. This causes the fibers to expand, and suddenly your perfectly fitting door starts to press hard against anything in its way—including that foam or rubber lining you rely on to keep your house comfortable.
Here’s the thing—when a wood door swells, it’s not always even. Sometimes just the bottom or one edge grows thicker, so you get uneven pressure on the weatherstripping. This leads to a few classic problems:
- The weatherstripping tears where the door rubs extra hard.
- The adhesive releases, so strips peel away and look floppy.
- The foam compresses and rebounds poorly, leaving gaps.
You might be wondering why manufacturers still use wood for doors if swelling is such a pain. Honestly, wood looks great and lasts for decades—but it comes with these quirks. And while many brands, from Andersen to Masonite, use different weatherstripping or edge designs, no wooden door is completely immune.
How to Spot Weatherstripping Damage from Door Swelling
It’s not always obvious at first. Maybe your door just starts feeling a bit sticky, or you catch a chill near the frame. Take a closer look, and you’ll see the telltale signs:
- Flattened or torn areas where the door is tightest
- Loose or dangling strips especially in corners or at the bottom
- Visible light or wind leaks around the edges, even with the door closed
Let me explain with a quick story: I once moved into a house with a beautiful, old oak front door. After the first rainy week, the bottom weatherstripping looked chewed up—flattened in some places and totally missing in others. Every cold draft made it obvious what was missing. If you’re noticing the same, it’s a classic sign your weatherstripping lost its battle with a swollen wood door.
In some cases, you might also see the sticky side of the strip left behind, while the foam itself is gone. That means the adhesive failed (often from too much pressure as the wood expanded). Don’t ignore these clues—fixing them early saves bigger headaches (and energy bills) later.
What to Do Before Repairing Damaged Weatherstripping
Here’s an important step a lot of people skip: Make sure the wood door isn’t still swollen when you repair the weatherstripping. It’s tempting to stick on a new strip right away, but if your door is puffed up from humidity, you might just repeat the cycle.
Try these simple checks before starting your repair:
- Open and shut the door several times. Does it stick or scrape in certain spots? Mark those areas.
- Wait for dry weather if possible. A door may shrink back to normal as things dry out, changing the fit around the weatherstripping.
- Sand or plane the edges very slightly if the swelling is severe and repeat every season. But don’t overdo it—you want a snug fit, not a drafty one!
If you repair weatherstripping while the door is at its widest, you’ll end up with gaps when it dries out—leading to the same old issues. It’s a bit like putting a new castle wall up at high tide; when the water recedes, your defenses have holes.
Removing Old Weatherstripping Cleanly
In most cases, you’ll need to get rid of the damaged stuff before adding new weatherstripping. This part gets messy, but going slow makes a difference. Here’s how I usually tackle it:
- Start by carefully peeling away the old strip. Go slow so you don’t splinter the door edge or rip the frame.
- If there’s sticky residue left behind, use a plastic scraper or your fingernail—skip metal tools that gouge the wood.
- For stubborn adhesive, dab on some rubbing alcohol or adhesive remover. Let it sit a minute, then wipe away.
- Wipe the area clean with a damp cloth and let it dry completely before moving on.
If you try to put new weatherstripping over old, dirty, or sticky patches, it just won’t stick well. Take the extra time now—it’s worth it when your new strip lasts through more than one rainy season.
Sometimes, you’ll discover hidden nails or staples, especially on older or custom doors. Pry these out gently with pliers, or the new strip won’t sit flat.
Choosing the Right Replacement Weatherstripping
Not all weatherstripping is created equal. There’s a dizzying array of materials—foam, rubber, silicone, felt—plus different brands promising their own magic solution. Picking the right one is crucial so you don’t have to fix it all over again next time your wood door swells up.
Here are the main types you’ll see at hardware stores or online:
- Adhesive foam strips: Cheap and easy for quick fixes. They work well if your door is mostly square and only swells a little, but can compress too much under heavy pressure.
- Rubber or silicone bulb strips: Last longer and bounce back from pressure better than foam. Best for spots where your door swells and presses hard against the frame.
- Pile/felt strips: Good for light-duty and tight spots but easily damaged and not great for heavy swelling.
You might be thinking, “Do I need to buy the same brand as my door?” For big brands like JELD-WEN, Pella, or Andersen, matching the original isn’t a bad idea, since the fit will be perfect. But universal weatherstripping often works fine for most repairs—just check the size and style. *Measure the width and thickness* of the gap when the door is closed so you get the right profile.
Step-by-Step: Installing New Weatherstripping the Right Way
Now for the hands-on part. Here’s a straightforward way to install new weatherstripping so it stands up to swelling, slamming, and wild weather.
-
Measure First:
Use a tape measure to check the length and width of each side of the door frame. Add a little extra so you can trim precisely at the corners. -
Cut to Fit:
Cut your new strips using scissors or a utility knife. Don’t stretch them—they should lie flat without tension. -
Peel and Stick (for adhesive types):
Starting at the top, press the strip in place along the frame edge. Work your way down, smoothing as you go. For nail-on styles, tap in brads or staples every 8–12 inches. -
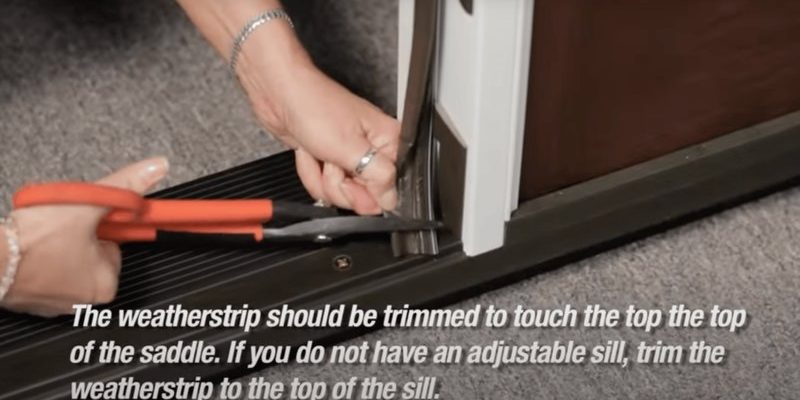
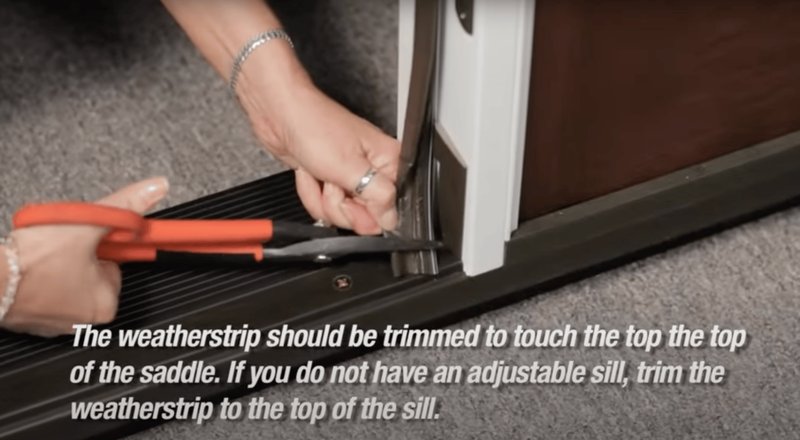
Check the Seal:
Close the door gently. You should feel a slight resistance—but not so much that you have to force it. If the fit is too tight, try a thinner strip or trim the edge slightly. -
Test and Adjust:
Open and close the door several times. Make sure the weatherstripping stays in place and rebounds after pressure.
Here’s a tip: Don’t install new weatherstripping if it’s freezing cold. Adhesive strips stick best when the frame is warm and dry.
Don’t worry if the new strip looks a bit puffy—it’ll flatten out as the door settles in. If you see corners peeling up or feel a gap, press the strip down firmly, or use a small tack to secure stubborn spots.
How to Prevent Weatherstripping Damage in the Future
Once you’ve fixed the problem, it pays to keep an eye on your door—especially during wet seasons or big temperature swings. Wood doors will always “breathe” a little, but you can make life easier for your weatherstripping (and your energy bill) with a few habits.
- Keep your door’s finish in good shape. A good coat of paint or varnish slows moisture absorption, so the swelling isn’t as dramatic. Touch up chips or cracks right away.
- Avoid slamming the door. It might feel satisfying, but every slam compresses and wears down the new weatherstripping.
- Consider a door sweep at the bottom. These can take more abuse than foam strips, especially in high-traffic areas.
- Do a seasonal check. Every spring and fall, open and close your door a few times. Look at the edges. If you see signs of swelling, dry out the area with a fan or adjust humidity indoors.
If you use a smart lock or garage remote (like a Genie or Chamberlain), make sure the repair doesn’t block the sensors or affect code entry—sometimes thick weatherstripping interferes with tight-fitting mechanics.
Comparing Universal Versus Brand-Specific Weatherstripping
You might be stuck between grabbing some universal weatherstripping at the hardware store or ordering a brand-specific kit online. Here’s how I usually break it down:
- Universal kits are cheap, available everywhere, and easy to cut or trim. They’re great if your door or frame isn’t an odd shape.
- Brand-specific weatherstripping (e.g., from Pella or JELD-WEN) fits like a glove. If your door has a trickier profile or uses a snap-in system, the original part is easier to install—and lasts longer.
Sometimes, universal strips need a little extra trimming or layering if the gap is wide from swelling. Don’t be afraid to layer two thinner strips if needed, rather than forcing a single thick one that gets destroyed the next time the weather changes. And if you upgrade to a better material—like silicone or a reinforced rubber bulb—your repair might outlast your last one, even if it’s not the original brand.
When to Call a Pro for Door and Weatherstripping Repairs
Honestly, most weatherstripping fixes are solidly in the DIY zone. But there are times when it pays to get help:
- The door stays swollen year-round, or you notice wood warping or rot. That’s a bigger repair than just swapping strips.
- The frame is out of square and nothing lines up—that’s a carpenter’s job to refit or adjust the opening.
- Complex entry systems or smart features (like coded locks, garage remotes, or security sensors) are misbehaving after repair. A pro can reset or sync everything safely.
Don’t be shy about calling in a pro—especially if your door is historic, extra expensive, or part of a complicated entry system. Sometimes it’s a quick fix for them, and you’ll learn something for future repairs.
But for most homeowners, fixing damaged weatherstripping after wood door swelling is a satisfying, affordable project that keeps your house comfortable and your energy bill in check.
Wrapping Up: Keeping Your Wood Door and Weatherstripping in Top Shape
Repairing weatherstripping that’s damaged by a wood door’s swelling isn’t just a home improvement chore—it’s a way to keep your house cozy, quiet, and protected from whatever the weather throws your way. The trick is to be patient: let the door settle first, clean up the old mess, pick the right replacement, and install it carefully. A few simple tools, a steady hand, and some common sense will get you further than any fancy gadget.
As long as you stay ahead of swelling and keep an eye out for loose or faded strips, your wood door will work like a charm year-round. And if you ever hit a snag, remember—there’s no shame in keeping a roll of extra weatherstripping in the junk drawer, just in case your door decides to “grow” again the next time it rains.