Think of your door’s hinges like the joints in your elbows or knees. When they get rusty, loose, or bent, everything else gets out of whack. Luckily, replacing door hinges is totally doable, even if you’ve never tackled this kind of project before. Whether you have a sturdy Jeld-Wen, a classic Masonite, or an old unbranded oak beauty, the steps are pretty much the same.
Here’s the thing: working with a solid wood exterior door is a bit different from replacing hinges on a lightweight interior door or a modern metal one. Solid wood is heavy, often a little unpredictable, and sometimes stubborn. But with the right approach, some patience, and a few basic tools, you’ll end up with a door that swings smoothly and looks great for years to come.
Signs Your Solid Wood Door Hinges Need Replacing
Honestly, you might be tempted to ignore a sticky or squeaky door, but the signs of failing hinges can sneak up on you. Before you reach for any tools, it helps to know what you’re actually dealing with. Most people wait until the door starts to sag so badly it drags on the ground or won’t even close all the way. But there are other red flags, like:
- Loud creaking or squeaking every time you open or shut the door, even after oiling the hinges.
- Loose screws that refuse to tighten, or stripped-out holes in the wood that let the hinge flop around.
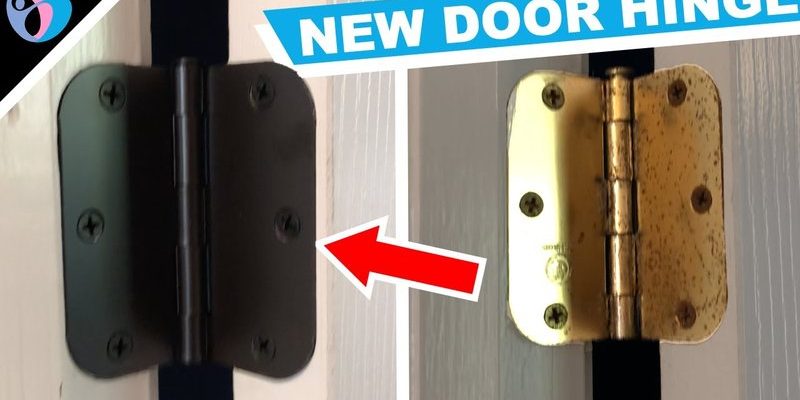
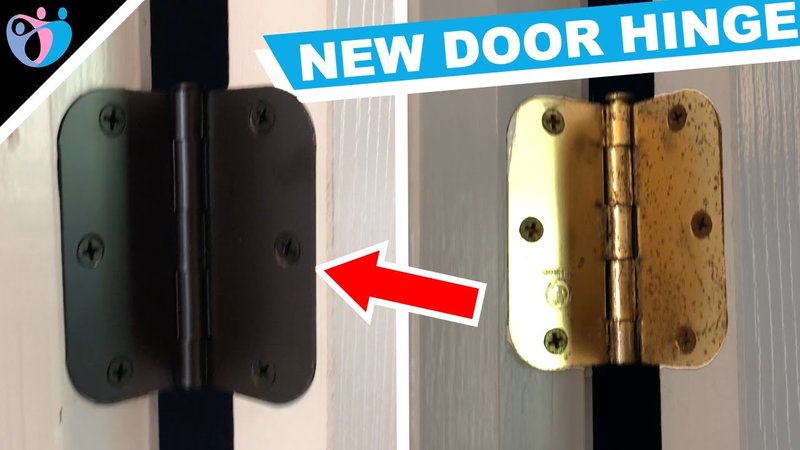
- Rust or corrosion on the hinge plates, making it hard for the door to move smoothly.
- Visible gaps between the door and the frame, especially near the top or bottom corners.
- The door feels wobbly or you notice tiny cracks forming in the wood near the hinge areas.
You might be wondering, “Can’t I just tighten the screws or add some WD-40?” Sometimes that works for a while. But if the hinge itself is bent, rusted, or has lost its shape, only a full replacement will get that door working right again. Swapping out the hinges before you end up with a bigger problem—like a door that falls off its frame—is always a smart move.
What You’ll Need: Tools, Hinges & Prep Work
Before tackling any DIY fix, I like to round up everything I’ll need. There’s nothing worse than balancing a heavy door only to realize you left your screwdriver in the garage! For replacing hinges on a solid wood exterior door, you’ll want to gather:
- New exterior-grade hinges (usually 3.5″ or 4″ for solid wood doors—check your current ones before buying)
- Screwdriver (Phillips or flathead, depending on your screws)
- Drill with bits (for making new pilot holes or driving screws fast)
- Wood filler (if any old screw holes are stripped)
- Hammer and small chisel (sometimes the mortise—AKA the little recess in the wood—needs adjusting)
- Shims or wedges (to hold the door steady while you work)
- Pen or pencil for marking new screw holes
Make sure your new hinges are specifically made for exterior doors. They’re usually thicker and sometimes have extra coatings to fight off rust. If you have a popular brand like Jeld-Wen or Masonite, you can usually match the size and hole pattern pretty easily. For older, unbranded doors, you may have to bring one of the old hinges to the hardware store for comparison.
Preparation is everything. Clear your work area, prop the door open, and have a spot ready to set aside any old screws or hinges. If your door is super heavy, it’s smart to have a helper—or at least a way to wedge it safely so it doesn’t crash down mid-project.
Removing the Old Door Hinges
Removing old hinges from a solid wood exterior door is where things get real. You might find layers of old paint, some surprise rust, or screws that feel like they’re welded in place. But patience and the right technique make all the difference.
Start by supporting the door. Honestly, this step is key—don’t skip it. If you’re working alone, use a couple of shims or sturdy blocks under the door to keep it from shifting. If you take out too many screws before the door is supported, you risk a heavy, hazardous mess on your toes (ask me how I know).
Then, unscrew the hinges from the door jamb (that’s the frame side) first. This keeps the door as stable as possible. Once those screws are out, move on to the ones attaching the hinge to the door itself. If the screws are stuck, try a bit of WD-40 and let it sit for a few minutes. Sometimes a firm tap with a hammer on the back of the screwdriver helps loosen stubborn screws.
If the screws spin endlessly but never come out, it usually means the wood around them is stripped. Don’t panic—you can fix that later with wood filler or toothpicks and wood glue.
Once the old hinges are off, check the mortise areas for any damage. Sometimes you’ll see splinters or paint buildup. Scrape or clean this out so your new hinges sit flat and flush.
Choosing the Right Replacement Hinges
Not all door hinges are created equal, and when you’re dealing with a heavy solid wood exterior door, getting the right kind matters. There are a few things to think about before you run out and buy the first shiny hinge you see.
First, size and thickness. Most exterior doors use bigger, sturdier hinges—usually 3.5″ or 4″ tall (measured vertically), with a thicker leaf. If your original hinges aren’t standard, bring one with you when shopping, or measure carefully from top to bottom and side to side.
Next is material and finish. You want strong steel or brass, not the thin tin-like stuff sometimes found on interior doors. Look for exterior-rated or weather-resistant labeling, since these take more abuse from temperature swings and humidity. Finishes like matte black, oil-rubbed bronze, or classic brass are common, but pick something that fits your door and frame.
You might be wondering if you should get ball bearing hinges. For a solid wood exterior door, these are great—they have tiny ball bearings inside that help support the weight and make swinging the door feel buttery-smooth. For older homes or historical doors, you may want to match your home’s style, so there are even reproduction Victorian or “antique” hinges out there.
When it comes to brands, you’ll often see options from National Hardware, Stanley, or the same brand as your door (like Jeld-Wen). Universal hinges work for most situations, but double-check the screw hole layout before you buy. If your door or frame is warped, look for hinges with a slightly adjustable plate—or be ready to chisel the mortise a bit for a perfect fit.
Installing the New Hinges on Your Door
Here’s where things start coming back together. Installing new hinges on a solid wood exterior door takes some care, but isn’t complicated. Let me break it down in simple steps:
- Position your hinge: Hold a new hinge in the old mortise spot. If it doesn’t fit perfectly (sometimes old paint or wood swells), carefully shave or chisel the area until the hinge sits flush—no gaps or bumps. Mark the new holes if needed.
- Pre-drill pilot holes: This step saves headaches later. Use a drill bit a little smaller than your screws to make shallow holes where the hinge screws will go. It stops the wood from splitting and keeps screws from wandering off course.
- Attach hinges to the door first: Secure the leaf with the moving pin to the door, and snug up the screws. Don’t overtighten; you want a firm hold, not crushed wood.
- Align with the jamb: With your door steady (shims still underneath!), line up the other leaf with the mortise in the door frame. It helps to have a helper here, but you can wedge the door upright if you’re solo.
- Fasten to the frame: Put in the top and bottom screws first, then fill out the rest. Check the swing—if it drags or sticks, adjust as needed before fully tightening everything.
If any screw holes are stripped out, fill them with wood glue and toothpicks (really!). Let it dry, trim flush, and then drive your screws in. This gives them something solid to grab. When all the hinges are in and tight, remove your shims and test the door swing a few times. It should open and close smoothly, with no scraping or sagging.
Troubleshooting Common Problems After Replacing Hinges
Sometimes, you install the hinges, close the door, and—bam—it still drags, sticks, or doesn’t line up right. Don’t worry, this happens a lot (especially in older houses where nothing is ever exactly square).
Problem: Door still sags or scrapes the floor.
Usually, this means the hinges aren’t lined up in the mortises, or the screws aren’t biting into solid wood. Double-check each hinge and make sure they’re sitting flush—sometimes just loosening, realigning, or putting in longer screws fixes this. For really stubborn doors, you might need to add a thin cardboard or wood shim behind one hinge to tilt the door ever so slightly.
Problem: Door rattles or pops open on its own.
This can happen when the hinges are too loose, or the door has warped over time (thanks, weather!). Tighten all screws, and if that doesn’t fix it, look for gaps between the door and the frame. Sometimes just moving the strike plate on the frame helps.
Problem: The hinge pin works its way out over time.
This is common on old exterior doors that get slammed or see lots of action. Try lightly tapping the pin in with a hammer, or replacing with a new, tighter pin if necessary. For real peace of mind, you can buy safety hinges where the pin can’t be easily removed.
Don’t get frustrated if you have to adjust things a couple of times. Old doors have lots of personality and sometimes it takes a few tweaks to perfect the swing.
Tips for Maintaining Your New Door Hinges
Once your solid wood exterior door is swinging happily, you’ll want to keep it that way for years. Maintaining your hinges doesn’t take much time and can save you from another replacement down the road.
- Lubricate periodically with a silicone spray or light machine oil. Avoid heavy grease that attracts dust.
- Check for loose screws every few months, especially after a season of heavy weather or temperature swings.
- Wipe away dirt or moisture when you clean your entryway—rust can sneak up fast, especially if hinges get splashed in the rain.
- Listen for unusual noises—a new squeak or grind is an early sign something’s out of line.
If you spot rust starting, use a fine steel wool pad to clean it off, then touch up with a clear finish or paint. Keeping moisture away is key, so make sure the door sweeps and weatherstripping are intact. Taking these small steps can keep your door—and its hinges—working smoothly for a long time.
Alternatives: Should You Upgrade, Repair, or Replace?
You might be wondering if replacing the hinges on your old solid wood exterior door is the best move—or if there are other options. Honestly, it depends on your situation and the overall health of your door.
If your door is otherwise in good shape (no rotting wood, cracks, or major warping), new hinges are usually all you need. But if you notice big issues—like the frame is out of square, or the door is getting soft from water damage—it might be worth looking at a bigger repair or even a full replacement.
- Repair options: If only the screw holes are damaged but the hinges are still good, wood filler and longer screws could do the trick.
- Upgrade options: Consider switching to ball bearing or security hinges for extra smoothness or peace of mind. Some modern hinges even have built-in self-closing or security features.
- Full replacement: If your solid wood exterior door has seen better days, replacing the entire unit (door, frame, and all) can solve multiple problems in one go—just be prepared for a bit more work and expense.
Sometimes, it’s smarter (and cheaper) to fix what you’ve got, especially with a high-quality old door that has character and style. A good set of new hinges can make all the difference.
Wrapping Up: Enjoy Your Smooth-Swinging Door
Getting through a project like replacing hinges on an old solid wood exterior door is all about patience and attention to detail. Sure, it takes a little effort, but the payoff is huge—a door that opens and closes like new, without the drama, noise, or struggle. Whether you’re working on a Jeld-Wen, a Masonite, or an old-family classic, these steps are your roadmap.
Take your time, check your work as you go, and don’t be afraid to make small adjustments for a perfect fit. Once it’s all back together, you’ll be surprised by how much better your entryway feels—and by how much less grumbling you’ll hear from family or guests about that “impossible” front door. Here’s to smooth entries and exits, and a job well done!