The trickiest part? If your door closer is integrated into the hinge (like the Soss or Bommer brands), you won’t spot an obvious box or rod to tinker with. The adjustment points are subtle, the instructions sometimes vague, and there’s always the risk of making things worse if you don’t know what you’re doing. Let me explain how to spot, adjust, and fine-tune your integrated door closer—so you get that satisfying, safe, just-right door close every time.
What Is An Integrated Door Closer, And How Does It Work?
Let’s start with the basics: an *integrated door closer* is pretty much what it sounds like—it’s a device hidden inside the door’s hinge, designed to control how quickly and smoothly the door closes. Unlike the big, external closers you see in schools or commercial buildings, these are compact and out of sight, often chosen for their subtlety on exterior doors where you want clean lines or a weather-sealed look.
The main purpose is safety and convenience. Without a closer, a door might whip shut with the wind, slam unexpectedly, or never close fully. Integrated closers use a small hydraulic or spring mechanism embedded in the hinge barrel. When you open the door, this mechanism “charges” (kind of like winding up a spring or stretching out a rubber band). Once you let go, it slowly releases that tension, guiding the door back to its frame in a controlled motion.
You might be wondering how you even know if yours is integrated. Here’s the thing: if you *don’t* see a separate box on top or inside the door, *and* there’s a slightly bulkier hinge with a small screw or cap on the barrel, you’ve probably got an integrated closer. Brands like Soss and Bommer are well known for this style, and the designs can vary from basic return springs to full-fledged hydraulic control.
Why Bother Adjusting An Exterior Hinge Door Closer?
You might think, “If the door closes, why mess with it?” But honestly, a poorly adjusted closer can be a real headache—or even a safety issue. Imagine a door that slams shut in a gust of wind, or one that doesn’t catch the latch and stays cracked open in the rain. That’s more than annoying; it’s an open invitation for bugs, drafts, or even intruders.
There are a few big reasons you’ll want to fine-tune your exterior hinge closer:
- Safety: Prevent injuries or accidents from a door that shuts too hard or fast.
- Longevity: Gentle closing protects the door frame, hinges, and lock hardware from stress and damage.
- Energy Efficiency: A securely closed door keeps out drafts, rain, and extreme temperatures—key for exterior doors.
- Peace & Quiet: No more slamming noises or endless “almost shut” doors that need another push.
Plus, if your door closer is out of sync (say, after a repair or wild weather), even resetting or pairing it with a new hinge or remote door hardware can help everything work together. Making adjustments now saves a lot of troubleshooting later.
Common Signs Your Integrated Door Closer Needs Adjustment
So, how do you know when it’s time to grab your screwdriver or hex key? Most of us notice problems only after living with them for a while, but there are some classic clues you can watch for:
- The door slams: If it closes with a bang, the closing speed is too high—you’ll want to dial it back.
- The door drifts or hangs open: Maybe the closer isn’t pulling the door shut firmly enough, or there’s not enough latch force.
- The door doesn’t latch: A door that’s almost shut but not quite is often a sign that final force or alignment needs adjusting.
- Resistance or rough motion: Any grinding, squeaking, or jerky closing means the mechanism could be out of code (worn or dirty) or set wrong.
Sometimes, you’ll see tiny leaks around the hinge or notice oil spots—some hydraulic closers can weep fluid if they’re failing. If you’ve just installed a new door or changed hardware, the factory settings on the closer may not match your door’s weight or swing, so an initial setup or reset is almost always needed.
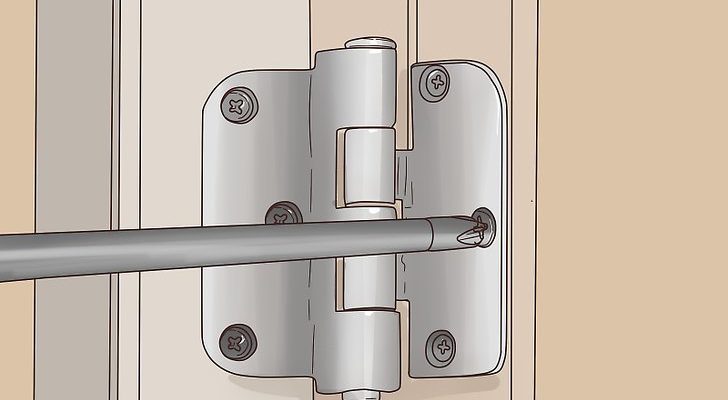
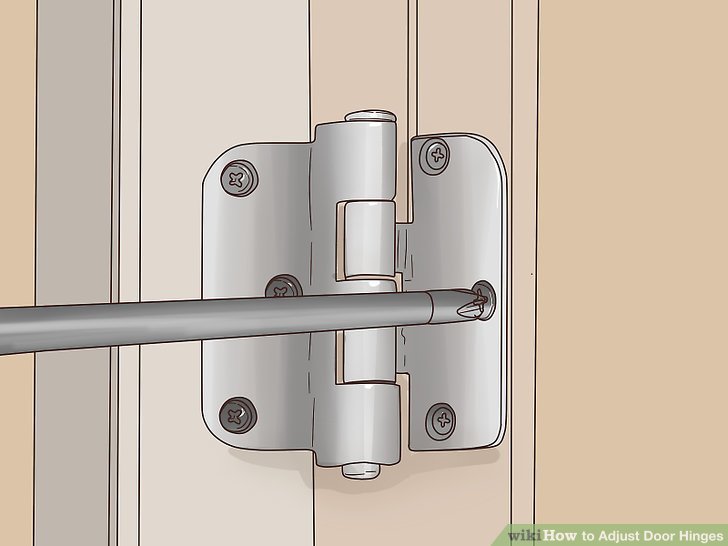
How To Identify The Adjustment Points On Your Exterior Hinge
Let’s get hands-on. Most integrated door closers aren’t labeled with a big “adjust here” sign. Instead, you’ll find small screws—sometimes under a cap—on the end of the hinge barrel. That’s where the magic happens. The exact location and type depend on the brand:
- Bommer hinges: These often have a tension pin or screw on one end. You’ll need a hex key or slotted screwdriver to turn it.
- Soss hinges: Expect a tiny set screw, sometimes with an included tool in the package.
- Generic brands: Look for a small access hole or a flat-head screw at the hinge knuckle (the fat, middle part).
It’s easy to confuse these with the main hinge screws (the ones holding the hinge to the door or frame). Only the adjustment screw should be turned. If you’re ever unsure, check your model number or manual online—most major brands have their specs up for easy troubleshooting.
One tip: give the area a quick clean before starting, as dirt and paint can hide the screw or make it tough to turn. If you see a little “+” and “-” symbol, that’s where you’ll make your adjustment for speed and force.
Step-By-Step: How To Adjust An Integrated Door Closer On A Hinge
Ready to get hands-on? Here’s how to tweak that integrated closer safely and smoothly. Take your time—rushing can strip screws or make things worse.
- Gather tools: You’ll likely need a small screwdriver (flat or Phillips), a hex key (Allen wrench), and a sturdy step stool if the hinge is high.
- Locate the adjustment screw: Find the small screw at the end or top of the hinge barrel. Remove any decorative cap if needed.
- Turn the screw: Clockwise usually increases tension (making the door close faster or with more force); counterclockwise reduces it. Only turn in small increments—about a quarter turn at a time.
- Test after each adjustment: Open the door wide, let it go, and watch. Repeat tiny changes until the door closes smoothly and latches without slamming or dragging.
- Don’t over-tighten: If you force it too much, you risk damaging the mechanism. If you meet heavy resistance, stop and reset.
Let me be clear: it’s normal to spend several rounds adjusting and testing. Exterior doors are heavier and affected by wind, so err on the side of slightly slower closing and stronger final latch force. If the door is part of a security system or smart lock setup, pair or sync your closer adjustments with those devices for best results.
What If The Door Still Doesn’t Close Right? Troubleshooting Tips
Here’s the thing: sometimes a simple adjustment doesn’t do the trick. Maybe the door is warped, the hinge is bent, or there’s grit in the mechanism. Before you panic, try these troubleshooting steps:
- Check for alignment: Make sure the door is plumb and the hinges are tight. If not, the closer can’t do its job, no matter how well you reset it.
- Clean and lubricate: Dust, paint buildup, or old grease can jam the hinge. Use a soft cloth and a drop of silicone spray (never WD-40, which can attract grit).
- Inspect for leaks or code issues: Any oil or hydraulic fluid leaking out is a sign the closer needs repair or replacement. Don’t try to refill or fix it yourself if it’s a sealed unit—call the manufacturer or a pro.
- Replace if needed: Sometimes, an old integrated closer just can’t hold tension anymore. Upgrading to a new hinge (ideally the same brand and size to match the cutout) is the only real fix.
For older or universal hinges, syncing with new hardware can take some trial and error—don’t be afraid to consult support or watch brand-specific video guides. If the door has a remote-activated lock or sensor, check its battery and code settings after adjusting the closer to avoid communication slip-ups.
How Integrated Hinge Closers Compare To Other Types
You might be wondering if you’d be better off with one of those big, universal surface-mounted door closers you see in stores. Here’s a quick comparison of your options:
- Integrated hinge closers: Nearly invisible, great for clean looks or historical doors. Requires careful install and limited adjustment range.
- Surface-mounted hydraulic closers: Highly adjustable, easier to see and service, but bulkier and more obvious. Better for super-heavy doors or high-traffic commercial spaces.
- Spring hinge (non-hydraulic): Cheap and simple, but lacks smooth control—can slam if door weight isn’t matched perfectly.
If you’re already using a Soss or Bommer integrated closer, honestly, you’re probably after subtlety or weather resistance—or maybe your local building code required them. For most homes, sticking with the integrated style keeps things tidy, but don’t be afraid to swap for a universal closer if you constantly fight wind or heavy use.
Maintenance Tips For Long-Lasting Door Closer Performance
Once your door is closing just right, you want to keep it that way. Integrated door closers don’t need a ton of maintenance, but regular check-ins make a big difference.
- Wipe hinges down quarterly: Remove dust and debris to keep adjustment points clear.
- Check tension every season: Temperature changes, humidity, and settling can affect how the door swings and latches.
- Test for leaks: Catch weeping or sticky hinges early to avoid bigger problems.
- Keep door hardware synced: If you use electronic locks or remote access, make sure batteries are fresh and codes are updated after adjusting mechanical parts.
If you move into a new place, it’s worth going through a full adjustment and reset cycle—previous owners may not have cared as much about smooth closing as you do. And if the closer starts acting up, jot down the brand and model before shopping for replacements—integrated hardware isn’t universal, so you’ll need an exact match.
Final Thoughts On Adjusting Integrated Door Closers
Getting an exterior door to close perfectly with an integrated hinge closer might seem fiddly at first, but once you know where to look and how to tweak, it’s mostly about patience and small adjustments. Take it slow, test often, and don’t force anything—you’ll find that sweet spot where the door closes quietly, latches securely, and makes coming and going a little more pleasant.
If you ever feel stuck, remember: you’re not alone. Even pros run into stubborn doors every now and then. With the right tools and a bit of know-how, you’ll have your integrated door closer working in sync with your home’s rhythm—smooth, silent, and exactly how you want it.