
You might be staring at that battered threshold, wondering if this means buying a whole new door or calling in a professional. Honestly, you can save a lot of money (and hassle) by tackling the job yourself. Even if you’re not handy with a hammer, fixing or replacing a cracked exterior door sill—whether it’s wood, aluminum, or composite—is more doable than you think. Let’s walk through the process step-by-step so your entryway looks sharp and does its job again.
Signs Your Exterior Door Sill Needs Repair
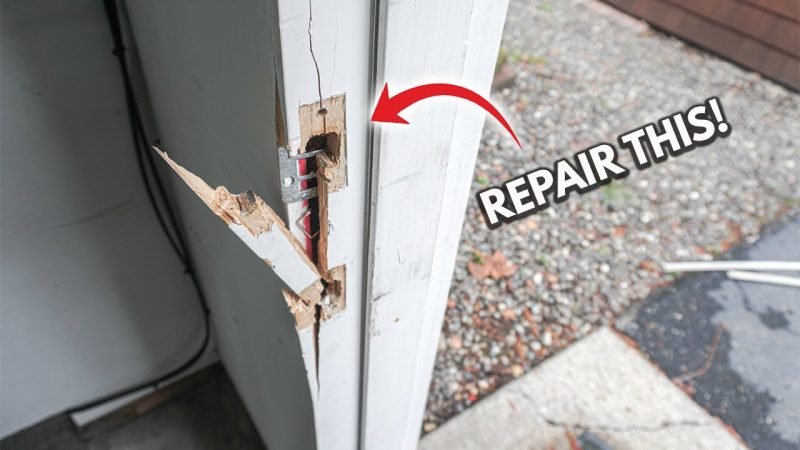
Knowing exactly when to repair a cracked or broken exterior door sill can be tricky. Sometimes, the damage is obvious—a big, splintered crack or a chunk missing. Other times, warning signs can be subtle. You might spot soft spots underfoot, bubbling paint, or stubborn dampness just inside the door after rain.
Here’s the thing: Ignoring these problems will only make things worse. That little crack you noticed last month can quickly grow, especially if water keeps seeping in. Before long, you might end up with wood rot, mold, or even a warped door that sticks.
Some classic clues that your exterior door sill needs attention include:
- Visible cracks, splits, or chunks missing near the threshold
- Soft, spongy feeling when you step on or press down on the sill
- Frequent moisture, mold, or mildew gathering at the base of the door
- Drafts or light coming through under the door when it’s shut
If you spot any of these, it’s smart to act fast. The sooner you repair a cracked or broken exterior door sill, the easier (and cheaper) the fix will be.
Choosing the Right Tools and Materials
You don’t need a garage full of fancy tools to repair a door sill, but the right ones will make the job a lot smoother. The materials you’ll use depend on your door’s setup—some sills are wood, others are metal, and newer models might use composite or vinyl. The most common brands—like Jeld-Wen and Masonite—work with all of these, but always check your sill for any specific hardware or design quirks first.
Most basic repairs need the following tools:
- Pry bar or flathead screwdriver for removing old trim or sill pieces
- Hammer and nails or drill and wood screws for fastening the new sill
- Wood filler or epoxy for patching small cracks (for wooden sills)
- Measuring tape and saw for cutting new material to size
- Caulk and caulk gun to seal up any gaps at the end
If you have a composite or aluminum sill, you might need a metal blade or special adhesive instead of wood filler. Honestly, it’s worth reading the packaging or looking up your brand’s guidelines—especially for newer doors with “all-in-one” sill and weatherstrip assemblies.
Prepping for the Repair: Safety and Setup
Before you start swinging a hammer, let’s talk safety—and a little prep work. Even a small repair on your exterior door sill can create sharp edges, flying splinters, and loads of dust. You want to protect yourself (and the inside of your home).
It’s smart to:
- Wear safety glasses and gloves—especially if you’re working with metal or composites
- Lay down a drop cloth to catch debris and keep your floor clean
- Prop the door open or, if needed, remove it from the hinges for easier access
- Double-check for wires or pipes under the sill if you’re working on an exterior wall or near old brickwork
Here’s a pro tip: Take a quick photo of the sill area before you start pulling things apart. That way, if you forget how the parts fit later, you’ve got a handy reference.
How to Repair a Cracked or Broken Exterior Door Sill
Now we’re at the heart of the job. The exact steps may change a bit depending on your door and sill material, but here’s the general playbook anyone can follow. Let me explain each step in plain language so you can follow along—even if you’ve never tackled a home repair before.
Step 1: Remove the Damaged Sill
Most sills are nailed or screwed in place under the door frame. Start by gently prying off any door trim covering the sill edges. Use a flathead screwdriver or pry bar, and go slow—so you don’t crack the frame or surrounding wood.
Once the trim is off, loosen the old sill by prying upwards. If the sill is really stuck, try tapping it with a hammer. Pull out any nails or screws as you go.
Step 2: Clean and Inspect the Area
With the old sill gone, you’ll probably see years of dirt, old caulk, and maybe even a few bugs hiding underneath. Sweep everything away and check the subfloor or framing for rot. If you see soft wood or crumbling areas, stop and patch or replace those before adding a new sill.
Step 3: Measure and Cut the New Sill
Carefully measure the length and width of the old sill, then transfer those measurements onto your new piece of wood, composite, or aluminum. Use a saw (or metal blade, if needed) to cut it to size.
Step 4: Test Fit and Secure the New Sill
Pop the new sill into place before you fasten it down, just to check the fit. It should sit snugly with no big gaps along the edges. Once you’re happy, secure it with finishing nails or screws—and make sure it’s level!
Step 5: Seal and Finish
Run a bead of exterior-grade caulk around every seam—especially where the sill meets the door frame and subfloor. Replace the trim, repaint or stain everything, and let it dry fully before exposing it to rain or heavy foot traffic.
Patching Small Cracks vs. Full Sill Replacement
You might be wondering: Do I always need to replace the whole thing, or can I just patch a crack? Here’s how I see it:
Small Cracks (Wood Sills):
- Wood filler or epoxy can work wonders on minor splits or shallow cracks. Clean out the damaged area and squeeze in the filler, shaping it with a putty knife. Sand smooth once it’s dry, then paint or stain to match.
Bigger Damage or Rot:
- If the crack runs deep or the wood feels soft and “punky,” a patch won’t hold. Moisture has probably gotten in, and the rot will keep spreading under the surface—even if it looks fine on top.
- Full sill replacement is the safest bet in these cases. It takes a little longer, but you’ll avoid having to redo the job in a few months.
Composite or Aluminum Sills:
- Patching is tough unless you have the exact matching material or a specialty kit. For visible cracks or breaks, swapping out the sill is usually the best call.
Sealing, Weatherproofing, and Preventing Future Damage
Repairing a cracked or broken exterior door sill solves the immediate problem—but if you skip weatherproofing, you might end up right back where you started. Even a brand-new sill can start to rot, swell, or split if moisture gets in.
Here’s how to keep your sill strong for the long haul:
- Use a paintable exterior sealant or caulk around all edges and seams. Make sure you seal both the inside and outside edges for the best defense.
- Paint or stain the sill with exterior-grade products. Think of this as a raincoat for your wood or composite. For aluminum, check for any exposed areas that need touch-up paint to prevent rust.
- Check the weatherstripping under your door. If you see light coming through, or the strip is worn out, swap it for a new one. Brands like Jeld-Wen and Masonite make universal kits that fit most doors—even if you don’t have their exact model.
It’s smart to give your door sill a quick inspection every spring and fall. Catching worn paint, cracked caulk, or loose weatherstripping early will save you major repairs later.
Alternatives and When to Call a Pro
Let’s be honest: Sometimes you reach a point where DIY just doesn’t cut it. Maybe the frame is rotten, or there’s complex code or permit requirements in your area. If you’re dealing with a custom door, a fancy multi-point lock, or decades-old brickwork, calling a professional can save time and headaches.
Common signs it’s time to call in help:
- Extensive rot or mold inside the wall or under the sill
- Door or threshold out of alignment after repair, causing trouble with the door closing or locking
- Electrical wiring, battery-powered sensors, or plumbing running under the threshold—these require special handling for code and safety
- Historic doors or homes where matching the original style matters
On the other hand, if your situation is pretty standard (just a cracked or broken exterior door sill on a modern wood, composite, or aluminum threshold), most repairs are straightforward for beginners. Universal parts and easy-to-follow repair kits are available at most hardware stores, and you can sync up your new sill with your existing door hardware.
Final Thoughts on Repairing Exterior Door Sills
A cracked or broken exterior door sill can go from minor nuisance to major problem if you let it slide. But with a little patience and the right approach, you can handle most repairs on your own—even if you’ve never picked up a hammer in your life. Just remember: Choose your materials carefully, match the repair to the damage, and always finish up with good weatherproofing. Whether you’re patching with wood filler or swapping in a brand-new sill from a trusted brand like Jeld-Wen or Masonite, your entryway will be back in shape—and your home protected from the elements—in no time.