Repairing an exterior door threshold might not sound glamorous, but it’s one of those straightforward fixes that can save you from bigger headaches later. Whether your home sports a classic Andersen, Pella, or Jeld-Wen door, the principle stays the same: a stable, well-fitted threshold is key. The good news? Most of the time, you only need basic tools and a chunk of your afternoon. Maybe you’ve never messed with thresholds, or you’re worried about messing up your weather seal—don’t stress. Let’s walk through what’s actually going on, how to fix it, and why this humble strip of wood or metal matters so much.
Why Do Exterior Door Thresholds Become Loose?
Honestly, thresholds take a lot of abuse. You stomp on them, carry groceries over them, let muddy boots rest on them, and often don’t spare them a second thought. Over the years, this constant use wears down the fasteners and the material itself. Wood thresholds can rot, especially if rain sneaks in under the door. Metal thresholds might get bent or work loose from shifting in the house’s foundation.
You might be wondering, is it just the screws coming out, or is there more going on? It’s usually a mix. Screws can loosen (or even strip out) as wood shrinks, swells, or deteriorates. If there’s any moisture, that problem just gets worse. In some houses, “settling” shifts the frame enough that the threshold starts to rock, even if everything up top looks square. Some brands even use adjustable thresholds, like those sloped aluminum ones with little plugs. Those can get stuck or stripped out too, so troubleshooting the brand specifics can help.
The big thing is, *if you ignore a wobbly threshold, it usually won’t fix itself*. Even a tiny bit of movement can tear up your weatherstripping or give ants a straight shot inside. So, if you see the screws popping out or notice a gap, it’s time for action.
How to Check What’s Wrong With Your Threshold
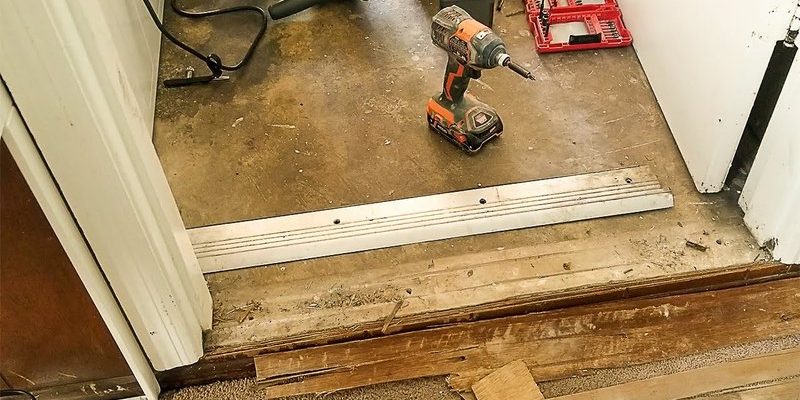
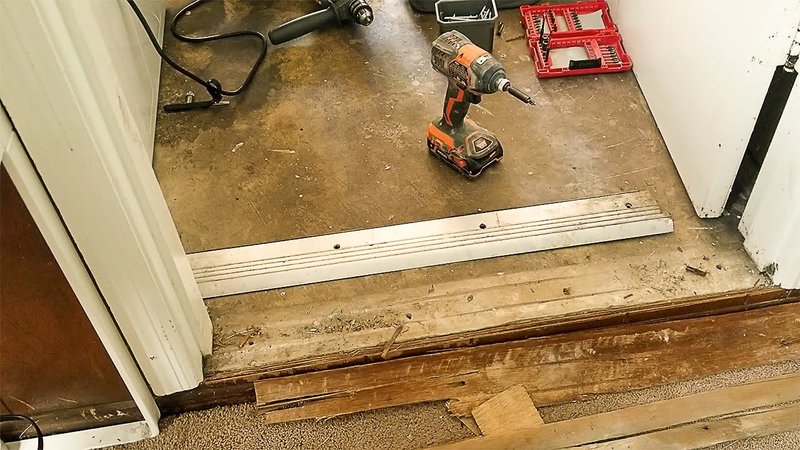
Let me explain—before you grab a screwdriver, you need to figure out what’s actually causing the wobble. Start by gently pressing down along the whole length of the threshold. Does the whole piece move, or just part of it? Can you actually see the screws pulling out, or is the wood soft and spongy under your finger?
Here’s my go-to checklist for troubleshooting a loose threshold:
- Loose screws — Sometimes, screws just work their way out. Try tightening them, but don’t crank so hard you strip the hole.
- Rotten wood — Press with a screwdriver. If it sinks in, the wood’s probably rotten and needs replacing, not just tightening.
- Gaps or missing caulk — Look for obvious spaces where the threshold meets the door frame or floor. Missing caulk means moisture might be making things worse.
- Threshold type — Is it wood, aluminum, composite, or vinyl? Adjustable or fixed? Different types need different fixes.
If you’re dealing with an Andersen brand door threshold, you might find a few extra adjustment screws under plastic plugs. For a basic wood threshold, you’ll mostly be dealing with screws and maybe some finishing nails. Take note of what you see—getting the right replacement materials later will be much easier.
What Tools and Materials Will You Need?
You won’t need a hardware store’s worth of tools, but a few basics really help. Here’s what most people need to repair a loose or wobbly exterior door threshold:
- Phillips and flathead screwdrivers (for removing and resetting screws)
- Drill with bits (for pre-drilling or driving new screws if holes are stripped)
- Replacement screws (use corrosion-resistant types: stainless or coated ones)
- Caulk and caulking gun (for resealing edges)
- Utility knife (to cut old caulk or any damaged weatherstripping)
- Wood filler or epoxy (if you’re patching rotten spots and not replacing the whole threshold)
- Hammer and pry bar (for removing old thresholds if necessary)
- Tape measure and pencil (to size up a replacement)
If you’re troubleshooting an adjustable aluminum threshold, you might need a hex key or the manufacturer’s special adjustment tool (sometimes included with the original remote hardware kit if you’ve kept it).
Here’s the thing: if the threshold is really rotted or bent, it’s usually easier just to replace the whole thing. If it’s only loose, re-securing with fresh fasteners and caulk usually does the trick.
Step-By-Step: How to Fix a Loose Exterior Door Threshold
This process isn’t rocket science, but it does help to take your time and do it right. Here’s how to handle most repair jobs, whether you’ve got a classic wood threshold or a modern aluminum one:
-
1. Remove any old caulk or debris.
Use your utility knife and a putty knife to scrape away old caulk or sealant around the threshold. Sweep out any dirt or grit so you’re working with a clean surface. -
2. Tighten or replace the screws.
Try tightening each screw with your screwdriver. If a screw spins without getting tighter, the hole might be stripped. You can:- Fill the hole with wood glue and wooden toothpicks, then reinsert the screw (for wood thresholds).
- Use a larger screw if the original hole is too big.
- For metal or adjustable thresholds, check for hidden screws under plastic plugs and snug them down.
-
3. Patch or replace damaged wood.
If you find rotted wood, dig it out with a screwdriver. Use wood filler or epoxy for small patches, or swap the whole threshold if the damage is bad. -
4. Reseal the edges.
Run a bead of high-quality exterior caulk along the edges where the threshold meets the floor and door frame. Smooth with your finger or a caulk tool for a neat seal. -
5. Test for stability.
Stand on the threshold, shift your weight from side to side, and make sure there’s no more give or wobble. If you still feel movement, double back and check for hidden fasteners or damaged subflooring.
Pro tip: For adjustable aluminum thresholds (like you might find on newer Pella or Andersen doors), sometimes the trick is gently raising or lowering the screws under the plugs until the threshold fits snug against the door. Don’t overdo it—too high, and your door won’t close; too low, and you lose your weather seal.
When Should You Replace the Whole Threshold?
There’s honestly a point where repairing just isn’t worth it. If the threshold is rotten through, badly bent, or missing chunks, it’s time to swap it out. Here’s how to know you’re at that stage:
- Soft, spongy wood throughout the threshold—that means rot has gotten deep, and patching it will only last so long.
- Large gaps under the door even after tightening screws—your old threshold has basically given up the ghost.
- Visible water damage or mold growth—this isn’t safe or healthy to keep in place.
- Threshold won’t stay put—if you’ve tried all the above, and it still shifts, new material is the answer.
Replacing isn’t that much harder than repairing, but you’ll want a good tape measure and maybe a trip to the hardware store. Match the new threshold to your door brand (Andersen, Pella, Jeld-Wen, or a universal fit) for best results. Cut the new piece to size, test-fit, and secure with the same steps as above—just be sure to caulk everything tight for weatherproofing.
How Trim and Weatherstripping Factor Into the Repair
You might notice some rubber, vinyl, or even fancy built-in weatherstripping along your threshold. This stuff matters—not just for keeping out the rain, but also for making sure your threshold repair lasts. If you remove the door or threshold, check for damaged weatherstripping and replace it if it’s cracked or missing.
Here’s a quick breakdown:
- Replace worn weatherstripping—your local hardware store stocks universal kits that work with most brands.
- Check door bottom sweeps—the strip at the bottom of your door should still make contact with the new or repaired threshold.
- Re-attach trim—sometimes, you need to pry up a little baseboard or shoe molding. Nail or glue it back in place, then touch up with caulk or paint.
Think of weatherstripping and trim like the “battery” and “remote code” for your door’s weather seal—if one piece isn’t working, the whole system loses its protective edge.
Alternative Options and Upgrades
If you keep running into trouble with your old threshold, or you want a more hands-off fix, you’ve got a few choices. Universal thresholds are available for almost any standard door width and can be trimmed to fit, no matter what brand you have. Aluminum or composite models are more durable outdoors than plain wood, especially if you live somewhere wet.
Some newer systems even come with built-in adjustment screws and snap-on weatherstripping. Here’s the thing: upgrading your threshold setup can also help with energy efficiency. Want to stop drafts? Choose a thicker, insulated threshold and a matching door sweep.
Whether you stick with your original hardware or go for an upgrade, just make sure everything syncs up—doors, thresholds, and weather seals all have to work together, like pieces of a code. If you’re in doubt, bring a photo or your old threshold to the hardware store, or check your door’s brand (it’s usually stamped on the hinge or lock plate) for exact-fit parts.
Final Tips for Keeping Your Threshold Stable
Once you’ve fixed up your loose or wobbly exterior door threshold, keeping it in good shape is really about routine checks. Don’t wait for the next big wobble—when you’re cleaning, take a second to:
- Check for loose screws and snug them up if needed.
- Look for gaps or cracks where caulk may be missing.
- Test the fit with the door closed—you shouldn’t see daylight or feel a draft.
- Replace worn weatherstripping before it falls apart.
If you live somewhere with lots of rain or snow, regular inspections go a long way. Don’t let water sneak into your subfloor—a solid threshold stops leaks before they start.
You don’t have to wait until your threshold is teetering to take care of it. A few minutes every few months is all it takes to keep your entry safe, sound, and sealed.
Repairing a loose or wobbly exterior door threshold is one of those “small but mighty” home fixes. A steady threshold means fewer drafts, better security, and less hassle down the line—so it’s worth doing right, whether you’re working with an Andersen, Pella, Jeld-Wen, or any other style. Take your time, be patient with the process, and enjoy the feeling of a job well done every time you step through your door.