Let me explain why composite thresholds, like the ones in most Therma-Tru or Masonite exterior doors, are popular: they’re designed to resist rot, mold, and the kind of everyday abuse that comes from feet, pets, and weather. But like any part of your home, even these sturdy thresholds can wear out or break—especially after a few years of slammed doors or soggy seasons. If you’ve noticed your door threshold feels soft, looks warped, or is letting in too much air, it’s probably time to swap it out. This article will walk you through what that means, why it matters, and step-by-step instructions to get it done right.
What Is A Composite Threshold And Why Does It Break?
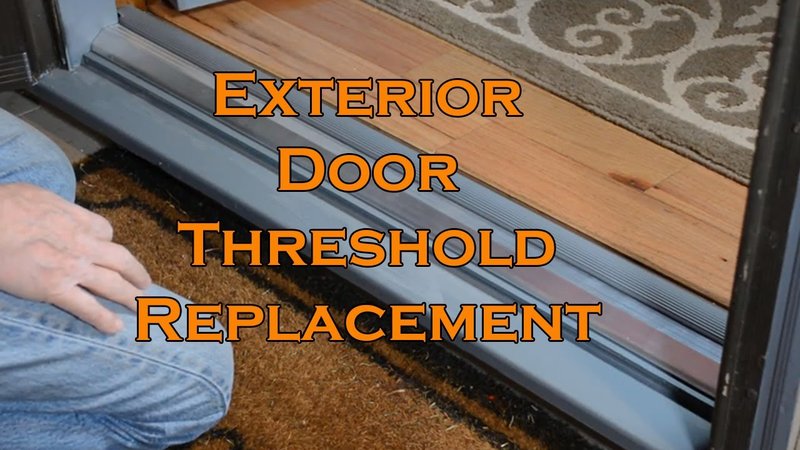
Composite thresholds are the flat strip at the bottom of your exterior door frame. You step on them every time you walk in or out, but their real job is to seal out moisture, dirt, and pests. Composite means they’re made from mixed materials—usually recycled wood fibers and plastic—making them stronger and more weather-resistant than wood.
So why do they break? Honestly, life happens. All that foot traffic, shifting weather, and (if you’re like me) dragging heavy groceries over the door can take a toll. Common issues include cracking, warping, dents, and even chunks missing. Over time, even the best composite thresholds can separate from the sill or lose their waterproof edge.
Here’s the kicker: a damaged threshold isn’t just cosmetic. It can let water pool under your door, leading to mold or rotting floors. You might also feel drafts, see your energy bills climb, or hear every bug in the neighborhood invite itself inside. That’s why replacing a damaged composite threshold matters more than most people realize—it keeps your home sealed, safe, and comfortable.
Signs You Need To Replace Your Exterior Door Threshold
You might be wondering how to tell when your composite threshold is truly done for. Some signs are obvious, like big cracks or a chunk missing. But sometimes, the clues are more subtle. If you notice the rubber sweep or gasket isn’t sealing right, cool breezes sneak under the door, or rainwater is showing up just inside the entry, don’t brush it off.
Run your hand along the threshold. Feel for soft spots—these are often where moisture has worked in and started breaking down the material. Look for warping, especially near the ends where thresholds take the most abuse. If you have trouble closing or locking your door, the threshold could be out of alignment or bulging up.
Sometimes, the color of the composite changes, looking gray or faded. This isn’t just ugly—it means UV damage has started breaking down the plastic or resin holding things together. If you’re replacing weatherstripping again and again, the threshold itself might be the real problem.
Pro tip: If you use a Therma-Tru, Masonite, or JELD-WEN exterior door, replacement thresholds are sold specifically for those brands. You’ll get a tighter fit and better long-term performance.
Tools and Materials You’ll Need (And Why They Matter)
Before you start hacking away at your old threshold, let’s talk tools. Trying to improvise with the wrong gear usually ends up making more work for yourself (trust me, I’ve been there). Here’s what you’ll actually need for a successful composite threshold replacement:
- Pry bar or sturdy flat-head screwdriver: To carefully loosen and lift the old threshold without damaging the door frame.
- Hammer or mallet: For encouraging stubborn nails or pieces to budge.
- Utility knife: To cut away old caulk or weatherstripping cleanly.
- Measuring tape: You’ll need the exact width and depth of the threshold opening.
- Metal snips or saw: In case the new threshold needs to be trimmed to fit.
- Caulk and caulk gun: For sealing up the new threshold against water and air leaks.
- Screws and drill (or screwdriver): To securely fasten the new threshold into the sill or subfloor.
- Replacement composite threshold: Make sure you get the right size and brand for your door. Therma-Tru, Masonite, and JELD-WEN each use slightly different shapes and colors.
You might be tempted to skip a tool or two, but each one plays a part. For example, trying to remove a threshold without a pry bar usually leads to splintered wood or bent metal. And don’t forget the caulk—this is what keeps water out and energy sealed in, so it’s not optional.
Step-By-Step: How To Replace A Damaged Composite Threshold
Here’s where the rubber meets the road. Replacing a threshold might seem complicated, but if you break it down step by step, it’s manageable—even for a first-timer. Go slow, and don’t rush the process. Here’s how you do it:
1. Remove The Damaged Composite Threshold
Start by opening the door all the way. Use your utility knife to slice along the edges of the old threshold, cutting through any caulk or paint that’s sealing it in. This keeps you from tearing up the frame when you pry it out. Next, wedge your pry bar (or flat-head screwdriver) under one edge and gently start lifting. Work your way from one side to the other—don’t just yank it up in one spot or you risk damaging the door jamb.
If the threshold is nailed or screwed down, look for fasteners and remove them. Sometimes these are hidden under debris or caulk, so dig a little if you have to. Once everything’s loose, lift out the old composite threshold. There’s usually some debris or leftover caulk—scrape that away so you have a clean, flat surface for the new one.
2. Measure And Trim The New Threshold
Here’s the part where accuracy pays off. Use your measuring tape to check the width and depth of the opening where the new threshold will sit. If you bought a replacement for your exact door type and brand (like a Therma-Tru door), it should fit right in. If not, you might need to trim it with metal snips or a saw.
Dry fit the threshold first. Set it in place without caulk or screws—see if it sits flat and snug against both sides of the frame. If it wobbles or leaves a gap, trim the edges carefully and try again. Don’t force it; the threshold should settle naturally in place.
3. Install And Seal The New Threshold
Once you’re happy with the fit, it’s time to install for real. Run a bead of exterior-grade caulk along the bottom and sides of the opening. This is what keeps water and air from sneaking in under the door. Place the new composite threshold in position, making sure any built-in weatherstripping lines up with the door sweep.
Press down firmly and check that it’s level. If the threshold came with screw holes, use your drill to secure it to the sill or floor. Wipe away any excess caulk right away—you want a clean, neat finish. Give the caulk at least a few hours (or overnight) to cure before you start walking on the new threshold or exposing it to water.
Common Problems With Door Threshold Replacement (And How To Avoid Them)
You might run into a few hiccups along the way—everyone does. Sometimes the threshold won’t sit flat because the subfloor is uneven, or the frame is a hair too tight. If you hit this issue, don’t panic. Double-check your measurements and trim a little more off the threshold as needed. For stubborn gaps under the new threshold, a foam seal or extra caulk can usually close things up.
Another problem? Old screws that snapped off or stripped. If this happens, use pliers to remove any stuck fasteners, or carefully drill new pilot holes nearby. Don’t drive a new screw into a stripped hole—the threshold won’t stay secure and could wobble loose over time.
Sometimes the door won’t close smoothly after installing the new threshold. Usually, this means the threshold is too tall, or you’ve picked a style that doesn’t match your door’s original profile. Double-check the thickness of your replacement, and if needed, shave a tiny bit off the bottom with a sander or saw.
Insight: If you’re pairing your repair with new weatherstripping, sync up your measurements. Sometimes a slightly fatter threshold can affect how the door seals, so adjust your sweep or gasket as needed for a perfect fit.
Composite vs. Wood Or Metal Thresholds: Why Material Choice Matters
Maybe you’re thinking: do I really need another composite threshold? What about wood or metal? Here’s my two cents. Composite thresholds, like those found on modern Therma-Tru and Masonite doors, are designed to handle moisture and everyday abuse better than most wood versions. They won’t rot or warp as quickly, and bugs aren’t interested in eating them.
Wood thresholds do offer a more traditional look—and if you’re restoring an old home, that might matter. But wood needs regular maintenance (think sealing, painting, or sanding) to keep out rot and mildew. Metal thresholds, usually made of aluminum, are tough and long-lasting but can get slippery when wet and don’t always offer the same snug seal as composite.
If you want low-maintenance and energy efficiency, composite is the clear winner. But if your door frame is custom or you’re worried about finding a brand-specific fit, metal or universal wood thresholds might be worth considering. Just be aware you’ll need to stay on top of upkeep.
Maintaining Your Exterior Door Threshold For The Long Haul
Once your new composite threshold is in place, you probably want it to stay looking (and working) great for years. The good news is, maintenance is pretty simple. Honestly, a few quick habits can save you from another headache down the line.
First, every couple of months, check the threshold for dirt, leaves, or grit. This stuff acts like sandpaper and can scratch up the surface or wedge under the door, slowly wearing down the seal. Keep things swept and wiped clean.
Next, watch out for any water pooling against the threshold after storms. If you see this, it might mean your caulk needs a refresh, or the door frame has shifted a bit. Reapply caulk as needed, especially where the threshold meets the sill or side jambs.
Finally, look at the door sweep (the rubber or vinyl strip that runs along the bottom of your exterior door). If it’s cracked, torn, or missing sections, swap it out. The sweep and the threshold work together—if one fails, the other can’t do its job.
Wrapping Up: Replacing Your Composite Threshold Is Worth It
Replacing a damaged composite threshold on an exterior door might seem like a big job, but it’s one of those repairs where the payoff is immediate. You’ll feel the difference in your home right away—less draft, better energy efficiency, and a tighter seal against rain and pests. Whether you’re working with a Therma-Tru, Masonite, or another popular door brand, taking the time to measure, fit, and install carefully really pays off.
Don’t be afraid to take it slow, double-check each step, and invest in the right materials. A little extra effort up front means you won’t have to troubleshoot the same problem again next season. In the end, a fresh composite threshold helps keep your home looking sharp and feeling comfortable—right where it counts.
