Picture this: you’re rolling in from a long day, arms full of groceries. You gently push the door open with your foot, and boom—a nasty scuff marks your beautiful door. Frustrating, right? Installing a kick plate can prevent those everyday mishaps. Plus, it can add a polished look to your garage entry, enhancing the overall aesthetic. Now, let’s dive into how you can tackle this simple DIY project.
What is a Kick Plate?
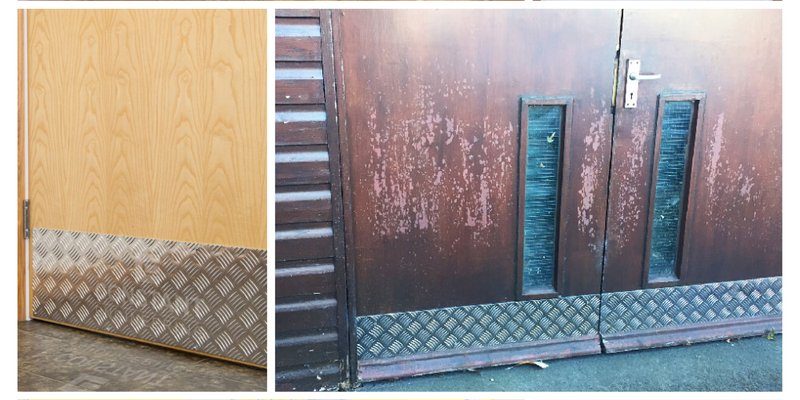
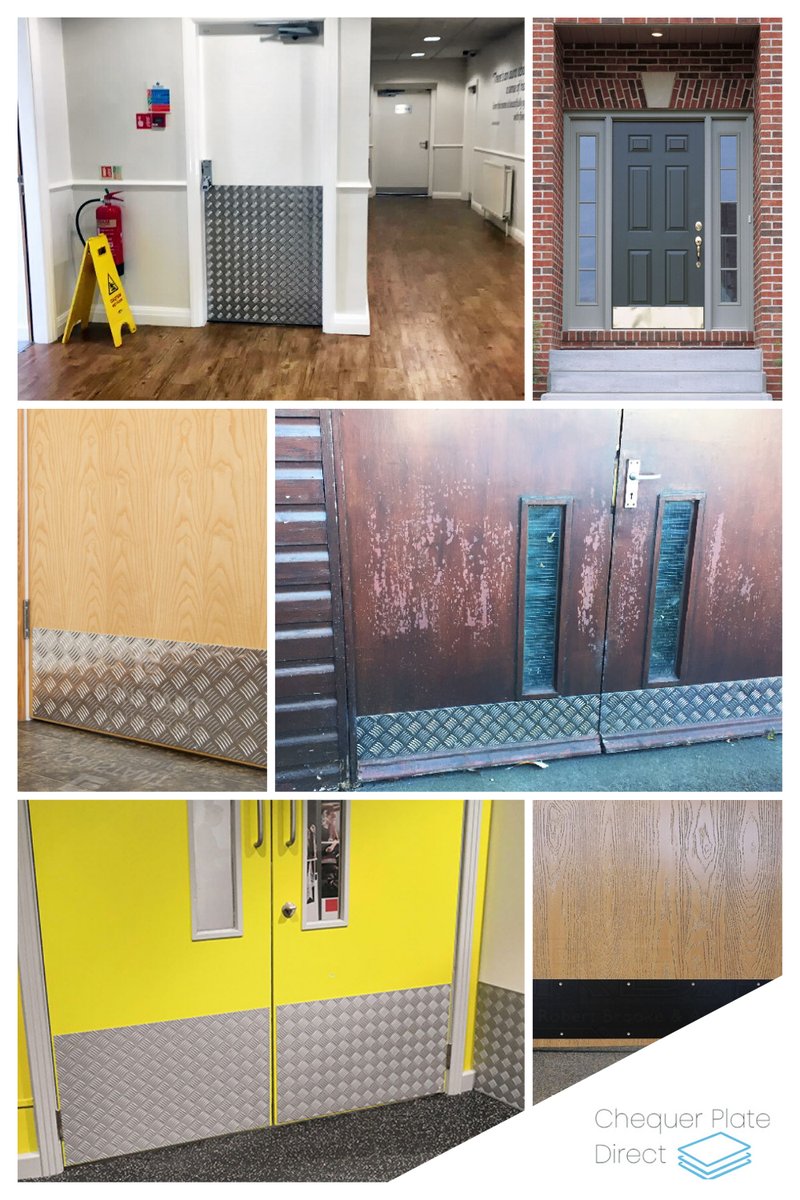
A kick plate is a protective strip typically made of metal or plastic, attached to the bottom of a door. It’s designed to guard against damage from foot traffic, pets, and even rogue carts. You might have seen them in commercial spaces, but they’re just as beneficial in residential settings, especially on garage entry doors that see a lot of action.
You can choose from various materials, like stainless steel or aluminum, based on your style preference and budget. Stainless steel kick plates offer durability and a modern look, while more economical plastic options can still get the job done with style. Ultimately, the choice is yours, but think about how the material will fit into your home’s aesthetic.
Tools and Materials Needed
Before you jump in, it’s important to gather everything you’ll need. Here’s a handy list to guide you:
- Kick plate (the right size for your door)
- Measuring tape
- Pencil or marker
- Drill and drill bits
- Screws (usually included with the kick plate)
- Screwdriver
- Level
Having these tools on hand will make the installation process smoother. If you’re missing any of these items, make a quick trip to your local hardware store. It’s worth investing in a good set of tools, as they’ll come in handy for future projects.
Measuring Your Door
Getting the right measurements is crucial. You wouldn’t bake a cake without measuring the ingredients, right? Similarly, measuring your door ensures your kick plate fits perfectly. Start by using a measuring tape to find the width of your door.
Here’s the basic process:
1. Measure the width: Measure from one edge of the door to the other at the bottom where you’ll attach the kick plate.
2. Decide on height: Most kick plates range from 6 to 12 inches in height. Choose a height that fits your door and personal preference.
3. Mark your measurements: Use your pencil or marker to mark where the kick plate will go.
Double-check your measurements to avoid costly mistakes. Remember, it’s always better to measure twice than to cut once!
Preparing the Door Surface
Now that you’ve measured and marked everything, it’s time to prepare the door surface. Cleaning the area where the kick plate will attach is essential. Dust, grime, or old adhesive can affect how well the kick plate sticks and stays in place.
Follow these steps:
1. Clean the surface: Use a cloth and some all-purpose cleaner to wipe down the door’s bottom edge. Make sure it’s dry before you proceed.
2. Check for damage: Examine the door for any cracks or chips. If you find any, consider repairing them with wood filler or caulk.
3. Level the marks: Use a level to ensure that your marks for the kick plate are straight. This helps your installation look professional.
Taking the time to prep will pay off when you admire your handiwork later!
Attaching the Kick Plate
You’re now ready to install the kick plate! This step might seem a bit daunting, but it’s usually straightforward. Here’s how to do it safely and properly:
1. Align the kick plate: Position the kick plate along the marks you made on the door. Ensure it’s level and centered.
2. Drill pilot holes: Use the drill to create pilot holes in your marked spots. This prevents the wood from splitting when you add screws.
3. Secure the kick plate: Align it once more and use your screwdriver to drive in the screws through the kick plate into the pilot holes.
You might be wondering, “What if my kick plate has adhesive?” If it does, follow the manufacturer’s instructions for that specific product. In many cases, you’ll still want to use screws for added security.
Finishing Touches
Once your kick plate is secured, step back and admire your work. Does it look good? If yes, fantastic! If any screws need adjusting, now’s the time to do that. A well-installed kick plate should sit flush against the door.
As a finishing touch, you might consider applying a sealant or paint around the edges. This can enhance longevity and improve the overall look. Additionally, make sure to check for any rough edges. Sanding any sharp spots will prevent any unwanted scrapes.
Maintenance Tips for Your Kick Plate
Congratulations! You’ve successfully added a kick plate to your interior garage entry door. But just like anything else in your home, you’ll want to keep it looking good. Here are some quick maintenance tips:
– Regular cleaning: Wipe down the kick plate every so often to remove dirt and grime. Depending on the material, use a cleaner that won’t scratch or damage the surface.
– Check for damage: Periodically inspect the kick plate for scratches or loose screws. Tighten or replace screws as needed to keep it secure.
– Refresh the finish: If your kick plate starts to dull, consider using a metal polish on stainless steel options or a touch-up paint for plastic ones.
Remember, a little maintenance goes a long way in prolonging the life of your kick plate.
Adding a kick plate to your interior garage entry door is a small project with a big impact. It not only protects your door but also enhances your home’s aesthetic. With just a few tools and materials, you’ve transformed a functional space into something more polished and durable.
Now that you know how to install a kick plate, you can tackle similar projects with confidence. Who knew DIY could feel this rewarding? Enjoy your handiwork, and don’t hesitate to take on more home improvement tasks—it’s all about making your space function better and look great!