Honestly, the first time I saw a Schlage double-sided kick plate sitting in its box, I thought, “How complex can this be?” Turns out, you don’t need a toolbox straight out of a home improvement show. You just need a few basic tools, a steady hand, and a little patience. Let’s walk through the process, step by step, so your next installation goes off without a hitch—even if you’ve never done anything like this before.
What Is a Double-Sided Kick Plate and Why Do You Need One?
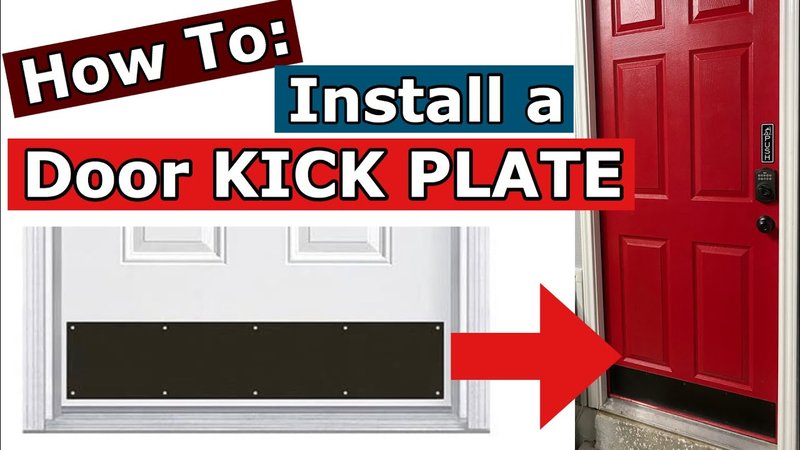
Here’s the thing: a kick plate is a thin sheet of metal or heavy-duty plastic that attaches to the bottom of a door. The “double-sided” part means it’s designed to protect both the front and back of the door, not just one side. In high-traffic spots, every extra bit of coverage matters.
You might be wondering if you really need one. If your door is in a spot where people (or pets!) constantly kick, push, or bump into it, a double-sided kick plate is your best ally. Think about the endless parade of shoes, carts, and cleaning equipment battering the door in a busy hallway or commercial kitchen. That’s rough on the paint—and the wood underneath. Double-sided plates act like a shield, stopping scratches before they start, and keeping the door looking almost new for years.
Most brands, like Schlage or Prime-Line, offer universal fit models that work on wood, metal, or composite doors. You don’t have to worry about matching brands like you do with a remote code or battery—most plates just pair up with your existing door, no sync or reset needed. Honestly, it’s one of the simplest upgrades for big impact.
What Tools and Materials Do You Need?
So, what’s in your toolbox right now? Here’s what you’ll need for a smooth kick plate installation. Don’t worry if you’re missing something—you can usually swap in a similar tool, just like using a universal remote instead of a brand-specific one.
- Double-sided kick plate (check the length and width)
- Measuring tape or ruler
- Pencil or non-permanent marker
- Drill with bits (usually 1/16″ or as specified by the manufacturer)
- Screwdriver (manual or electric)
- Level (optional, but recommended)
- Masking tape
- Provided screws (they come with most kick plates)
- Cleaning supplies (rag, mild detergent)
Let me explain why each one matters. The level helps you avoid a lopsided install (which will drive you crazy every time you see it). The masking tape’s just there to keep the plate steady while you mark holes and drill. A clean surface helps the kick plate adhere flush—trust me, you don’t want to trap dirt under there for eternity.
How To Measure and Mark for Your Kick Plate
You’d be surprised how many installations get botched just because someone guessed at the size. Even if you’ve got a so-called universal plate, precise measuring is your best insurance. Grab your tape measure and check the width of your door. Most standard residential doors are 36 inches wide, but commercial ones can run larger. Don’t forget to measure the height from the bottom edge—you want to center the plate, not bury it halfway up the door.
Once you’ve got the right size, hold the kick plate up to the door and eyeball where you want it. Most people set the bottom edge of the plate flush with the bottom of the door, but you’ve got wiggle room if you want a certain look. Use your pencil to lightly trace the corners onto the door. Then, using the supplied screw holes in the plate as a guide, mark where each screw will go.
Tip: Use a level before you commit to those marks. Even a tiny tilt can make the whole door look off. Double-check your lines—rushing here just means more work later.
If your kick plate didn’t come pre-drilled, just mark evenly spaced spots about an inch from each side and spaced every 8–12 inches along the top and bottom. Consistent spacing looks clean and helps hold the plate tight.
Prepping the Door for Installation
Don’t skip this step! Start by giving the door a good wipe-down with a damp rag and a little mild detergent. Dust, oils, and debris can mess with how snugly the kick plate fits. If you’re working with an older door, check for any raised nails or screws near the bottom. Hammer them flush so nothing pushes against your new plate.
Once the surface is clean, let it dry completely. Tape the kick plate in place using masking tape, lining it up with your pencil marks. This is your chance to step back and make sure everything looks level and even. If something’s off, now’s the time to adjust—much easier than moving the plate after you’ve started drilling holes.
You might be tempted to just hold the plate in place and dive right in, but trust me: taped plates stay put, and you get a safer, more accurate result.
Drilling and Attaching Your Double-Sided Kick Plate
Here’s where things get a little noisy. With your plate taped in place and your marks made, use a drill bit one size smaller than your screws to create pilot holes for each mark. This step’s not just for looks—it prevents the wood from splitting and helps the screws go in straight.
If your door’s metal or has a composite core, take it slow so you don’t damage the surface or burn out the bit. Once all the pilot holes are in, remove the masking tape and hold the kick plate in position. Starting with the center screw, attach the plate to the door, working outward. This keeps the plate from bowing or bubbling out in the middle.
Insight: If you run into resistance, don’t force the screw—it could strip or break. Back it out, check your pilot hole, and try again.
Repeat the process for the back side of the door with the second plate. Make sure the screws don’t stick out or catch—especially if the door’s used by kids or pets.
Finishing Touches and Quality Check
You’re on the home stretch now! Tighten all the screws just until they’re snug—don’t over-crank, or you could bend the plate or mar the door surface. Give everything a gentle wipe-down with a soft, dry cloth to remove fingerprints and smudges. If your kick plate came with a protective film, peel it off now. There’s something satisfying about that final reveal—just like removing the plastic from a new phone.
Swing the door open and closed a few times. Listen for any rattles or scrape sounds that might mean a loose screw or misaligned plate. Check both sides for evenness, and run your hand along the edges to make sure there are no sharp burrs.
If you want to go the extra mile, you can touch up any tiny paint dings around the screw holes with a matching paint pen. Little details go a long way, especially in high-traffic spots where the door gets a lot of attention.
Common Mistakes to Avoid When Installing Kick Plates
We’ve all had those “what was I thinking?” moments on a DIY project. Here are a few pitfalls to dodge, so you don’t have to double back:
- Skipping the pilot holes: It’s tempting to take a shortcut, but directly screwing into wood or composite doors risks splitting or stripping. Always drill first, even if it feels like an extra step.
- Ignoring fit and alignment: Lining up the plate by eye alone often leads to a crooked final look. Use a level and take your time measuring.
- Choosing the wrong size: Too small, and you’ll miss foot traffic marks; too large, and it looks awkward. Measure twice, buy once.
- Using the wrong screws: Not all screws are equal—use what’s provided or recommended by your plate’s manufacturer. Wrong ones can rust, break, or poke through the other side.
- Forgetting about clearance: Make sure your plate doesn’t rub on the floor or catch on mats, especially where doors swing wide or sit low.
Honestly, taking five extra minutes at each step can save you hours of frustration. It’s all about going slow and treating the install as a sync—not a race.
Comparing Double-Sided Kick Plates to Alternatives
You might be wondering, do you really need a double-sided kick plate, or would a single-sided plate do? The answer depends on your door’s location and how much abuse it takes.
- Double-sided kick plates protect both sides, which is great for doors that get traffic from both directions—like restaurant kitchen doors or hallway entrances at school.
- Single-sided kick plates save a bit of money and work fine for doors that stay closed most of the time, or where only one side faces the action (like a front exterior door).
- Alternative materials like clear acrylic offer protection with less visual impact, but they tend to show scuffs more quickly and don’t last as long in busy spots.
Think of it like choosing between a universal remote and a specialized one: You want the solution that fits your situation without a lot of fiddling or troubleshooting later. In high-traffic areas, double-sided is almost always the smart call for long-term door health.
Maintaining Your Kick Plate for the Long Haul
Once you’ve got your double-sided kick plate installed, keeping it clean and tight is surprisingly easy. Most stainless steel or brass plates wipe down with just a damp cloth. For tougher grime, a little dish soap or diluted cleaner does the trick. Avoid anything abrasive—you don’t want to scratch the finish or dull the shine.
Check the screws every couple of months, especially after heavy use or extreme weather. If any start to loosen, just snug them up with a screwdriver. And if a screw goes missing, replace it quickly to avoid rattles or warped plates.
If you ever need to reset or upgrade your kick plate, the process is just a reverse of installation. Honestly, once you’ve done it once, it takes less than ten minutes. The key is staying ahead of wear so your door keeps looking—and working—its best.
Wrapping Up: Why a Double-Sided Kick Plate Is a Smart Move
Installing a double-sided kick plate isn’t just about keeping your door looking good. It’s about making your space work better, longer, and with less hassle. High-traffic doors take a daily beating, but with the right shield in place, you’re not constantly touching up paint or worrying about deeper damage.
With a Schlage or similar universal model, you’re looking at a project that’s doable even for beginners—no special codes, pairing, or troubleshooting required. Take your time, follow the steps, and you’ll end up with a neat, professional look that stands up to whatever life (or your family, or your customers) can throw at it. That’s door protection you can literally kick back and enjoy.
