You might have a classic wood front door from Masonite, a new steel model by Therma-Tru, or a simple fiberglass entryway from JELD-WEN. No matter the brand, the basic steps to adjust the door and add weatherstripping are pretty much the same. You just need a good eye, some simple tools, and a few spare minutes to tackle those tiny gaps. Let’s dig in and make your home a little cozier—and your next energy bill a bit less shocking.
Why a Tighter Door Seal Matters
Here’s the thing: even the best exterior door is only as good as its seal. If you can see daylight around the edges, you’ve got a problem. Those tiny gaps can let in chilly drafts in winter or blistering heat in summer. Plus, bugs and even rainwater may slip inside, turning your tidy entryway into a mess. It’s not just about comfort, either. Wasted energy means higher utility bills, and nobody likes paying to heat or cool the outdoors.
The right weatherstripping acts like a comfy jacket for your home. It helps hold in the temperature you want and keeps out the rest. But if your door isn’t adjusted properly, weatherstripping might not make full contact—or it could even get crushed. That’s why both steps—adjustment and weatherproofing—go hand in hand.
Honestly, most homeowners don’t realize how much of a difference a few simple tweaks can make. It’s one of those quick fixes that pays off in warmth, peace of mind, and savings. If you’re tired of rolling up a towel to block cold air or messing with wonky locks, it’s time to get serious about your exterior door’s seal.
Spotting Door Gaps and Seal Problems
Sometimes the problem is obvious: you feel a breeze coming through the doorframe. Other times, it’s sneakier—a faint whistle on a windy day or a streak of rainwater after a storm. You might even notice light peeking through at night when the hallway’s dark. These are all clear signs your exterior door needs a tighter seal and maybe new weatherstripping.
Not all gaps are created equal. They can show up along the top, bottom, or sides of your door—sometimes in more than one place at once.
Here’s a quick way to check for trouble:
- Close the door and look for light around the frame. Any bright slivers mean air can get through.
- Run your hand slowly around the edges—does it feel cold or breezy?
- Slide a piece of paper under the door and along the sides. If it slips through easily, you’ve got a gap.
- Look for worn, cracked, or flattened weatherstripping. If it’s falling apart, it can’t do its job.
Figuring out exactly where the problem is helps you target your fix—so you don’t waste time (or weatherstripping) on spots that don’t need it.
Tools and Materials for Adjusting Your Door
Before you dive in, it’s smart to gather everything you need. Adjusting an exterior door and adding weatherstripping doesn’t take fancy gear, but a few basic tools will make life easier. Here’s what you’ll want on hand:
- Screwdriver: Most exterior doors use Phillips or flathead screws for hinges and strike plates.
- Weatherstripping: Choose from foam tape, rubber gasket, or even vinyl strips—whatever fits your door style and brand.
- Utility knife or scissors: For cutting weatherstripping to size.
- Hammer and finishing nails (optional): Sometimes needed if your weatherstripping attaches this way.
- Measuring tape: Don’t eyeball it—measure each section for a perfect fit.
You might also want a step stool if your door is tall, or a pry bar if you need to adjust the threshold. Most adjustments are about small, careful movements—so don’t rush. Whether your door is a heavy steel slab from Therma-Tru or a lightweight fiberglass entry, protect your fingers, work slowly, and double-check everything as you go.
Step-By-Step: Adjusting the Door for a Tighter Seal
Let me explain how to get your exterior door lined up just right. Most of the time, tiny shifts make a big difference. If your door sags, sticks, or feels lopsided, it won’t seal well—no matter how fancy the weatherstripping is.
- Check the hinges: Open the door and inspect the hinges for loose screws. Tighten any loose ones with your screwdriver. If the door still sags, you might need longer screws to anchor into the wall frame.
- Adjust the strike plate: If the latch doesn’t line up smoothly, the strike plate may need to move. Slightly loosen the screws, shift the plate so the door closes snugly (but not too tight), then re-tighten.
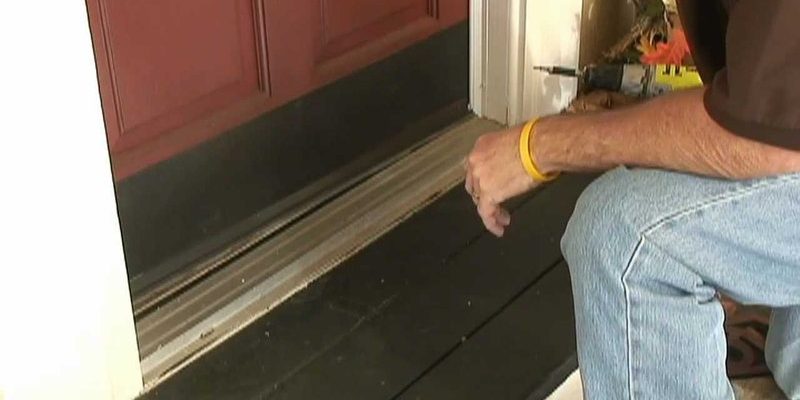
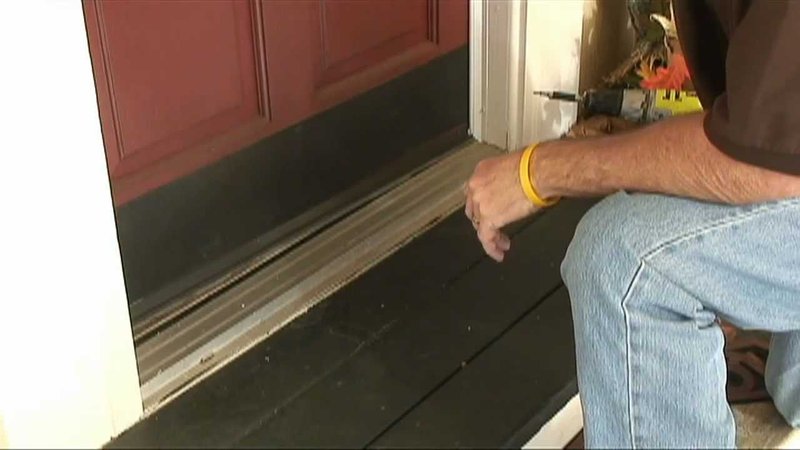
- Inspect the door sweep: That rubber or vinyl strip along the bottom should touch the threshold, but not drag. If it’s worn or missing, swap it for a fresh one.
- Check the threshold: Some door thresholds can be raised or lowered. Look for adjustment screws—turn them slowly to close up any gap at the bottom.
Keep the test simple: after each tweak, close the door and re-check for light and drafts. It sometimes takes a few tries to get everything flush. Be patient. You want the door to latch easily but seal tight—think “firm handshake,” not “bear hug.”
Adding or Replacing Weatherstripping the Right Way
Now that your door aligns better, let’s talk about weatherstripping. Brands like M-D Building Products, Frost King, and 3M all make good options. The key isn’t the name on the box—it’s installing it in the right spot, with the right tension.
- Remove the old: Peel away any worn or crumbly weatherstripping. Clean the frame so your new strip will stick.
- Measure twice, cut once: Use your measuring tape and utility knife to cut pieces to the exact length of each side.
- Apply carefully: Start at the top, working each strip firmly into the corners. For adhesive-backed strips, press and hold for a good seal. Nail-in or slot-style options need to be seated flat and even.
- Test the fit: Close the door and check for resistance. If the weatherstripping is too thick, the door may not latch. Too thin, and you’ll still have gaps. Adjust as needed.
It isn’t about brute force—it’s about finding that Goldilocks spot where the weatherstripping kisses the door, not crushes it. On steel doors, magnetic weatherstripping might be best; on wood ones, go with flexible foam or rubber. Universal kits fit most brands, but double-check your measurements to avoid gaps at the corners.
Common Problems and Smart Troubleshooting
You might be wondering, “What if my door still leaks after all this?” Here’s the reality: even after you adjust the hinges and weatherstripping, a few stubborn problems can pop up. Let’s walk through some classic troubleshooting scenarios.
- The door won’t latch: If it’s hard to close, the weatherstripping might be too thick or misaligned. Peel it off, reposition it, and try again.
- Gaps in the corners: Sometimes, corners don’t seal because the strips are too short or not pressed in all the way. Cut new pieces to overlap or use corner pads for extra coverage.
- Drafts at the bottom: If air sneaks under the door, double-check the sweep and threshold. Some doors (especially older ones by Masonite or JELD-WEN) have adjustable thresholds—just turn the screws a bit at a time.
- Weatherstripping keeps falling off: Clean the surface thoroughly. If adhesive won’t stick, try nail-in or slot-type strips. For painted frames, lightly sand before applying new strips.
Most problems can be fixed with a little patience and the right approach. If all else fails, a professional door installer can tweak things in minutes—sometimes for less than you’d spend on a fancy dinner.
Troubleshooting isn’t just for “old” doors, either. Even brand-new models can settle, especially after a season of rain or sun. If you stay alert to the signs and act quickly, a tight seal is easy to maintain.
Choosing the Best Weatherstripping for Your Door
Honestly, there’s no “one-size-fits-all” when it comes to weatherstripping. The best type depends on your door’s material, shape, and how much use it gets. Let me explain the main types:
- Foam Tape: Flexible and easy to apply, good for minor gaps on wood or composite doors.
- Rubber or Vinyl Gasket: More durable, great for high-traffic entryways. These often press into a groove or nail into place.
- Magnetic Strips: Perfect for steel doors (like those from Therma-Tru). They snap right into place, sealing tightly with minimal effort.
- Door Sweeps: Attach to the bottom edge, blocking drafts and bugs. Some are screw-on, others stick with adhesive.
Ask yourself: Do you need something super-durable for slam-happy kids? Is your door exposed to wild weather? Foam tape is easy and cheap, but wears faster. Rubber or vinyl last longer but may need occasional re-fitting. Universal kits are handy, but always check the width and thickness—especially for older or non-standard door brands.
Keeping Your Exterior Door Seal in Good Shape
Once you’ve made your door fit snugly and added new weatherstripping, the job isn’t quite finished. Keeping that tight seal working well will save you headaches down the road.
Check your door every season. Weather and temperature shifts can cause doors and frames to swell or shrink. After a big rainstorm or a hot, muggy day, take a minute to check for new drafts or gaps. If you spot trouble, a quick adjustment keeps you ahead of the game.
Keep the weatherstripping clean. Dirt and grime can break down foam and rubber strips, making them less effective. Wipe down the door edges and sweep regularly—especially in spring and fall.
Replace as needed. Even the best weatherstripping wears out eventually. When it starts to crack, compress, or peel, swap it for a new strip. It’s a small effort for a big boost in comfort.
If your home is older or you live in a climate with wild swings, you might need to tweak your door more often. But a tight seal is worth the effort—your energy bills, your comfort, and your peace of mind will all thank you.
Final Thoughts: Enjoy a Quieter, Cozier Home
Adjusting an exterior door to create a tighter seal with weatherstripping isn’t just another item on the home maintenance checklist—it’s a smart move that pays off every single day. A draft-free door means a warmer winter, a cooler summer, and way less stress about bugs or rain sneaking in. Whether you’re working with a classic Masonite entry, a sleek Therma-Tru steel door, or something unique, the principles stay the same: small, careful adjustments and the right weatherstripping make all the difference.
The whole process is straightforward if you go step by step. Gather your tools, tune up the frame, fix the seal, and keep an eye on it as the seasons change. It’s a little bit of know-how, a dash of patience, and a nice reward at the end—a calm, comfortable, and energy-smart home.