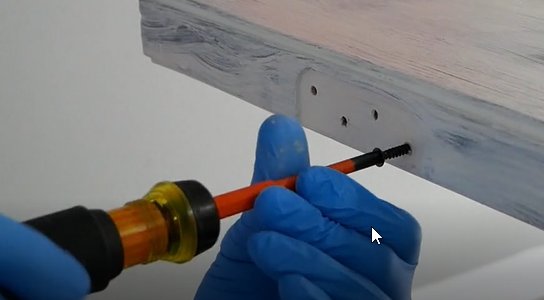
This problem can occur in many homes, whether you have a standard interior door or a heavy-duty exterior door. While it may seem daunting, repairing a stripped screw receiver is something you can handle with a few tools and a bit of patience. Let’s walk through the process together, as if we’re discussing it over coffee at your favorite café.
Understanding the Hinge and Its Components
Before diving into repairs, it’s important to understand the parts involved. A door hinge consists of two leaves: one attached to the door and another to the door frame. Each leaf includes what we call a screw receiver—essentially a socket where screws are inserted to hold the hinge in place. If these receivers become stripped, they lose their ability to grip the screw, which leads to instability.
Think of the screw receiver as a glove too big to hold the finger securely. It’s meant to fit snugly around the screw, but wear and tear can cause it to stretch out or get damaged. The stripped receiver can result from a few factors, such as improper installation, over-tightening, or simply time wearing down the materials.
Understanding how these components fit together is key to executing a repair effectively. Once you identify what’s going wrong, you can approach the repair process with confidence.
Gathering Your Tools and Materials
Having the right tools on hand can significantly ease the repair process. For this job, you’ll need:
- A screwdriver (Phillips or flathead, depending on your screws)
- Wood glue or epoxy
- A wood dowel, toothpicks, or wooden matchsticks
- Drill with a drill bit (optional)
Having these items ready will make your job smoother. If you’re wondering why wood glue works, it’s because it can fill the stripped hole and give your screws something to grab onto. Meanwhile, dowels and toothpicks act like fillers, providing the necessary support for the screws.
Take a few moments to gather everything before you start. This way, you won’t find yourself running to the hardware store halfway through the process.
Removing the Stripped Screw and Hinge
Now it’s time to get hands-on. First, you need to remove the screws from the hinge. If a screw is stripped, it might not come out easily. Here’s a little trick—try using a rubber band in between the screwdriver and the screw head for added grip.
Once you’ve got the screws out, gently pull the hinge away from the door and frame. If you notice that it’s still stuck, a gentle tap with a hammer can help loosen it. Just be careful not to damage the door or the frame!
Removing the hinge allows you to see the extent of the damage and decide how best to proceed with the repair.
Filling the Stripped Receiver
With the hinge removed, you can now focus on repairing the stripped receiver. One of the most effective methods is filling the hole with wood glue and a dowel. Here’s how:
1. Choose a dowel that fits snugly into the screw hole.
2. Cut the dowel to the appropriate length—just a little longer than the hole depth.
3. Apply wood glue to the dowel and insert it into the hole, pushing it in firmly.
4. Let it dry for a few hours or as the glue instructions suggest.
This creates a new, solid base for your screws and helps ensure they grip properly for the long term. If you don’t have dowels handy, toothpicks can work in a pinch—just insert several to fill the hole adequately.
Reinstalling the Hinge
After the glue has dried and set, it’s time to reinstall the hinge. Start by aligning the hinge with the newly filled receiver. Make sure everything lines up correctly before putting in any screws.
When you’re ready to insert screws, it’s a good idea to use a bit of force but avoid overtightening. Too much pressure can strip the new repair. Start with the top screw, then move to the bottom, making sure the hinge stays straight throughout.
If you’re worried about the screws staying put, consider using a bit of thread-locking adhesive for added grip. This can help prevent the screws from loosening over time.
Testing the Door Functionality
Once the hinge is back in place and secured, it’s essential to test the door’s functionality. Open and close the door a few times to ensure it swings smoothly without any wobbling or squeaking. If everything works fine, congratulations—you’ve successfully repaired the stripped screw receiver!
But if problems persist, you might want to check that the doorframe is square and that the hinges aren’t warped. Sometimes, an underlying issue can cause more problems than just the stripped receiver.
Preventive Measures for the Future
To ensure that you don’t face the same issue again, there are a few preventive measures you can take:
1. Regular Maintenance: Periodically check your door hinges for signs of wear and tear.
2. Use Proper Screws: Ensure you’re using the right size and type of screws for your hinges.
3. Avoid Overtightening: When installing screws, tighten them just enough to secure the hinge without straining the material.
By keeping an eye on your door hinges, you’ll save yourself from future headaches and repairs.
Repairing a stripped screw receiver in a door hinge leaf might sound tricky, but with patience and the right approach, you can do it successfully. Think of it as a little DIY project that not only fixes a problem but also gives you the satisfaction of knowing you tackled it yourself.
With your newly secured hinge, your door will function smoothly again, making your space feel just a bit more complete. So, grab your tools, and remember: every small repair you make only adds to your confidence and skill. Happy fixing!