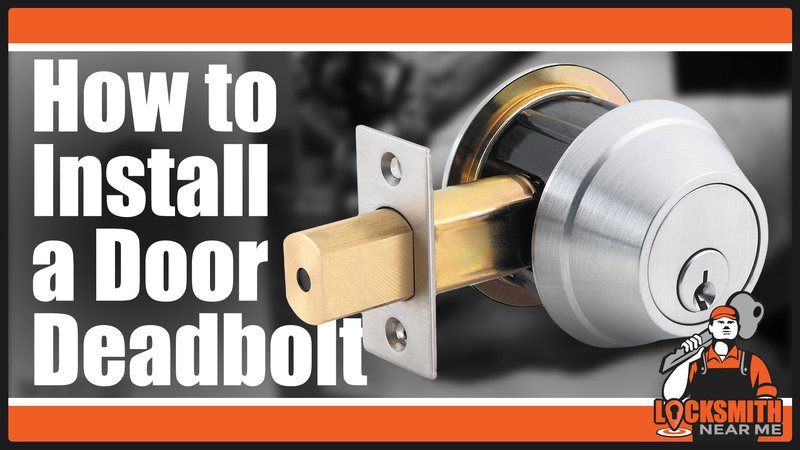
Honestly, adding a dummy deadbolt is a little like putting hubcaps on a car that never leaves the driveway; it’s not about performance, it’s about keeping things visually balanced. Even if your door panel isn’t ever going to swing open, that deadbolt can be the finishing touch that makes everything look intentional. Whether you’re working with a well-known brand like Schlage, Kwikset, or Yale, or just grabbing a basic universal dummy deadbolt from the hardware store, the approach is basically the same. The best part? There’s no need for special codes, batteries, or even a drill in some cases—just a few simple steps, even if you’ve never installed a lock in your life.
What Is a Dummy Deadbolt, And Why Would You Use One?
You might be wondering, what’s the point of a deadbolt that doesn’t actually lock? A dummy deadbolt is all about appearances. It looks just like a real deadbolt, with the same familiar faceplate and thumb-turn, but there’s no internal mechanism—no latch, no bolt, nothing actually moves. In other words, it’s just for show.
Dummy deadbolts help maintain a consistent look across multi-panel doors or on any door that doesn’t need to lock.
Lots of people use them on the “inactive” side of double entry doors—like those grand front entrances. It keeps both doors looking uniform, even though only one really needs to lock or unlock. There’s also a bit of a security “decoy” effect; someone glancing at your door won’t know whether it’s a working lock or not. But let’s be clear: installing a dummy deadbolt will not make a non-functional door more secure. If security is your top concern, you’ll want to reinforce the frame itself or use more robust dummy hardware.
Tools and Materials You’ll Need
Here’s the thing: this is truly a beginner-friendly DIY project. You don’t need to be a locksmith, and you won’t need a toolbox that looks like Batman’s utility belt. In fact, most dummy deadbolt kits come with everything you need to get started.
- Dummy deadbolt set (brand-specific or universal—just match the finish and style)
- Phillips-head screwdriver (manual or powered)
- Measuring tape
- Pencil or marker
- Level (optional, but helps prevent a crooked lock)
- Drill (only if you need pilot holes—most doors won’t require heavy drilling)
Most kits from brands like Kwikset or Schlage include template stickers or little guides to make lining things up a breeze. Universal options are usually just as simple. If you’re worried about sync or pairing—relax! With a dummy deadbolt, there’s no electronic code, pairing, or battery to mess around with.
Choosing the Right Dummy Deadbolt for Your Door
Not all dummy deadbolts are created equal. The two big things to watch for are style and compatibility. You’ll want something that matches your existing door hardware. If your working door has a matte black Schlage deadbolt, try to find a dummy version in the same color and design, or the closest possible match. Most hardware stores carry brand-specific dummies right alongside standard locks.
Compatibility’s another thing to check. Not all dummy deadbolts attach the same way. Some are surface-mounted, which means the screws simply go from the front of the deadbolt into the door panel—nothing sticks out the back, and there’s nothing to line up internally. Others might need small pilot holes. If your panel is extra thick or thin, check the manufacturer’s specs first.
If you can’t find an exact brand match, universal dummy deadbolts are a safe bet. Just know they might look slightly different in shape or finish. For decorative or non-standard doors (like those made of glass or metal), you may need to get creative or consider alternative non-locking hardware.
Where to Position the Dummy Deadbolt
Getting the placement right matters more than you’d think. The goal is for your dummy deadbolt to line up visually with any real hardware on the active door. That means matching both the height and the distance from the door edge (called the “backset”). Most standard deadbolts sit around 6 to 12 inches above the door handle.
Here’s my go-to method for lining things up:
- Close both doors so they’re flush.
- Mark the height of the real deadbolt on the working door using a piece of painter’s tape or a sticky note.
- Transfer the same height to your non-functional panel—use a level if you want things perfect.
- Measure the backset (distance from the edge of the door to the center of the deadbolt hole) and mimic that on the dummy side.
If you don’t have a matching deadbolt to copy, look at photos online or check manufacturer guidelines for standard placements. At the end of the day, your eyes are your best judge—step back and make sure things look balanced before you drill any holes.
Step-by-Step Guide: Installing a Dummy Deadbolt
Here’s where the rubber meets the road. Honestly, this is the easiest kind of “lock” install you’ll ever do. Most dummy deadbolts attach with just two screws. Here’s the basic process:
- Hold the dummy deadbolt up to your marked spot. Make sure it’s straight and at the correct height. Use a level if you’re picky.
- Trace the outline or mark the screw holes with a pencil. Most kits include a mounting template—use it if you’ve got one.
- Drill tiny pilot holes if your door panel is hardwood or pre-finished. This prevents splitting or cracking.
- Line up the dummy deadbolt and drive in the screws by hand. Most go from the front, so there’s nothing to line up on the back of the panel.
- Give the faceplate a gentle twist or two to check that it sits flush and the thumb-turn (if there is one) moves smoothly.
And… that’s pretty much it. No codes, no pairing, and no tricky battery doors. If you do bump into trouble—like the screws stripping or the panel splitting—stop and reassess. Sometimes, switching to shorter screws or predrilling a tad deeper is all you need to get things back on track.
Common Mistakes and How to Avoid Them
Even though this job is easy, a few rookie mistakes still happen. Here’s what to watch out for:
- Crooked installation: If you eyeball it, the deadbolt might end up slanted, which is instantly noticeable. Always measure and use a level, even if you think you’re good at “just guessing.”
- Splitting the door panel: Driving screws directly into hardwood or MDF without pilot holes almost always leads to cracks. Take a few seconds to make small starter holes, especially with older doors.
- Mismatched finishes: Nothing ruins the look faster than a shiny brass dummy paired with a brushed nickel handle. Double-check the finish and style before buying. Universal dummies are handy, but may not be a perfect match.
- Mounting too close to edge: Place the deadbolt too close to the edge, and the screws might not grip well, or the faceplate could overhang—always mimic the real hardware’s placement.
If you get stuck removing an old dummy deadbolt (maybe the screws are stripped, or the faceplate is stuck), try gently rocking it back and forth with a putty knife beneath the edge, or use a screw extractor if things are really wedged tight.
Alternatives to Dummy Deadbolts for Non-Functional Doors
You might be thinking, “Is a dummy deadbolt really my only option here?” Not at all. If you’re mainly after looks, there are other non-locking, decorative hardware options that offer a similar effect—sometimes even more style.
- Dummy handlesets: These look like full entry handles but don’t actually connect to any latching mechanism—just surface-mounted.
- Escutcheon plates: Simple decorative plates that cover up old lock holes or give your door a more finished, elegant feel.
- Pull handles: Great for double doors, especially interior ones—adds functionality without a locking mechanism.
For a perfect match, try to stick to the same manufacturer as your working lock. If you’re updating the whole entryway, you might even swap out all the hardware for a fresh, modern look—Schlage, Kwikset, Yale, and Baldwin each offer a wide range of “dummy” versions to complete the set.
Final Checks and Cleaning Up
Once your dummy deadbolt is mounted, step back and give everything a once-over. Does the finish match? Is it straight, snug, and flush with the door surface? Try moving the thumb-turn if it has one—does it spin freely, or is it rubbing against the panel? A quick adjustment here can save you from years of noticing a tiny tilt every time you pass by.
Use a soft cloth to wipe away fingerprints or pencil marks, and if you drilled any pilot holes, vacuum up sawdust. If you’ve got kids in the house, explain that this deadbolt is just for show and won’t actually keep the door closed; sometimes people like to “test” new hardware in creative ways.
There’s a small sense of satisfaction that comes from a job well done—even such a simple one. Dummy deadbolts might be basic, but getting that clean, finished look on your non-functional door panel? Totally worth it.
Wrapping Up: When a Dummy Deadbolt Makes All the Difference
At the end of the day, installing a dummy deadbolt on a non-functional door panel is one of those projects where a small touch makes a big visual impact. It’s not about boosting security, but about tying your space together and avoiding that lopsided, unfinished look. Whether you’re using a universal model or picking a matching piece from Schlage, Kwikset, or Yale, the main thing is to take your time, measure twice, and enjoy the upgrade.
If your main goal is clean, consistent style with zero fuss, this is about as easy—and satisfying—as DIY gets. And if you ever change your mind or update your hardware, removing a dummy deadbolt is just as simple. Here’s to doors that look as good as they deserve, no matter how often (or never) they open.
