In this guide, we’ll dive into the steps to adjust your sliding barn door so that the gap at the bottom is just right. Whether you’re dealing with a standard door or a custom build, you’ll find tips that work for you. It’s all about getting the hang of it, so let’s get started!
Understanding Your Sliding Barn Door Setup
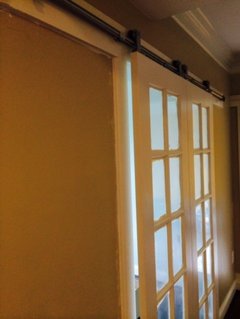
Before jumping into adjustments, it’s essential to understand how your sliding barn door operates. Most sliding barn doors are mounted on a track system, with rollers that let the door glide smoothly. The gap at the bottom can depend on several factors, including the track’s height, door size, and floor level.
Most barn doors will have a hardware kit that includes a track, rollers, and other components. If you find yourself confused, take a moment to inspect the hardware. Identifying the parts can help you understand where adjustments can be made.
Here’s a quick rundown of the key components:
- Track: The metal strip the door slides on.
- Rollers: These help the door glide along the track.
- Hangers: Attached to the door, holding it on the track.
- Floor guides: Prevent the door from swinging away from the wall.
Understanding these components will make it easier to adjust your door correctly.
Why a Perfect Gap Matters
You might be wondering why the gap at the bottom of your sliding barn door is such a big deal. A perfect gap isn’t just about aesthetics; it also serves practical purposes.
First off, a well-adjusted door keeps out unwanted drafts, bugs, and even dust. A gap that’s too wide can feel like an invitation for critters to wander in. Moreover, if the door drags on the floor, it can damage both the door and the floor over time—think of it like wearing shoes that are too small; it causes wear and tear.
On the flip side, having a gap that’s too small can lead to the door sticking. This can make it difficult to slide and can result in annoying bumps and scratches. With a little patience, you can achieve the perfect balance.
Tools You’ll Need for Adjusting
Gathering the right tools can make your adjustment process smoother. You don’t need a fancy toolbox; just a few basic items will do. Here’s what you’ll typically need:
- Adjustable wrench: For loosening and tightening nuts on the hangers.
- Screwdriver: To adjust screws on the track or floor guides.
- Level: To ensure your door hangs straight.
- Tape measure: For precise measurements of gaps and door height.
- Wood shims: These can help raise the door if it needs a boost.
Having these tools on hand will help you tackle the adjustments more efficiently.
Measuring the Gap at the Bottom
Now that you’ve got your tools ready, measuring the gap at the bottom is the next step. This part is crucial because you want to know precisely what needs adjusting. Here’s how to do it:
1. Start with the Door Closed: Close the barn door completely.
2. Use Your Tape Measure: Measure the distance from the bottom of the door to the floor. This gives you your current gap.
3. Check at Both Ends: It’s important to measure at both ends of the door. Sometimes, the floor may not be perfectly level, affecting your measurements.
After you’ve gathered your measurements, you’ll know if you need to raise or lower the door.
Adjusting the Door Height
With measurements in hand, let’s adjust the door height. If you find that the gap is too wide, you’ll want to raise the door. Here’s how to do that:
1. Loosen the Hanger Bolts: Use your adjustable wrench to loosen the bolts holding the hangers in place.
2. Raise the Door: With the help of a friend or a sturdy ladder, carefully lift the door to the desired height.
3. Tighten Everything Back Up: Once the door is at the right height, tighten those bolts securely. Make sure it’s firmly in place.
If your door is dragging and you need to lower it, just do the opposite. Loosen the hangers, lower the door, and then retighten.
Adjusting the Floor Guides
Sometimes, the floor guides can affect that perfect gap too. If your door is skipping the track or swinging, adjusting the guides might solve the problem.
1. Locate the Floor Guides: These are usually at the bottom of the door frame, keeping the door aligned.
2. Adjust Their Position: Use the screwdriver to loosen any screws holding the guides. Move them up or down as needed, then retighten.
3. Check the Door Movement: Once adjusted, slide the door open and closed to see if it’s functioning smoothly.
This step can significantly improve the ease of use for your sliding barn door.
Final Checks and Adjustments
After making your adjustments, it’s time for some final checks. Start by closing the door completely. Look for any gaps or areas where it might drag. Use your level to ensure the door hangs straight, adjusting the hangers if necessary.
Take a moment to check the gap at both ends again. It might require a few tweaks before everything feels just right. Remember, getting it perfect is about patience and making small adjustments.
Letting the door glide smoothly is the goal here. It shouldn’t stick or require too much effort to slide it open and closed.
Regular Maintenance Tips
Finally, now that you’ve adjusted your sliding barn door, keep it in good shape with some regular maintenance. A little upkeep goes a long way in ensuring it stays perfect.
– Clean the Track: Dust and dirt can build up over time, causing issues. Regularly clean the track where the door slides.
– Check for Wear: Periodically inspect the rollers and hangers for any signs of wear. Replace anything that looks damaged.
– Lubricate the Rollers: A little lubricant on the rollers can help them glide more smoothly. Just a few drops of silicone spray will do the trick.
With these tips, your sliding barn door will remain functional and beautiful for years to come.
In closing, adjusting your sliding barn door for a perfect gap at the bottom doesn’t have to be a daunting task. By following these steps, you can enjoy a door that not only looks great but functions beautifully. Happy adjusting!