Imagine you’re at a friend’s house. You’re chatting and sipping coffee, and then you notice their door doesn’t close quite right. You could fix it with a feeler gauge, a handy little tool that helps you measure gaps with precision. Think of it as the ruler for your door. In this article, we’re diving into how to use a feeler gauge for precise strike plate adjustment, so your door operates smoothly.
Understanding the Basics of a Feeler Gauge
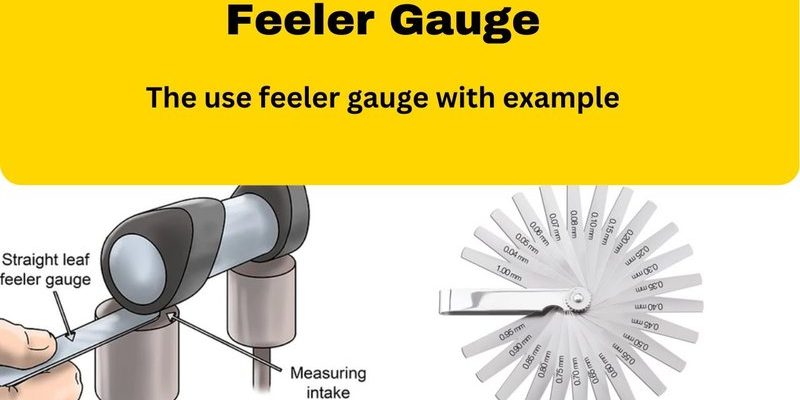
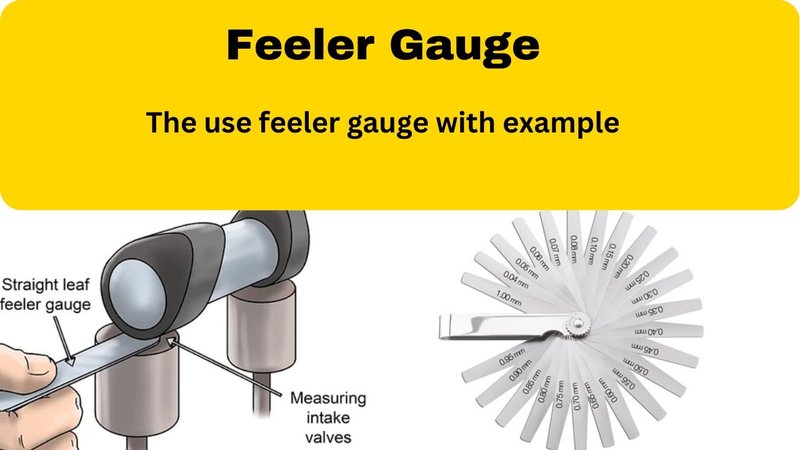
Before we jump into the “how-to,” let’s talk about what a feeler gauge actually is. A feeler gauge is a set of thin metal blades that come in various sizes. Each blade measures a specific gap, which is crucial when it comes to adjusting things like a strike plate on your door. You might be thinking, “Why do gaps matter?” Well, they directly affect how well your door locks and closes.
Using a feeler gauge isn’t just for professionals; it’s super accessible for anyone willing to give it a shot. Imagine trying to slide a piece of paper between two surfaces. If it fits perfectly, great! But if it’s too loose or too tight, you need to make adjustments. That’s exactly what a feeler gauge helps you figure out—making sure the strike plate aligns just right with the latch.
Tools You’ll Need for the Job
Before we get started, let’s gather our tools. You might have a few of these lying around your house, and others are easy to find. Here’s a quick list of what you’ll need:
- Feeler Gauge: The star of the show! Get a set that has a variety of thicknesses.
- Screwdriver: To adjust the screws on the strike plate.
- Level: Optional but helpful for ensuring everything’s straight.
- Pen or Marker: For marking any adjustments you need to make.
- Safety Glasses: Always a good idea when working around hardware.
These tools will help you achieve the precise adjustment you need. Honestly, having everything on hand before starting makes the process much smoother.
Step-by-Step: Using the Feeler Gauge
Now that you’ve got your tools, let’s get into the fun part—using the feeler gauge! Follow these steps, and you’ll be on your way to a perfectly adjusted strike plate.
Step 1: Check the Alignment
First, close the door gradually to see how it fits with the strike plate. Is it too tight? Too loose? This is your initial check. A good rule of thumb is to use the feeler gauge to find out exactly where the gaps are.
Step 2: Measure with the Feeler Gauge
Take your feeler gauge and choose a blade that you think will fit between the door latch and the strike plate. Slide the blade into the gap. If it fits snugly, you’ve found the right gap size. If it doesn’t fit, try a thicker or thinner blade until you find the perfect match.
Step 3: Make Adjustments
Once you’ve determined the gap, it’s time to adjust the strike plate. Use a screwdriver to loosen the screws on the strike plate. Here’s where your measurements matter! If the gap is too tight, move the plate slightly outward; if it’s too loose, move it inward.
After making adjustments, test the fit again with the feeler gauge. You might have to repeat this a couple of times to get it just right. It’s a bit like tuning a guitar; each little adjustment makes a difference.
Step 4: Finalize and Test
Once you’re happy with the adjustments, tighten the screws on the strike plate. Give the door a test run. Open it, close it, and make sure it latches securely. If you notice any issues, don’t hesitate to tweak it again. Remember, even small changes can make a big impact on the overall performance of your door.
Common Problems and Troubleshooting
You might run into some hiccups when adjusting your strike plate. Here are a few common problems and how to resolve them:
– Door Sticking: If your door still sticks after adjustment, double-check that nothing is obstructing its path. Sometimes, a misaligned hinge can cause issues too.
– Latch Not Catching: If the latch doesn’t engage with the strike plate, you may need to lower it slightly. Use the feeler gauge again to verify the gap.
– Screw Issues: If screws are stripped or won’t tighten, consider replacing them. This ensures the strike plate stays securely in place.
Remember, the goal is to have a door that opens smoothly and latches securely. If you’re still having trouble, don’t hesitate to call a pro.
Why This Matters
You might be wondering why all this matters. Proper door alignment ensures that your home is secure, and a well-functioning door makes your life easier. Plus, it adds to the overall aesthetic of your living space. Think of it as giving your door a little TLC!
Using a feeler gauge for a precise strike plate adjustment is a simple yet effective technique. Not only does it boost security, but it also can save you from future headaches related to door misalignment.
Adjusting a door strike plate may not sound like the most glamorous project, but it’s an important task that can make a significant difference. With just a few tools and a feeler gauge, you can achieve that perfect fit.
Remember, it’s all about patience and precision. Check your gaps, adjust when necessary, and don’t rush the process. Soon enough, you’ll have a door that shuts with ease, making your home a more comfortable place. Happy adjusting!