Let’s set the scene: maybe you’ve got a basic Kwikset or Schlage deadbolt on your front door, or perhaps you own a fancier smart deadbolt with a key backup. No matter the brand, all deadbolt cylinders rely on carefully aligned pins and springs tucked inside—a little like a lock’s version of a secret handshake. Over time, dirt, moisture, and friction build up, making everything inside feel sticky, slow, or just plain stubborn. Proper lubrication isn’t just about getting your key to turn; it keeps your lock protected, reliable, and ready for the long haul.
Whether you want to fix a slow lock before it gets worse, or you’re troubleshooting a remote-controlled smart lock system that still needs an old-school key, I’ll walk you through exactly how to lubricate a deadbolt cylinder for lasting results. If you’ve never taken apart a lock or chosen a lubricant before, don’t worry—I’ll go step by step, and even toss in tips for avoiding common mistakes.
Why Deadbolt Cylinders Get Stiff (And Why It Matters)
Let me explain what’s really going on inside your deadbolt. Every time you slide your key in and turn it, you’re lining up a tiny stack of pins and springs. It’s a delicate little dance, and when everything’s clean and smooth, you barely notice it. But over months and years, dust and grit sneak their way into the cylinder. Worse, some older lubricants can actually gum up over time, attracting even more debris and making things stickier.
Here’s the thing—ignoring a stiff deadbolt doesn’t just make you late for work. Over time, forcing your key can bend or snap the delicate pins inside, or even break your key off in the cylinder. That’s a way bigger headache (and repair bill) than a simple lubrication job. It’s also worth saying: today’s smart locks and remote-controlled deadbolts may have batteries and code-based entry, but most still include a physical key backup. If you don’t maintain that cylinder, you might find yourself locked out when the battery dies—and trust me, it happens at the worst moment.
So, a little regular care isn’t just about convenience. It’s about keeping your home secure and your lock’s lifespan as long as possible. If you’ve noticed stiffness or that gritty, grinding feeling, it’s time to give your deadbolt some love.
Choosing The Right Lubricant For Deadbolt Longevity
You might be wondering what makes one lubricant better than another for deadbolts. Not all products are created equal, and grabbing the wrong stuff—like WD-40, which a lot of people reach for without thinking—can actually make problems worse.
Graphite powder is the classic choice for most standard deadbolt cylinders. It’s dry, so it won’t attract dust, and it gets deep into those tiny spaces between pins and springs. Plus, it doesn’t gum up over time. Silicone-based sprays are also popular, especially for modern or high-traffic locks, since they’re less messy than graphite and resist temperature extremes. For some smart deadbolts (yes, even the ones with battery backup or remote code entry), the manufacturer may recommend a specific lubricant—always worth checking your lock’s manual before you start.
Don’t use oil-based lubricants like 3-in-1 oil or standard grease. These tend to trap dirt and can turn sticky over time, turning a quick fix into a sticky mess.
Here’s a quick comparison:
| Lubricant Type | Pros | Cons |
| Graphite Powder | Dry, dust-resistant, long-lasting | Messy, may stain surfaces |
| Silicone Spray | Clean, works in cold/heat, easy to apply | Can overspray, needs wiping |
| Oil-Based (avoid) | Easy to find, cheap | Attracts dirt, gums up, short-lived |
Pick the right product based on your lock type, how often you use it, and your climate. Honestly, a tiny tube of graphite in your junk drawer is a great insurance policy against sticky locks.
What Tools And Supplies You’ll Need
Before you get started, gather your supplies. You don’t need a full toolbox or specialty gear—just a couple of basics will do the trick:
- Lock lubricant (graphite powder or silicone spray)
- Clean key (not worn or bent)
- Paper towel or rag to catch drips or excess
- Compressed air (optional, handy for blowing out dust)
- Small brush or old toothbrush (for exterior cleaning)
If you’re working with a battery-powered or code-entry smart deadbolt, make sure the batteries are fresh and the lock is in the “unlocked” position (so you don’t accidentally trigger the locking mechanism mid-process).
You don’t have to remove the lock from the door for simple lubrication. If you’re troubleshooting a stuck cylinder after a failed syncing or code reset, stick to these steps before thinking about dismantling anything.
Keep a gentle touch—no need to force anything. If your key is badly worn or bent, get a new copy made before lubricating. Sometimes, what feels like a stiff cylinder is partly due to a bad key.
Step-By-Step: How To Lubricate A Stiff Deadbolt Cylinder
Let’s break down the process into simple, no-nonsense steps. Even if you’ve never done this before, these instructions will help you work slowly, safely, and effectively.
1. Clean The Exterior And Key Slot
First, clear away any loose dirt, cobwebs, or debris from around the deadbolt. Use a small brush or old toothbrush to gently scrub the faceplate and the area around the keyhole. For outdoor locks, this step really matters—pollen, grime, and rain can all build up over time.
If you have a can of compressed air handy, give the key slot a couple of short bursts. This helps blow out any dust or grit that could mix with your lubricant and cause trouble later.
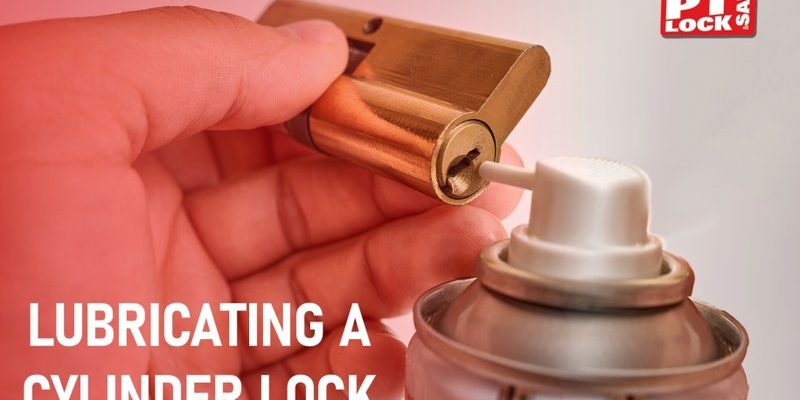
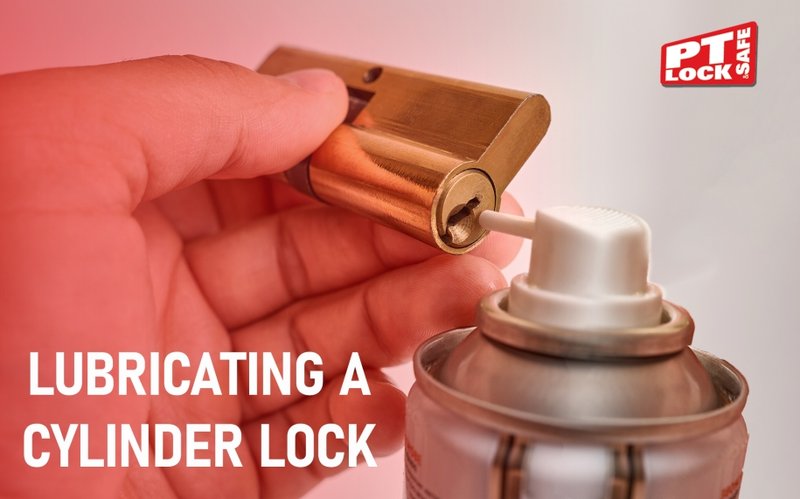
2. Apply The Lubricant
Here’s the fun part. If you’re using graphite powder, gently tap the nozzle or puff a small amount directly into the keyhole—think half a pea-sized amount, max. With a silicone spray, use the fine straw attachment and spritz for just a second or two. Don’t drench it; a little goes a long way.
Wipe away any excess from the outside. Silicone sprays can run, so have that paper towel ready.
3. Work The Key In And Out
Insert your clean key fully into the cylinder, then pull it out. Repeat this 6–10 times. The motion helps distribute the lubricant deep inside, reaching all those pins and springs. If the key still feels sticky, add a *tiny* bit more lubricant and repeat.
If you see grey or black residue on your key or towel, don’t worry—that’s just leftover grime being pulled out.
4. Test And Repeat If Needed
Turn the key gently in both directions. Listen and feel for smoother movement. If it still feels gritty or stiff, wait a minute, then give the lock another dose of compressed air and a second round of lubrication. Some older or heavily-used cylinders may need a couple of cycles to fully clear out old residue.
When you’re satisfied, wipe the key clean and give the lock a final polish with your towel. Don’t forget to test the bolt itself—if the cylinder is smooth but the bolt sticks, a dab of lubricant on the bolt edges can help.
Troubleshooting Common Problems After Lubrication
Sometimes, even after lubing up, a deadbolt cylinder remains stiff or unreliable. Let’s troubleshoot a few scenarios:
Old or bent key: If the key sticks, even with fresh lubricant, check for visible bends or wear. A new key cut from the original code (not a copy of a copy) can fix more than you’d think.
Internal damage: If lubrication doesn’t help and the cylinder still feels gritty or frozen, the pins or springs inside might be corroded or broken. You’ll need a locksmith for a rebuild or replacement.
Smart lock errors: If you have a remote-controlled deadbolt and the backup key won’t turn, check for code or sync issues with the electronics. Sometimes, the lock’s motor or clutch can block the cylinder; resetting the lock can help, but always troubleshoot with batteries removed.
Remember, lubricating is preventative—but it can’t fix hardware failure. If nothing changes after a couple of tries, it’s time to call in the pros.
How Often Should You Lubricate Your Deadbolt Cylinder?
This is one of those “better safe than sorry” habits that pays off over the years. For most home deadbolts (Kwikset, Schlage, Yale, or any off-brand), you should lubricate the cylinder every 12–18 months. If you live somewhere dusty, or your lock gets heavy use, aim for once a year.
For outdoor locks exposed to rain, salt, or freezing weather, check more often—grit and moisture speed up wear. For smart locks or remote-controlled models with backup keys, stick to the same schedule even if you rarely use the key. You don’t want a dead battery and a stuck cylinder at the same time.
“A few minutes of lock care every year can save you from hours of frustration and a big locksmith bill when you least expect it.”
Make it part of your spring or fall home checklist, right along with changing batteries in your smoke detector or testing your garage door remote.
Alternatives: When Lubrication Isn’t Enough
Sometimes, even after a careful lubrication job, your deadbolt feels stubborn or unreliable. Here’s what else you can try:
- Replace the cylinder: Most deadbolts let you swap just the cylinder. It’s more involved, but doable for beginners with a screwdriver and a little patience.
- Upgrade to a new deadbolt: If your lock is old, consider investing in a fresh cylinder or a new smart deadbolt. Modern models often have better build quality, weather protection, and smoother operation.
- Call a locksmith: For jammed locks, broken keys, or any issue where code resets or lubrication don’t work, a pro can diagnose and fix the real problem (without damaging your door).
There’s no shame in calling for help when you’re stuck! But for most cases—a sticky key, sluggish turn, or rough feeling—lubrication is the fix that keeps your lock running strong.
Final Thoughts: Give Your Deadbolt A Little TLC
Caring for your deadbolt cylinder is a classic “small effort, big pay-off” task. Whether you’re using a basic Kwikset, a Schlage with a code-entry pad, or a high-tech remote-controlled lock, regular lubrication keeps your keys turning without drama. It prevents bigger, costlier problems down the road and makes sure you’re never caught off guard—especially when the batteries die, your remote is out of sync, or you just want your lock to feel as smooth as the day you installed it.
Grab that tube of graphite or can of silicone, take five minutes, and show your deadbolt some love. Your future self (and your front door) will thank you.