Repairing a broken roller assembly isn’t something you need to dread. With a bit of guidance and the right tools at your side, you can handle this task like a pro. Whether it’s a sliding glass door or a heavy-duty door made from steel, the steps can be quite similar. In this article, we’ll delve into the nitty-gritty of getting your sliding door back on track!
Understanding the Roller Assembly
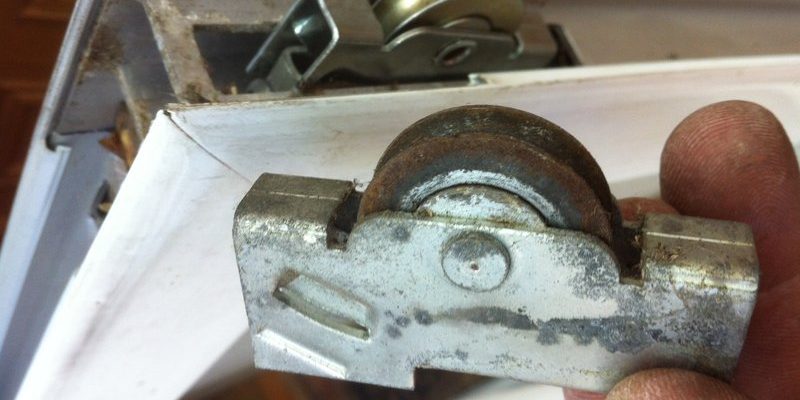
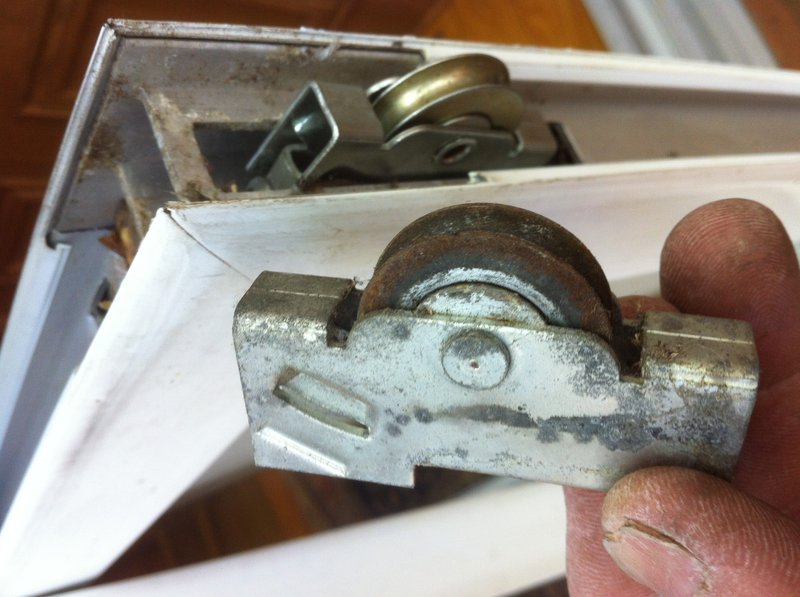
Before diving headfirst into repairs, let’s take a moment to understand what a roller assembly is and why it matters. The roller assembly is made up of wheels that help your heavy-duty sliding door move smoothly along its track. Think of it as the door’s best friend, helping it open and close without hassle.
If the rollers are damaged or worn out, you’ll notice a few symptoms. The door might stick, make strange noises, or even come off the track altogether. Regular maintenance can help extend the life of these components, but if you find yourself in a situation where repairs are needed, don’t worry. It’s a repair process you can handle.
Identifying the Problem
You might be wondering how to determine if your roller assembly is the issue. Here are some common signs that indicate you need a closer look:
- Sticking or Jamming: If your door feels like it’s caught on something, the rollers might be misaligned or damaged.
- Noisy Operation: Loud grinding or squeaking sounds may signal that the rollers are worn out.
- Door Off Track: If your door has derailed from the track, the roller assembly is likely the culprit.
Recognizing these signs early can save you time and effort down the road, so keep an eye (and ear) on your door!
Gathering Your Tools
Now that you’ve identified the problem, it’s time to gather the tools you’ll need for the repair. Having everything ready before you start can save you from unnecessary interruptions. Here’s a handy list to get you going:
- Screwdriver Set: You’ll likely need both flathead and Phillips screwdrivers.
- Replacement Roller Assembly: Make sure to choose the right type for your sliding door.
- Adjustable Wrench: Useful for tightening bolts.
- Lubricant: A silicone spray or similar product will help smooth operation.
- Measuring Tape: To ensure the new rollers fit perfectly.
With these tools in hand, you’re ready to tackle the problem head-on. Remember, preparation is key!
Removing the Old Roller Assembly
Now comes the hands-on part: removing the broken roller assembly. Follow these steps carefully:
1. Start by Securing the Door: If it’s a heavy-duty door, it might be wise to have someone help you hold it. Safety first!
2. Remove any Stops or Guides: Look along the top and bottom of the door for any screws holding it in place. Use your screwdriver to remove these.
3. Carefully Lift the Door: With someone holding the door, gently lift it off the track. You might need to tilt it slightly to get it free.
4. Get to the Roller Assembly: Once the door is off, you’ll see the roller assembly. Check for screws or bolts that hold it in place and remove them with your wrench or screwdriver.
Keeping your tools organized during this process can help you avoid any missed steps!
Installing the New Roller Assembly
Installing the new roller assembly is like putting the pieces back together in a jigsaw puzzle. It can be satisfying to see progress! Here’s how to do it:
1. Align the New Rollers: Position the new roller assembly in the same spot as the old one. Make sure it fits snugly in place.
2. Screw it in Place: Using your screwdriver, secure the new roller assembly with the screws you removed earlier. Double-check that it’s tight and secure.
3. Test the Rollers: Before you put the door back on, give the rollers a spin. They should turn smoothly without any resistance.
4. Reinstall the Door: This part might need a buddy! Lift the door again, carefully align it with the track, and lower it in place.
Each step should feel like you’re getting closer to that smooth-gliding door you once had.
Finishing Touches
You’re almost done! After replacing the roller assembly, it’s time for a few finishing touches that ensure everything runs smoothly:
– Lubricate the Rollers: A quick spritz of silicone spray on the rollers will help reduce friction and prevent squeaking. Just don’t overdo it—less is more!
– Adjust the Door: Sometimes, the door may need slight adjustments to ensure it sits flush with the frame. Use the adjustable wrench to make any necessary tweaks.
– Check the Track: Lastly, inspect the track for any debris or damage. Cleaning it up can help prolong the life of your new rollers.
Taking these extra steps can make a huge difference in how your door performs in the long run.
Congratulations! You’ve navigated the steps to repair a broken roller assembly on your heavy-duty sliding door. By identifying the problem, gathering the right tools, and following the installation process, you’ve not only fixed the issue but also gained confidence in your DIY skills.
Remember, regular maintenance is key to keeping your door in great shape. Check those rollers every now and then, and don’t hesitate to lubricate them as needed. If you run into trouble again, you know what to do!
With your door back on track, enjoy the ease of use and the peace of mind that comes with a job well done. Happy sliding!