Now, let’s get into the nitty-gritty. You might be thinking about which latch to choose, or how to install it without losing your mind. One popular option is the Baldwin pocket door latch—known for its quality and ease of installation. Whether you’re a DIY enthusiast or a total beginner, this guide will walk you through the steps to get that latch and pulls installed without a hitch.
Understanding Pocket Door Latches and Pulls
Before diving into installation, let’s break down what a pocket door latch and pulls actually are. A pocket door latch is a mechanism that helps keep the door closed when you want privacy. It’s typically a simple catch that you can operate with your hand.
The pulls, on the other hand, are what you use to slide the door open and close. You’ll find they come in various styles and finishes, allowing you to customize your door to match your home décor. Having the right latch and pulls not only enhances the door’s functionality but also adds a dash of style to your space.
You might wonder, “Why not just use a regular doorknob?” Well, regular doorknobs take up valuable space that pocket doors are designed to save. By using a latch and pulls, you’re making the most of that sliding door setup—keeping it sleek and functional without compromising on ease of use.
Gather Your Tools and Materials
Alright, let’s get started! Before you begin the installation, it’s crucial to gather all the necessary tools and materials. Here’s a handy list to keep you organized:
- Pocket door latch kit (including pulls)
- Drill with drill bits
- Screwdriver (Phillips and flathead)
- Measuring tape
- Level
- Pencil for marking
- Wood chisel (if needed for adjustments)
Once you’ve got everything ready, you’re all set to start. Having the right tools at hand makes the installation process smoother and more efficient. Plus, you won’t get halfway through and realize you’re missing a critical item.
Step-by-Step Installation Process
Now that you have your materials, let’s walk through the installation steps:
1. Measure and Mark the Location
The first step is to figure out where you want to place the latch. Typically, it should be about 36 inches from the floor, which is standard for most door heights. Use your measuring tape to find this point on the edge of the door, and mark it with your pencil.
Next, you’ll want to measure the width of the latch and ensure it’s centered vertically. This will give your door a balanced look when it’s closed. Remember, take your time with this—accurate measurements will save you from headaches later.
2. Drill the Necessary Holes
With your measurements marked, it’s time to get drilling. Start by using a drill bit that matches the size of your latch screws. Slowly drill into the marked spots to create holes for the latch mechanism and the pulls.
If the wood is particularly tough, you might need to switch to a wood chisel to make sure everything fits snugly. Give yourself some grace here; it’s okay if it takes a few tries to get the holes just right.
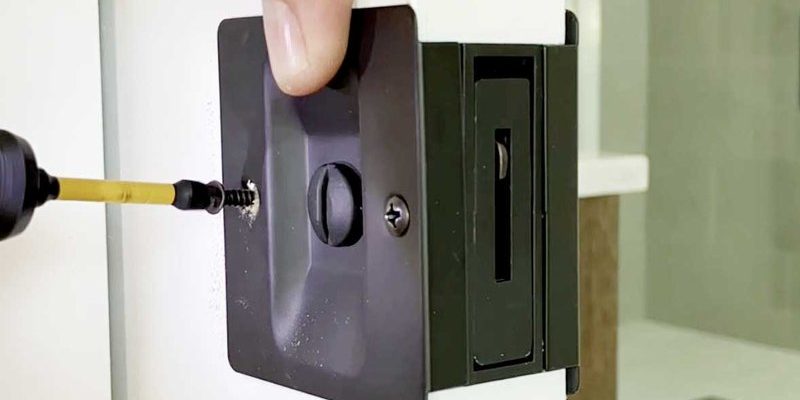
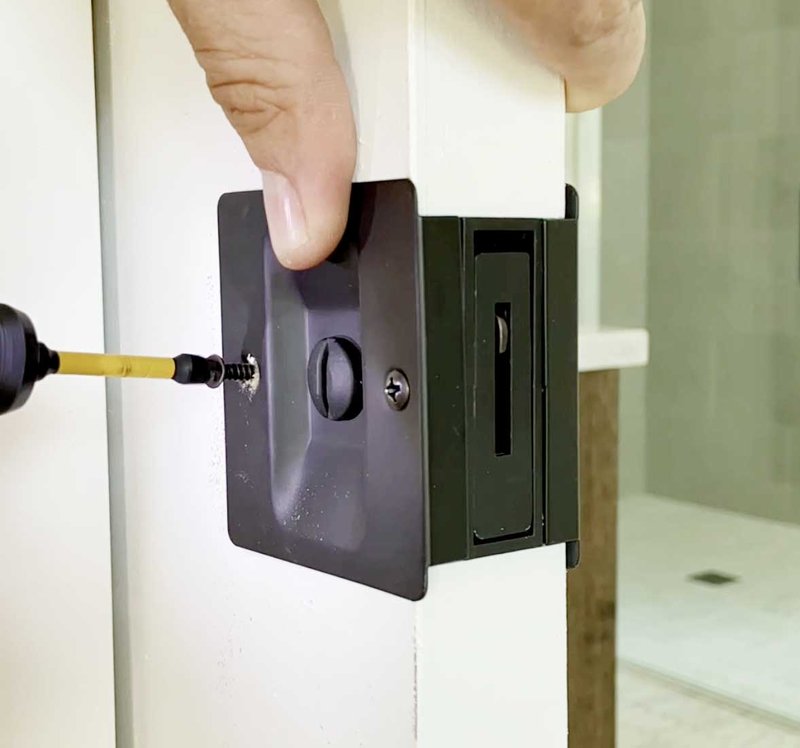
3. Install the Latch Mechanism
Once your holes are ready, it’s time to insert the latch mechanism. Push it into the opening you drilled, ensuring it sits flush against the door surface. Secure it in place using the screws provided in your pocket door latch kit.
Make sure you’re using the screwdriver to tighten the screws properly, but don’t overtighten—they could strip the wood. A good rule of thumb is to make it snug enough to hold but easy enough to adjust if needed.
4. Attach the Pulls
Finally, it’s time to add the pulls. These pieces typically have two screw holes to secure them to the door. Position the pulls where they’re comfortable for use, usually about eye level, and mark the holes.
Drill these holes, then attach the pulls using screws, just like with the latch. Check that everything is aligned and square—a level will come in handy here. Once done, give the pulls a tug to ensure they’re firmly attached and ready for use.
Common Issues and Troubleshooting
Even with the best intentions, sometimes things don’t go as planned. Let’s talk about a few common issues you might run into:
– Latch Not Catching: If the latch won’t catch, you may need to adjust its alignment. Slight tweaks can make a world of difference, so don’t hesitate to loosen the screws and reposition it slightly.
– Pulls Feel Loose: If the pulls feel wobbly, double-check the screws to ensure they’re tightened properly. If the holes are stripped, use wood glue to fill them and give the screws a better grip.
– Door Sticking: If your pocket door sticks after installation, make sure the track is clean and clear of debris. Sometimes dirt can build up and cause friction, making it harder to slide.
Finishing Touches
Congratulations! You’ve successfully installed your pocket door latch and pulls. Now it’s time to step back and admire your handiwork. Take a moment to test the door—slide it open and closed a few times to ensure everything operates smoothly.
If you’re feeling extra crafty, consider adding a coat of paint or stain to match your door’s finish. This can enhance its aesthetic and make it blend seamlessly into your room.
Also, keep in mind that maintenance is key. Regularly check the screws and latch to ensure they remain tight and functional. This small effort can prolong the life of your installation and keep your door working effectively.
Installing a pocket door latch and pulls doesn’t have to be intimidating. By following these simple steps, you can transform your pocket door from a basic element into a stylish and functional feature of your home. Remember to gather your tools first, take your measurements carefully, and don’t rush through the installation.
In the end, it’s all about making your space work better for you while adding a little flair. So go ahead and give it a try—you might discover that DIY projects aren’t so scary after all!