Think of silicone sealant as the invisible “weatherproof jacket” for your exterior door. Much like zipping up before heading outside, a good bead of silicone sealant will block out cold drafts, moisture, and even wandering bugs. Brands like GE, DAP, or Gorilla all make reliable silicone sealants for exterior use—just check for “exterior” or “outdoor” on the label to make sure it’s up for the job. Honestly, learning how to apply silicone sealant around an exterior door frame is one of the most satisfying DIY jobs you can tackle—one of those little fixes that delivers a big payoff in home comfort.
Let’s dive into the step-by-step process, common questions, and a few pro tips that can help even total beginners seal an exterior door frame with confidence.
Why Sealing Your Exterior Door Frame Matters
Here’s the thing: gaps around door frames are like open invitations for trouble. Rainwater can seep through tiny cracks and slowly rot the wood beneath, while chilly drafts can make your living room feel more like a breezeway. That’s not even mentioning the bugs and dust that slip in unnoticed. Without a good seal, your expensive heating and cooling leak straight outside, and no one wants to pay to warm the neighborhood.
Applying silicone sealant around an exterior door frame is a simple maintenance job that can protect your investment for years. Silicone is flexible and waterproof, so it won’t crack or shrink as the seasons change—a problem with cheaper, older caulks. Plus, a fresh seal gives your home a crisp, finished look that says, “someone takes care of this place.”
You might be wondering why you can’t just use any old caulk, or skip the job altogether. Here’s why: standard latex or acrylic caulks can dry out and split, especially in direct sun or freezing cold. Silicone, on the other hand, is like the superhero of sealants—tough, flexible, and weatherproof. Spending an extra five bucks on the right product saves a world of hassle down the line.
What You’ll Need: Tools and Supplies for the Job
Before you start, let’s talk gear. Don’t worry—you don’t need a professional setup, but gathering a few basics first will make everything smoother (and way less frustrating). Here’s a quick checklist:
- Silicone sealant for exterior use (brands like GE, DAP, Gorilla, or whatever is stocked at your local hardware store)
- Caulking gun (unless your sealant comes in a squeezable tube)
- Utility knife or scraper
- Painters’ tape (optional, for crisp lines)
- Rag and rubbing alcohol or soapy water (for cleaning the surfaces)
- Gloves (silicone is sticky stuff)
- Small bowl of soapy water (makes smoothing the bead easier)
Let me explain—using gloves keeps the sealant off your hands, but it also helps you smooth out the bead without making a mess. The painters’ tape? Not essential, but if you want pro-level edges, a roll of tape and ten extra minutes can make your work look sharp. And yes, a bowl of soapy water really is the “secret sauce” for fuss-free smoothing. It keeps the silicone from sticking to your finger, tools, or everything else.
How To Remove Old Caulk or Sealant
Before you start squirting on new silicone, you absolutely need to get rid of any old, cracked, or failing sealant around your door frame. Trying to seal over it is like painting over dust—it’ll just peel right off in no time.
Use a utility knife, scraper, or even a dedicated caulk removal tool to carefully slice and pry away the old material. Take your time here—rushing can damage the wood or paint. Once you’ve removed as much as you can, wipe down the area with rubbing alcohol or soapy water to remove leftover grime and dust.
Honestly, this step isn’t the most glamorous, but skipping it is a recipe for disappointment. A clean, dry surface is what allows silicone sealant to stick properly and do its job.
If you hit any stubborn bits, don’t be afraid to run your scraper or knife over them again. Just be gentle—no need to gouge the surface. By the end, you want a smooth, clean frame with no sticky or flaky residue left behind.
Prepping the Surface and Protecting Your Work Area
You might be tempted to jump right in, but spending a few minutes prepping saves time (and frustration) later. Dust, dirt, and moisture make it tough for silicone sealant to bond, so start by wiping down the entire door frame edge again. Let everything dry completely—moisture is the enemy of a good seal.
If you want crisp, professional-looking lines, use painters’ tape to mask along both sides of the gap you’ll be sealing—one strip on the door frame and one on the wall or siding. This acts as a “guardrail” for your bead and helps you avoid smears on the paint or brick.
Lay down an old towel or drop cloth at the base of the door. Silicone can be tough to get out of clothing or concrete, so a little protection goes a long way. Once the area’s clean, dry, and taped off, you’re ready for the main event.
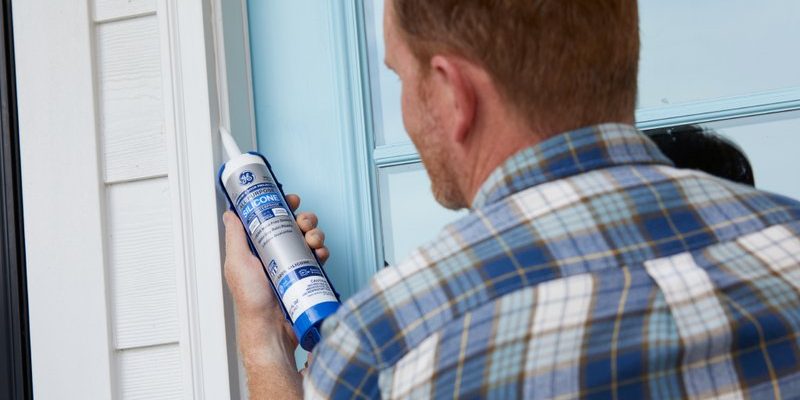
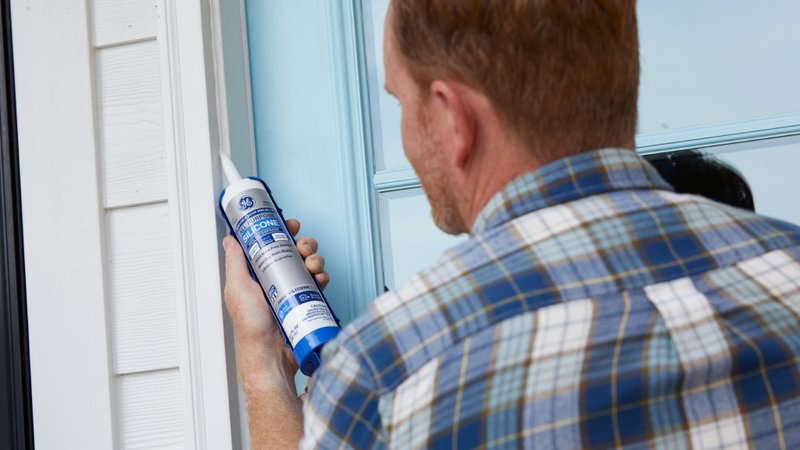
How To Apply Silicone Sealant Around An Exterior Door Frame
Here’s where the magic happens. Cut the tip of your silicone tube at a 45-degree angle—just wide enough to fill the gap you’re sealing. If you’re using a caulking gun, load the tube and press the release tab to get it ready. If you’re using a squeeze tube, just twist off the cap and you’re set.
Start at the top corner of the frame and pull the trigger slowly, moving the tip steadily along the gap. Try to keep steady, even pressure as you go—think “toothpaste on a toothbrush,” not “frosting a cake.” If you mess up? No worries, just pause and wipe up the mistake with a damp rag.
As you work your way down each side of the door, use a finger dipped in soapy water or a plastic caulk-smoothing tool to gently smooth the bead. This pushes the sealant into the gap and makes a rounded, professional-looking line. Don’t press too hard—just glide along the surface and let the silicone do its job.
*Here’s an honest tip: Less is more. If you’re squeezing out huge globs, you’re using too much. A thin, even bead is easier to smooth and works better in the long run.*
Once you’ve sealed all the way around the door frame, carefully remove the painters’ tape before the silicone starts to set. Wipe up any stray smudges quickly, since cured silicone is tough to clean off.
Troubleshooting Common Problems With Silicone Sealant
Even with careful prep, things don’t always go perfectly the first time. Here are some common hiccups and how to fix them:
- Sealant won’t stick: The surface might still be dirty or wet. Clean and dry it thoroughly, and try again.
- Messy lines: Too much sealant, or the tip is too wide. Cut the nozzle smaller and use less pressure.
- Bubbles in the bead: Usually from moving too fast or pushing air into the tube. Go slow and steady, and keep the tip close to the surface.
- Sealant pulling away as it dries: This can happen if the gap is too wide for one pass. In that case, let the first layer cure, then go over it again.
If you make a serious mess, don’t panic. You can scrape away uncured silicone with a rag and rubbing alcohol, then restart. Once it’s dry, though, a utility knife is your best friend for touch-ups.
How Long Should Silicone Sealant Cure?
You might be eager to show off your new weatherproof door or get back to using the entrance, but patience is key. Most exterior silicone sealants—especially from brands like GE and DAP—take about 24 hours to fully cure, though they’ll skin over and feel dry to the touch in as little as an hour.
It’s best to avoid touching, painting, or getting the sealed area wet during this time. If rain is in the forecast, wait for a dry spell or cover the frame with plastic for a day while the silicone sets.
The longer you let it cure, the longer it’ll last. A little bit of patience now means years of protection for your doorframe.
Check the tube for the brand’s specific instructions. Some “quick-dry” versions can be painted in as little as 30 minutes, but for regular outdoor silicone, sticking to the 24-hour rule is a safe bet.
Comparing Silicone Sealant To Other Caulking Options
You might be thinking, “Isn’t any caulk fine for an exterior door?” The answer—honestly—is no. Here’s a quick comparison:
| Type | Best For | Pros | Cons |
| Silicone Sealant | Exterior doors, windows, joints exposed to lots of weather | Flexible, waterproof, long-lasting, sticks to most surfaces | Hard to paint, messier than acrylic |
| Acrylic/Latex Caulk | Interior trim, small gaps in drywall | Paintable, easy clean-up, low odor | Not as weatherproof, can shrink and crack outside |
| Polyurethane Caulk | Concrete, masonry joins, expansion joints | Super strong, good for large gaps | Harder to apply, slow cure |
For an exterior door frame, silicone is the clear choice. If you need to paint over the sealant, look for the rare “paintable” silicone or consider applying a very thin line of paint at the edge, rather than covering the whole bead. A universal “all-purpose” caulk can work for temporary fixes, but it won’t last as long when the weather swings.
Maintaining and Inspecting Your Sealed Door Frame
Once you’ve finished the job, it’s easy to forget about it. But checking your door frame’s seal every year—usually in spring or fall—can catch new issues before they become big problems. Here’s what to look for:
- Cracks or gaps forming in the sealant bead
- Peeling or separation from the frame or siding
- Water stains or soft spots in the wood
If you notice any of these, just repeat the cleaning and re-sealing steps above. Unlike some home repairs, maintaining your silicone seal is a quick fix that pays off fast—no need to call in the pros unless the frame itself is rotted or damaged.
Wrapping Up: Strong Seals, Cozy Homes
Applying silicone sealant around an exterior door frame is one of those simple DIY jobs that can make a real difference—like pulling on a raincoat before heading into a storm. With the right tools, a bit of patience, and a tube of trusted silicone sealant, you can block out weather, bugs, and drafts for good. Plus, there’s something satisfying about stepping back and seeing the neat, finished bead around your door, knowing your home is that much more protected.
Whether you’re sealing up your entryway for the first time or touching up an old door that needs a little TLC, following these steps gets you professional results without the fuss. Here’s to a safer, cozier, and more comfortable home—one carefully sealed door frame at a time.