This is classic “home fix gone sideways” stuff. New weatherstripping—no matter the brand or if you splurged on the super-flexible foam or sturdy rubber—can make your door hard to close. Whether your setup uses a peel-and-stick Universal Solutions weatherstrip kit or a more heavy-duty brand, the problem’s not unusual. The trick is figuring out exactly why your door’s being stubborn and how to get it swinging smooth again—without tossing your weatherstripping (or your patience) out the window.
Let’s break down what’s really going on when a door gets sticky after weatherstripping, why it happens, and clear troubleshooting steps anyone can follow. I’ll walk you through the whole thing, from figuring out the “why” to the “how to fix it,” in plain English.
Why New Weatherstripping Makes Doors Hard to Close
Here’s the thing: weatherstripping is supposed to fill gaps and block airflow, but when it’s brand new, it hasn’t compressed or “settled in” yet. Think of it like a new mattress—firm and a bit stubborn at first, but with time and use, it shapes to fit. That new rubber or foam strip might be puffier and less forgiving than you expected, making your door feel tight or even slightly out of alignment.
Weatherstripping comes in different thicknesses and materials. If you’ve picked a brand like Universal Solutions with an extra-durable seal, it’s possible you’ve added *just enough extra bulk* that your door’s edges can’t squeeze past it smoothly. The harder you push, the more it resists, especially if the frame isn’t perfectly square (and most aren’t, especially in older homes).
Honestly, it’s easy to miss this when you’re doing the install. You want a good seal, so you press the strip in tight, maybe even overlap the edges a bit. Then, when you try closing the door, it’s suddenly a contest of strength—and let’s not even talk about what happens if the latch doesn’t line up. This is the classic “over-sealing” problem and it’s the most likely culprit if your door was working fine before.
Checking for the Most Common Problems
First things first: before you start pulling off the weatherstripping or calling a carpenter, let’s figure out what’s actually happening. Troubleshooting a door that’s hard to close after new weatherstripping means paying attention to details most people skip.
- Look for visible pinching or bunching. Open and close the door slowly, watching the edge where it hits the weatherstripping. Any spots where the strip rolls, buckles, or pinches are trouble zones.
- Check for misalignment. Does the latch line up with the strike plate? If the door has to be lifted or shoved, the frame might have shifted slightly, or the new strip could be pushing things out of whack.
- Test for even resistance. Is it hard to close only at the top, bottom, or along the whole edge? Full-length resistance usually means the weatherstripping is too thick. A single tight spot often signals a high spot or an install issue.
- Listen for squeaks and rubs. Sometimes, new weatherstripping makes a squeaky sound as the door scrapes across it. That’s a clue you’ve got too much friction somewhere—usually from a strip that’s too wide or installed too close to the inside edge.
You might be tempted to just slam the door shut and hope the weatherstripping “breaks in.” Let me be honest: that hardly ever works. Instead, it’s all about finding the *specific* trouble spot so you know exactly how to fix it.
Weatherstripping Types and Their Impact
Not all weatherstripping is created equal. The type and thickness matter a lot more than you’d think—just like using the wrong size battery in a remote, the wrong weatherstrip can make the whole setup go haywire.
- Foam Tape: Soft, easy to install, but can be overly thick right out of the package. It’s great for light gaps but may squish too much, or not enough, causing closing issues.
- V-Shaped or Tension Strips: These are metal or plastic and springy. They don’t add much bulk, but if installed too close to the edge or bent outwards too far, they can push the door off alignment.
- Rubber Bulb: Thicker, often used with pre-installed slots in metal or fiberglass doors. They give a tight seal but can be super stiff at first—making even a heavy entry door hard to shut.
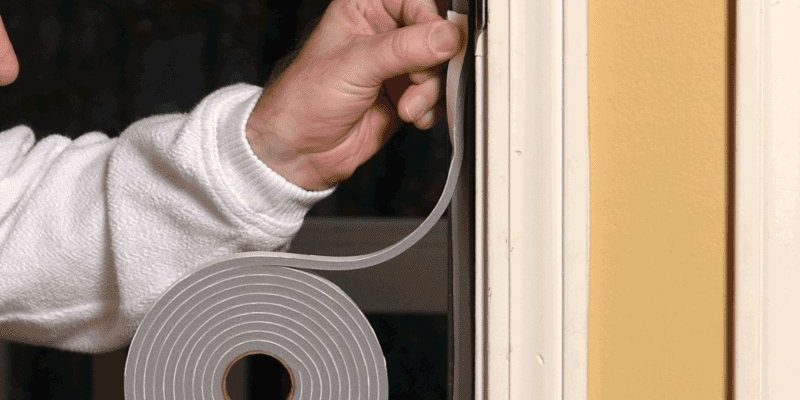
- Adhesive vs. Screw-On: Peel-and-stick like Universal Solutions brand is fast, but once it’s in place, it’s hard to tweak. Screw-on types let you adjust the seal, but the screws can loosen, causing sag over time.
If you upgraded to a more “premium” weatherstrip, you might end up with more resistance than before. The good news? Most weatherstripping compresses after a few days. The bad news? If you chose a style that’s too beefy or stiff, it might *never* settle down enough to let your door close easily.
Step-By-Step Troubleshooting for Stubborn Doors
Here’s a practical way to troubleshoot a door that’s hard to close due to new weatherstripping. This is the same step-by-step process I’ve used on my own front door more times than I’d like to admit.
- Inspect the fit as you close the door. Watch which part resists most. Mark the spots with painter’s tape.
- Open the door and inspect the weatherstripping. Look for crushed or warped spots. Feel with your fingers for bulges.
- Loosen or remove offending sections. With adhesive strips, gently peel back the sticky part near the trouble spot—just an inch or so. For screw-on types, loosen the screws and nudge the strip away from the door very slightly.
- Try to close the door again. If it’s easier, you’ve found the problem area. If not, keep adjusting in small sections until things improve.
- Trim or thin stubborn strips. Sometimes, using a utility knife to shave a millimeter off a foam or rubber strip can make all the difference. Just don’t cut too aggressively—work slowly and check the fit after each snip.
If you end up with little gaps after trimming, don’t sweat it. It’s better to seal 95% of the gap and have a working door than to trap yourself inside with a perfect seal you can’t open. That’s the real art of troubleshooting—a little compromise goes a long way.
When to Let Weatherstripping “Break In”
You might be wondering if your new weatherstrip just needs a little time to settle in. That’s a fair question, and here’s my honest take: *sometimes* it’s worth waiting a few days, especially with foam strips or medium-firm rubber. The pressure from the door will gradually compress the material, and you’ll often find that a stubborn door loosens up on its own within a week.
But here’s the catch: if you have to lean on the door with your shoulder every time you leave the house, or if the latch won’t catch at all, don’t wait for things to get better. That’s a sign the strip is just too thick or misaligned, and it’s time to adjust. Forcing the door over and over isn’t just annoying—it can bend the hinges, damage the frame, or even crack paint and hardware.
If the door gets a little easier to close after a day or two, you’re probably fine. If it’s still acting stubborn after three or four days, it’s time to go back to troubleshooting. That’s not being impatient—that’s just being smart about home maintenance.
How to Avoid Common Installation Mistakes
Most weatherstripping problems trace back to the install. It looks simple—just peel, stick, and press—but a few rookie mistakes can make life tricky.
- Don’t overlap at corners. Overlapping strips at the top and sides can double the thickness, making it nearly impossible for the door to close at those points.
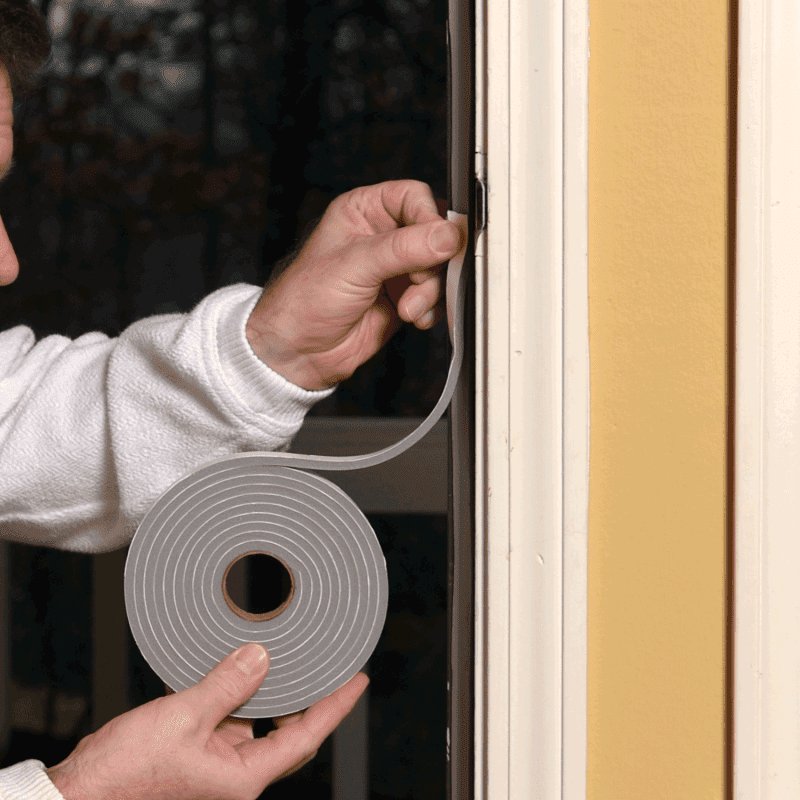
- Line up the strip with the edge, not over it. If you stick the weatherstripping too far into the opening, the door hits it hard. Aim to line it up right at the edge of the doorframe.
- Check for debris or old adhesive. Leftover bits from previous strip can bunch up under the new one, adding extra bulk.
- Test as you go. Don’t install the whole strip in one go. Close the door after each section to make sure it’s still swinging free.
If you got ahead of yourself and need to “reset” the install, don’t worry. Most peel-and-stick brands can be carefully removed and reapplied while the glue is still fresh. If you used a screw-on system, just back out the screws a bit and nudge the strip until the fit is better.
Comparing Different Weatherstripping Solutions
Not happy with how things feel? Here’s a quick comparison of common weatherstripping styles and why you might want to switch.
| Type | Best For | Drawbacks |
|---|---|---|
| Foam Tape | Quick fixes, doors with minor gaps | Can compress too much, wears out quickly, sometimes too thick |
| Rubber Bulb | Exterior doors, wide gaps, noise reduction | Very stiff at first, can be hard to close, not adjustable |
| V-Strip (Metal) | Old doors, uneven frames | Tricky install, may scratch paint, not very forgiving |
| Adhesive Backed (Universal Solutions, etc.) | DIYers, quick upgrades | Hard to reposition once set, can pull paint if removed |
If your current strip won’t cooperate, consider picking a lighter-duty option for now, even if it’s not as tough. Sometimes the “universal” or brand-specific foam tapes are the least hassle until you work out a better seal.
When to Call in a Pro (or Try a Universal Solution)
If you’ve tried everything—trimming, adjusting, re-seating—and your door still acts like it’s stuck in mud, it might be time to step back. Doors can warp, hinges can loosen, and frames can shift over time. Once in a blue moon, the real problem isn’t the weatherstrip at all, but a slightly crooked frame that’s only revealed by the new tight seal.
Honestly, there’s no shame in calling a pro if you’re stumped. A handyman can spot frame or door issues fast. On the other hand, if you’re in a rental or don’t have many tools, you might get by with a thinner universal foam strip. These are easy to install and remove, and won’t mess up your paint or trim. Plus, they’re cheap enough to experiment with until you find the perfect fit.
*Here’s my take: Home repairs aren’t about perfection—the goal is comfort, energy savings, and a door that actually works when you need it.*
Final Thoughts: Getting Back to a Smooth-Closing Door
Wrestling with a door that won’t close after new weatherstripping is frustrating, but you’re not alone. Most of the time, it’s a simple matter of matching the right strip to the right door—and making a few small adjustments if things get sticky. When in doubt, go slowly, troubleshoot step by step, and don’t be afraid to swap out a strip that just isn’t working for your needs.
Once you dial in the right weatherstripping and get your door closing smoothly again, you’ll be glad you took the time. Sure, it takes a little patience and trial and error, but the reward is a cozy, draft-free home and a door that works the way it should. No wrestling, no slamming—just a satisfying “click” as it latches closed, just like it’s supposed to.