Think of a door frame as a puzzle. Each piece needs to fit together just so, and the hinges play a critical role. If you’ve noticed your door creaking or it’s hard to lock, it’s likely time to examine the hinge mortise. Whether you’re dealing with an interior door, an exterior door, or a solid wood frame, you can tackle this repair with a few tools and a little patience.
What Is a Hinge Mortise?
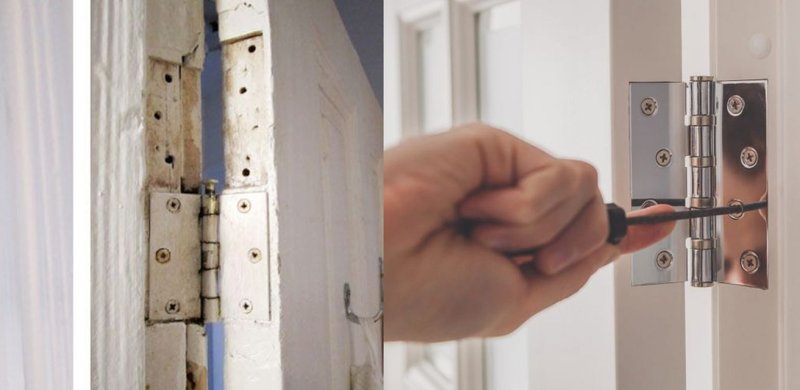
A hinge mortise is the cut-out section in the door frame where the hinge attaches. This cut-out allows the hinge to sit flush with the surface of the door frame, ensuring smooth operation. When done correctly, it should create a seamless connection that allows the door to swing open and shut without obstruction.
If the mortise is too shallow, the hinge won’t sit fully in the frame. This can lead to a door that sticks or doesn’t close properly. Picture trying to fit a square peg into a round hole—it just doesn’t work. You might be asking yourself, “How do I figure out if my hinge mortise is too shallow?” It’s often evident when you see the hinge protruding from the frame or hear squeaking sounds when operating the door.
Why Is It Important to Fix a Shallow Hinge Mortise?
Repairing a shallow hinge mortise isn’t just about aesthetics; it’s crucial for the functionality of your door. If left unaddressed, you could face issues like:
- The door may not close properly.
- It can cause wear and tear on the hinges, leading to more expensive repairs.
- Security concerns arise if the door doesn’t latch securely.
Honestly, like leaving a small problem unattended, even a minor misalignment can lead to bigger headaches down the road. For instance, think about how a crooked picture frame can drive you nuts. It’s that same feeling with a door that just won’t cooperate. The good news? Fixing it can be straightforward with a bit of careful work.
Assessing the Damage
Before diving into repair, take a close look at your door and hinge mortise. Open the door slightly and inspect the hinge position. Does it sit flush against the frame? If there’s a noticeable gap or the hinge is sticking out, you might have a shallow mortise on your hands.
Here’s a simple way to assess the damage:
1. Visual Check: Stand in front of your door and observe the hinges. Are they even? Does the door swing freely?
2. Feel for Gaps: Run your fingers along the mortise area. If you can feel any part of the hinge sticking out, it’s a sign of a shallow cut.
3. Test the Door: Open and close the door slowly. Does it stick or hang on the hinges? If it does, you may need to adjust the mortise.
Taking the time to assess the damage will help you determine the best course of action.
Gathering Your Tools
Now that you know what you’re dealing with, it’s time to gather the necessary tools. Here’s a list to get you started:
- Chisel (1-inch or 1.5-inch works well)
- Hammer
- Wood filler (optional)
- Sandpaper
- Wooden block (for leverage)
- Measuring tape
- Pencil for marking
Having these tools ready will make the job smoother. It’s a bit like having all your ingredients prepped before you start cooking—so much easier than running back and forth to find what you need!
How to Repair a Shallow Hinge Mortise
Ready to dive into the repair? Here’s a step-by-step guide to fixing that shallow hinge mortise. Take your time; it’s better to go slowly and do it right.
1. Remove the Hinges: Start by unscrewing the hinges from the door and frame. Use a screwdriver or drill for this step.
2. Mark the Mortise: Use your measuring tape to find out how deep the mortise should be. Mark it with a pencil to guide your chisel.
3. Chisel Away: Using your chisel and hammer, start carefully chiseling out material from the mortise. Work in small increments, checking the depth often to avoid going too deep.
4. Check the Fittings: After a few strokes, place the hinge back in the mortise to see if it sits flush. If not, keep chiseling until it does.
5. Smooth It Out: Once the hinge fits snugly, use sandpaper to smooth the edges of the mortise for a clean finish.
As you work, remember that patience is key. Just like with a recipe, you don’t want to rush through it. Instead, take the time to get that perfect fit.
Reinstalling Your Hinges
Once you’re satisfied with the mortise, it’s time to put everything back together. Here’s how to reinstall your hinges:
1. Position the Hinge: Align the hinge with the mortise and hold it in place.
2. Screw It In: Using your screwdriver or drill, start screwing the hinge back into the frame. Make sure to tighten it securely but not too tight that it strips the wood.
3. Check the Door: Open and close the door several times to ensure it operates smoothly. Adjust if necessary.
You might be wondering if you need to do anything else. If there are any gaps around the hinge or mortise, you can fill them with wood filler for a cleaner look. Just allow it to dry, sand it down, and paint over it if needed.
Preventing Future Issues
After all that work, you want to make sure it lasts. Here are some tips to help prevent shallow hinge mortises in the future:
- Inspect Regularly: Check your hinges every few months to catch issues early.
- Use Quality Hinges: Invest in good-quality hinges that won’t wear out as quickly.
- Don’t Overload Doors: Be cautious about hanging heavy items on your doors, as this can strain the hinges.
By staying proactive, you can avoid the hassle of having to repeat this repair. Just think about how nice it feels to open and close a door smoothly without any fuss!
A shallow hinge mortise may seem like a small issue, but it can lead to bigger problems if left unaddressed. By taking the time to assess the situation, gather your tools, and make the necessary adjustments, you can ensure that your door operates smoothly for years to come.
Remember, home repair doesn’t have to be intimidating. With a little knowledge and some patience, you can tackle projects like this and restore functionality to your door. So next time you face a stubborn door, you’ll know just what to do!