Think of the strike plate as the doorway’s bouncer, controlling who gets in. When the bolt can’t fit through, it’s like a club that’s too exclusive. Luckily, this isn’t a complicated job, and you don’t need a toolbox full of fancy tools or a degree in carpentry. With just a few steps and some basic materials, you can complete this task like a pro. Let’s dive into how to widen that opening and get your door functioning smoothly again.
What You’ll Need for the Job
Before you begin, it’s essential to gather the right tools and materials. You want everything at your fingertips so you can work efficiently. Here’s a quick list of what you’ll need:
- Screwdriver: A standard or Phillips head screwdriver, depending on your strike plate screws.
- Chisel: A sharp chisel will help you carve out more space.
- Hammer: For tapping the chisel.
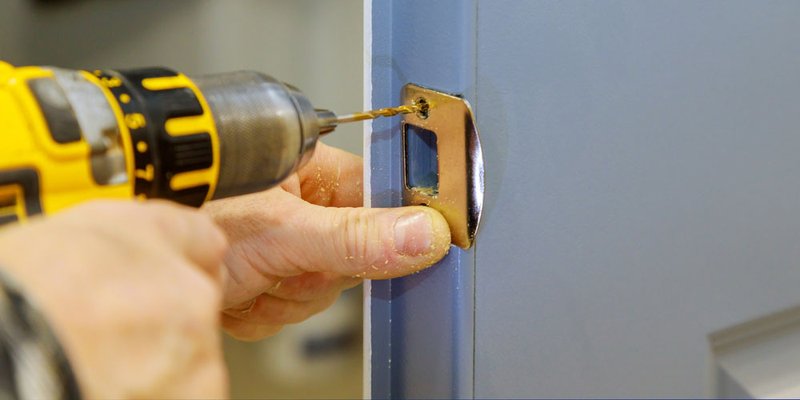
- Drill: Optional, but useful if you need to make larger adjustments.
- Sandpaper: To smooth out any rough edges.
- Measuring tape: To measure the existing strike plate opening.
Having everything ready makes the process smoother and less stressful.
Assessing the Current Strike Plate Opening
Before you grab your tools, take a moment to assess your current strike plate opening. Start by measuring the width and height of the existing opening. You want to figure out just how much larger it needs to be for your new, thicker latch bolt.
Here’s the thing: proper measurements are crucial. If you’re unsure, use a caliper to measure the width of the latch bolt itself. Mark these measurements lightly on the frame around the strike plate. This will give you a clear target for your chiseling. Remember, take your time with this step. It’s much easier to take off more material than to put it back after you’ve removed too much.
Removing the Strike Plate
Once you have your measurements set, it’s time to remove the existing strike plate. Use your screwdriver to unscrew the plate from the door frame. If the screws are stuck, some gentle wiggling might help get them loose. Just be careful not to damage the surrounding area; you want a clean slate to work on.
After you’ve removed the strike plate, examine the area. This is your chance to clean up any debris or old paint that might hinder your work later. A clean surface helps create a better fit when you reattach the strike plate.
Widening the Strike Plate Opening
Now we’re getting to the fun part—widening that opening! First, align your chisel with the marked lines you drew earlier. You’ll want to start chiseling from the top or the bottom of the opening, gently tapping the chisel with your hammer. Here’s a tip: make angled cuts and work your way down. This way, you’re not taking off too much material at once.
Be mindful of how deep and wide you’re chiseling. You want to gradually create a wider opening to accommodate the thicker latch bolt. If you find it difficult, consider using a drill with a larger bit. Just be sure to control the drill to avoid overshooting your mark.
Smoothing the Edges
Once you’ve achieved the desired width and depth, it’s time to smooth the edges. Use sandpaper to remove any rough spots or splinters. This step is essential for ensuring the latch bolt moves smoothly through the opening. A smooth edge will help prevent any catching or rattling when the door is closed.
This part of the process is often overlooked, but honestly, it can make a world of difference in how your door functions. Plus, it gives your work a professional finish—no one likes a half-finished job!
Reattaching the Strike Plate
With the opening now widened and smoothed, it’s time to reattach the strike plate. Align it back over the opening and make sure it fits snugly. If everything looks good, securely fasten it with the screws you removed earlier. If you notice the plate isn’t aligned perfectly, make any slight adjustments at this point.
It’s best to test the opening before fully tightening everything down. Insert the latch bolt into the strike plate opening to ensure it fits properly. If it doesn’t align just right, you might need to make minor adjustments with your chisel or sandpaper.
Testing the Door Functionality
After everything is back in place, it’s time for the moment of truth. Close the door and check how the latch engages with the strike plate. It should move smoothly into the opening and lock securely. If it feels stiff or catches, you might need to widen the opening just a little more. Remember, you’re aiming for a snug fit without any resistance.
If everything works perfectly, congratulations! You’ve successfully widened the strike plate opening. If not, don’t worry. Troubleshooting is part of the process. Perhaps a little more chiseling or sanding will do the trick.
Final Thoughts on Widening Your Strike Plate Opening
Widening a strike plate opening for a thicker latch bolt may seem daunting at first glance, but it’s really a straightforward DIY task. With the right tools, clear measurements, and a careful approach, you can tackle this project with confidence. Remember, you’re not just making your door work; you’re enhancing your home’s safety and functionality. So, grab your tools, take your time, and enjoy the process. You got this!