Weatherstripping might sound technical, but at its heart, it’s just about plugging up the gaps that let outside air in and your nice, warm air out. It’s almost like giving your door a warm scarf—a simple, affordable fix that makes a huge difference. Even if your exterior door frame is uneven or a little wonky, you don’t need expensive tools or a contractor. With the right type of weatherstrip (like a flexible foam tape or rubber seal), and a little patience, you can cut drafts, keep bugs out, and make your home way more comfortable.
Why Does My Old Door Leak Air? Understanding the Problem
Let me explain what’s going on behind that chilly breeze by the door. Old exterior door frames are notorious for being less-than-perfect. Wood shrinks, swells, and twists over the years, especially if your door faces the weather. Hinges loosen, paint flakes, and suddenly you’ve got visible gaps—or worse, subtle warps you can’t see but definitely feel. These little spaces are an open invitation for drafts, dust, and sometimes creepy crawly things.
You might be wondering why this happens more in older homes. Honestly, building standards were different back in the day, and materials weren’t as advanced as modern composites. Over time, even the best-built frames develop personality—by which I mean, they get crooked. The result? Factory-cut weatherstripping often doesn’t fit, and gaps appear at the top, sides, or even the threshold.
If you’ve walked by your door and noticed a shimmer of daylight peeking through, or you feel a temperature drop right by the frame, that’s a dead giveaway. You don’t need fancy diagnostic tools—sometimes, you can literally see or feel where the problem is. Fixing it doesn’t just stop drafts; it helps with insulation, keeps your energy bills in check, and blocks out noise and dust, too.
Choosing the Right Weatherstripping for Uneven Frames
Here’s where people often get stuck: not all weatherstripping is created equal, and with an uneven exterior door frame, the kind you pick matters a lot. Stiff, rigid seals might work great on a new, perfectly square door, but they’re no match for wonky old wood that bows or dips in odd places.
So what do you use? For most old door frames, flexible weatherstripping is your best friend. Look for foam tape, V-strip (tension seal), or high-quality rubber gaskets. Flexible foam tape, for example, comes in rolls and squishes to fill weird shapes and awkward gaps—just peel, stick, and press into place. Rubber seals are a bit more heavy-duty and can stand up to regular slams and tough weather. If your frame has a huge gap at the bottom, you might want to add a door sweep—basically a flexible strip that attaches to the door itself and drags across the threshold.
Don’t forget to check the thickness, too. Too thin, and you’re back to square one. Too thick, and your door might not close at all. I like to buy a couple of sizes and test what fits best. If you need to, you can layer strips or trim them down. Just make sure whatever you choose is labeled for exterior use and can handle a bit of moisture without falling apart.
Essential Tools and Materials for the Job
Before you start, gather everything you’ll need. This isn’t a job where you want to be running to the hardware store halfway through, so a bit of prep goes a long way. Luckily, weatherstripping an old door doesn’t need fancy power tools or special skills—just basic supplies and a little patience.
- Flexible foam tape or rubber weatherstrip—get enough length for all four sides
- Door sweep (if your bottom gap is wide or uneven)
- Utility knife or sharp scissors—so you can cut strips to fit odd lengths
- Measuring tape—you’ll want to measure the sides, top, and bottom carefully
- Screwdriver and screws—for attaching a door sweep
- Cleaning supplies—rubbing alcohol or mild cleaner and a rag
- Optional: Caulk and caulking gun, for big cracks between the frame and wall
You might be tempted to skip the cleaning step, but trust me: adhesive strips don’t stick well to dusty, dirty, or greasy wood. Spending five minutes wiping the frame down makes the job easier and your weatherstripping lasts way longer. If you run into a stubborn old weatherstrip that won’t come off, a little adhesive remover works wonders.
Step-by-Step: How to Weatherstrip an Uneven Exterior Door Frame
Now for the hands-on part. Working on an old, uneven frame means you need to slow down and pay attention to each gap. Here’s how I make sure every nook and cranny gets sealed:
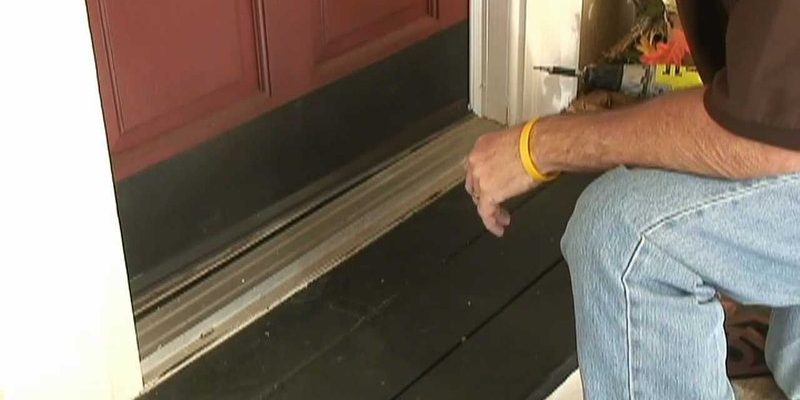
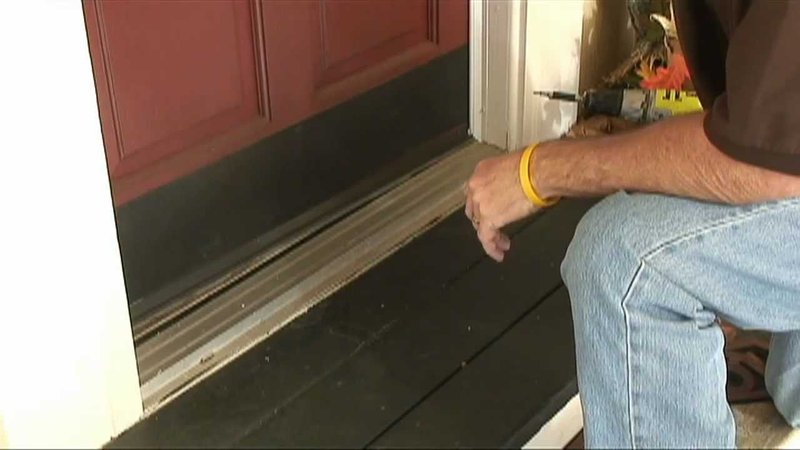
- Measure the gaps: Close your door and look for light or feel for air movement. Use a measuring tape to check the width of the space at several points along each edge. Remember, uneven doors need flexible solutions—some spots might be wider than others.
- Pick and cut your weatherstrip: Based on what you measured, choose the thickness that’ll compress to fill the widest gap without jamming the door. Cut strips to match the length of each side.
- Clean the door frame: Use rubbing alcohol or a mild cleaner to wipe down the frame where the new weatherstripping will go. Let it dry completely so the adhesive sticks well.
- Peel and stick: Start at the top, working your way down each side. Peel a few inches of the backing, stick the strip in place, then keep peeling and pressing as you go. Don’t stretch the material—just smooth it gently so it hugs every bump and dip.
- Install the door sweep (if needed): Line it up on the bottom edge of the door, mark the screw holes, and attach with screws, adjusting so the sweep brushes the threshold but doesn’t drag hard.
It’s totally normal to trim here and there or layer an extra strip where a gap is bigger. The goal is a seal that feels snug, without making the door impossible to close. Once you’re done, open and close the door a few times. If you hear scraping or have to push way too hard, trim or adjust the weatherstrip until it’s just right.
Common Problems and How to Troubleshoot Them
Weatherstripping old, uneven exterior door frames can be a bit of a puzzle. Sometimes, even after careful work, you notice the door sticks, or air still leaks in one stubborn spot. Don’t get discouraged—it’s all fixable with some tweaks.
If your door won’t close easily, the weatherstrip might be too thick in some sections. You can usually fix this by trimming the strip where it’s too bulky, or switching to a thinner one for that spot. For a door that’s still drafty, double-check for spots you missed—corners and the bottom edge are common culprits.
Adhesive not sticking? Sometimes, old paint or leftover grime messes with the bond. I like to press down on the strip for a few seconds after sticking it, making sure it’s really in place. If strips keep popping off, a dab of strong glue can help, or you may need to scrape off and clean the area again.
You might also have a frame that’s too damaged for tape to work—think warped wood or big cracks between the frame and the house. Here, a bead of exterior caulk fills deeper gaps before you add the weatherstrip. Occasionally, nothing works except a full frame repair, but that’s pretty rare unless your door is really falling apart.
Pro tip: Don’t overdo it. Some airflow is normal and even necessary for safety, especially in older homes and with gas appliances. Your goal is to stop the draft, not to make your home airtight.
Weatherstripping Alternatives: When the Usual Fixes Don’t Work
Sometimes, you’ll run into a door frame so uneven that regular weatherstripping just won’t cut it. Maybe the frame is badly warped, or the gaps change size from top to bottom. If you’ve tried all the usual options and drafts still sneak in, there are a few other tricks worth trying.
For side gaps, you can use adjustable metal or vinyl tension strips, which press tighter against the door and flex as needed. These are a bit more fiddly to install, but they really shine on extra-wavy frames. Door snakes—a heavy fabric tube tossed along the bottom edge—are a fast, cheap fix for big gaps under the door, especially in rentals where you can’t make permanent changes.
In really stubborn cases, I’ve seen people use threshold extenders or even retrofit the whole frame with a new jamb kit. That’s a bigger project, and honestly, most people can avoid it with flexible foam tape and a good door sweep. But it’s nice to know options exist if the DIY route isn’t cutting it.
How Weatherstripping Improves Comfort and Efficiency
It’s easy to brush off a little draft as “just one of those old house quirks,” but sealing your exterior door frame brings real, everyday benefits. The most obvious? Cutting down your energy bills. If you’re running the heat or AC and there’s a constant leak, that money’s just floating out the door.
There’s more to it, though. A well-sealed door keeps out dust, pollen, and bugs—seriously, a single strip of weatherstripping can mean no more surprise spiders popping in. If you live on a busy street, you’ll notice a drop in noise, too.
Comfort-wise, you might be surprised how much warmer and quieter a room feels once the door frame is sealed. I’ve done this in my own rental—one strip of foam tape, and suddenly my living room wasn’t freezing every time the wind kicked up. Plus, weatherstripping is easy to swap out later, which is perfect for changing seasons or if the door shifts again.
Wrapping Up: Making Old Doors Work Like New
Here’s what it comes down to: weatherstripping an old, uneven exterior door frame isn’t rocket science, but it does take patience and a little trial and error. The difference you’ll feel—from a warmer, quieter home to those lower utility bills—is absolutely worth an afternoon’s work. Choose flexible materials, measure carefully, and be ready to tweak until you get the perfect seal. For most people, that means less draft, more comfort, and a house that feels just a little bit more like home.