Lubricating a door latch is a bit like giving your car engine a good oil change. Just as the oil helps keep all the parts moving smoothly, lubrication ensures that your latch operates without any hitches or annoying squeaks. Whether you have a standard door latch at home or a more sophisticated one like a smart lock, the process is generally the same. Plus, it’s a DIY project that anyone can tackle, even if you’re not particularly handy.
In this guide, we’ll cover the tools you’ll need, the steps to follow, and tips to keep your latch in great shape for years to come. Ready? Let’s dive in!
Why Lubrication Matters for Door Latches
You might be wondering why lubricating a door latch is so essential. Well, over time, dirt, dust, and grime can build up in the latch mechanism. This buildup can make it harder for the latch to function properly, leading to frustration when you’re trying to use your door. By lubricating the latch, you’re not just making it easier to open and close; you’re also prolonging its life.
When a door latch gets stiff, you could be tempted to pull harder on it, which might eventually lead to damage. Think of it like trying to force a rusty bolt to turn—you might end up stripping it or breaking it entirely. Regular lubrication keeps the moving parts clean and allows them to slide easily. This small maintenance step can save you from bigger headaches down the road.
Plus, a well-lubricated latch operates quietly. No one likes the sound of a creaky door, especially if you’re trying to sneak in after a long day or keep the noise down for sleeping kids. A little lubrication goes a long way in creating a peaceful environment.
Tools You’ll Need for Lubrication
Before we get started, let’s gather the right supplies. You don’t need a toolbox full of fancy gadgets to lubricate a door latch effectively. Here’s a simple list of what to grab:
- Lubricant: A good-quality lubricant is key. Silicone spray or graphite powder works well for most latches.
- Cloth or rag: To clean the area around the latch and wipe away excess lubricant.
- Small brush or cotton swabs: These are handy for getting into tight spaces.
- Screwdriver (if needed): Occasionally, it helps to remove or adjust screws to access the latch better.
Having these items on hand will make the job much smoother. Now that we’re equipped, let’s get into the step-by-step process of lubricating your door latch.
Step-by-Step Guide to Lubricate a Door Latch
Now that you have your supplies ready, let’s break down the steps to effectively lubricate your door latch without removing it.
Step 1: Clean the Latch Area
Start by examining the latch. If there’s any visible dirt or grime, take your cloth or rag and wipe it down. This step is crucial because applying lubricant over dirt can trap the grime, making things worse instead of better. Make sure to get into the crevices of the latch and around the strike plate (the metal piece on the door frame).
If you have a small brush or cotton swab, use it to reach tight spots. Once everything looks clean, you’re ready for the next step.
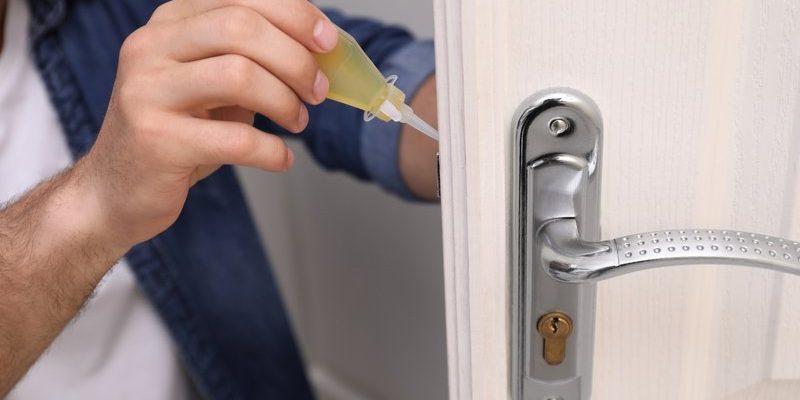
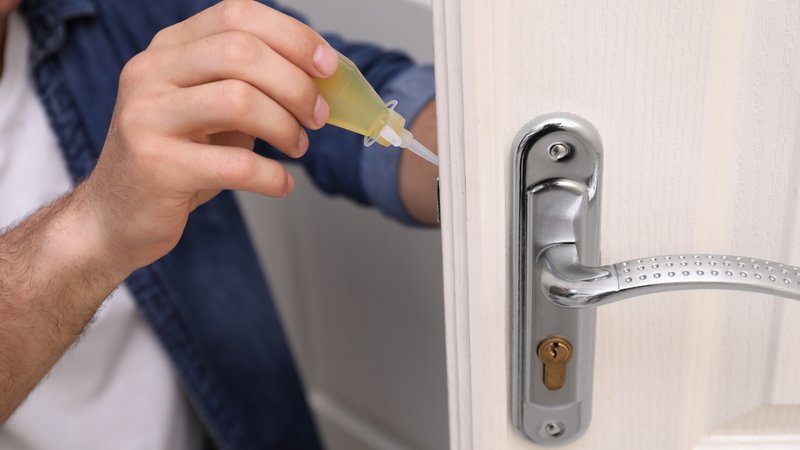
Step 2: Apply the Lubricant
Next, it’s time to apply the lubricant. If you’re using silicone spray, hold the can about six inches away from the latch. Give it a gentle spray, focusing on the moving parts. If you’re using graphite powder, sprinkle a small amount directly into the latch mechanism.
Be careful not to overdo it; a little goes a long way. You want to make sure the lubricant works its way into the mechanism, but you don’t need it dripping everywhere.
Step 3: Work the Latch
After applying the lubricant, it’s time to work the latch. Open and close the door several times to help the lubricant spread evenly throughout the mechanism. You might hear a satisfying *click* or feel the latch moving more smoothly than before.
This step is important because it ensures the lubricant reaches all the moving parts, allowing everything to glide effortlessly. If the latch still feels stiff, you can apply a bit more lubricant and repeat the process.
Step 4: Wipe Away Excess Lubricant
Once you’ve worked the latch, take your cloth or rag and wipe away any excess lubricant. This step helps keep your door frame clean and prevents any drips from staining your walls or floor. Plus, it keeps the area around the latch looking tidy, which is always a plus.
If you used spray lubricant, you might notice some residue on the door. A quick wipe with a clean part of the rag will take care of that.
Tips for Ongoing Maintenance
Now that you’ve successfully lubricated your door latch, let’s chat about maintaining it for the long haul. Regular upkeep is key to ensuring your latch continues to function smoothly.
– Schedule Regular Check-Ins: Set a reminder to check your door latches every few months. A quick cleaning and lubrication can work wonders and prevent future issues.
– Be Mindful of Weather: If you live in a place with extreme weather, you might want to lubricate your latches more frequently. Humidity can cause rust or corrosion, especially on metal latches.
– Choose the Right Lubricant: Not all lubricants are created equal. A silicone-based lubricant is often recommended for door latches as it won’t attract dirt like oil-based products might.
– Inspect for Damage: If you notice your latch getting stiff again shortly after lubrication, it might be a sign of wear or damage. Regularly check for any loose screws or other issues that could affect its function.
When to Seek Professional Help
While lubricating a door latch is a relatively simple task, there are times when you might need to call in a professional. If you find that lubricating the latch doesn’t solve the problem, it could indicate a more significant issue. Here are a few signs that it’s time to play it safe and seek help:
– Constant Sticking: If the latch is still sticking after lubrication, there might be misalignment or damage to the latch itself.
– Visible Damage: If you notice cracks or other visible damage on the latch, it’s best to replace it to avoid further issues.
– Unusual Noises: If your latch is making strange noises even after lubrication, it might be time for a deeper inspection.
Sometimes it’s just better to leave certain repairs to the experts, so don’t hesitate to reach out if you’re unsure.
There you have it! Lubricating a door latch without removing it is a straightforward task that anyone can do with a few basic tools and a little patience. Remember, just like keeping your car running smoothly, regular maintenance of your door latches can save you headaches in the long run.
So the next time you encounter a stubborn door latch, you’ll know exactly what to do. With proper care, your door latch will keep operating smoothly, allowing you to come and go without fuss. Happy lubricating!