
Now, you might wonder, “What exactly is a privacy pin?” It’s a mechanism that allows you to lock your door from the inside. With this simple tool, you can ensure your space is just that—your space—without the fuss of complicated security systems. Let’s walk through the steps to install a privacy pin. You don’t need to be a DIY expert to get this done. Just a bit of patience and a few basic tools, and you’ll have the peace of mind you’re after.
Understanding the Privacy Pin Mechanism
Before diving into the installation process, it’s essential to understand how a privacy pin works. Usually, privacy pins are designed to fit into existing door knobs that have a locking mechanism. When you press the pin, it locks the knob, preventing anyone from turning it from the outside. This is typically used for bathrooms and bedrooms, where a little privacy is crucial.
You might be wondering how a tiny pin can keep your space secure. The pin typically engages with a small latch inside the knob, which holds it in place. Giving it a firm push keeps the knob locked until you decide to unlock it. It’s a straightforward design, yet it provides effective privacy.
By understanding the mechanism, you can better appreciate the installation process. Knowing how it works will also help you troubleshoot any issues that might arise in the future—like if the lock gets jammed or the pin becomes difficult to press.
Gathering Your Tools and Supplies
Every successful installation begins with gathering the right tools. Here’s a quick list of what you’ll need:
- Privacy pin kit (available at most hardware stores)
- Screwdriver (either a flathead or Phillips, depending on your door knob)
- Drill (if you need to make new holes)
- Pencil
- Measuring tape
Having all these tools at the ready will streamline the installation process. You won’t find yourself halfway through only to realize you’re missing something crucial. Trust me, I’ve been there! A little prep can save you from a lot of frustration.
If you don’t have a privacy pin kit, they’re generally inexpensive. Check local hardware stores or online retailers. Make sure to read the product descriptions to find one compatible with your specific doorknob style.
Removing the Existing Door Knob
Once you have your tools, the next step is removing the existing door knob. If you’ve never done it before, don’t worry—it’s pretty straightforward.
1. Locate the screws: Most knobs have screws on either side of the knob. If you don’t see any, check underneath the knob; some designs might have a plastic cover hiding them.
2. Unscrew the knob: Use your screwdriver to carefully unscrew the knob from both sides. Keep these screws in a safe place; you’ll need them later.
3. Detach the knob: Once you’ve unscrewed everything, gently pull the two halves of the knob apart. Pay attention to how they fit together; this will help when you reassemble everything.
As you remove the knob, it’s a good time to inspect the latch and the condition of the hardware. If anything looks damaged or particularly rusty, this might be a good moment to replace those parts too.
Installing the Privacy Pin
Now comes the fun part—installing the privacy pin! Here’s how to do it step by step:
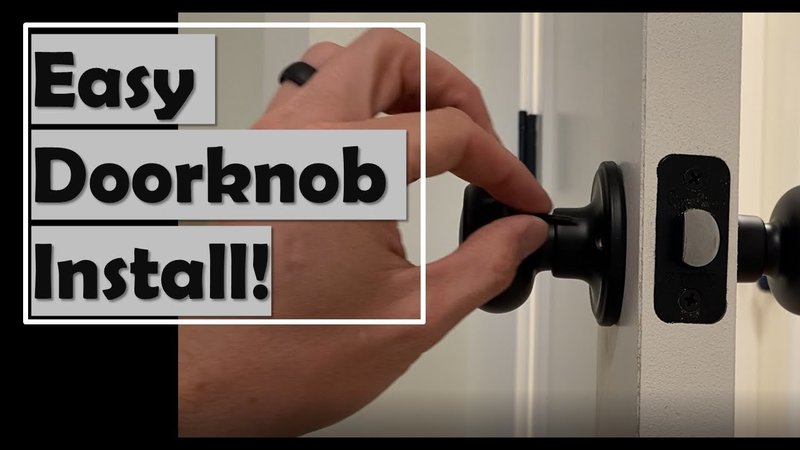
1. Align the new lock: First, take the privacy pin and line it up with the existing hole in your door. If your knob came with specific installation directions, be sure to follow them.
2. Insert the pin: Push the pin into the hole until it clicks into place. You should feel it secure against the latch mechanism.
3. Test the lock: Before reassembling the knob, test the privacy pin. Ensure it locks and unlocks smoothly. If it feels stiff or doesn’t engage properly, double-check the alignment.
It’s crucial that the pin works correctly before you put everything back together. This way, you won’t have to open up the knob again for a minor adjustment.
Reassembling the Door Knob
Once the privacy pin is securely in place and functioning, it’s time to reassemble the door knob. Here’s how to do it:
1. Align the halves: Take the two halves of the knob and align them according to how you observed them during removal.
2. Insert the screws: Use the screws you set aside earlier to secure the knob. Make sure they’re tightened, but don’t overdo it—snug is usually perfect.
3. Final adjustments: Test your door knob one last time. Ensure it turns smoothly and that the privacy pin locks without resistance.
At this stage, you should have a fully functional door knob that gives you the privacy you need. It’s satisfying, isn’t it?
Common Troubleshooting Tips
If you run into issues during installation, don’t get discouraged. Here are some common problems and their solutions:
– The knob won’t turn: If your knob is jammed, check if the latch is aligned properly. Sometimes a simple adjustment can do wonders.
– The privacy pin is stuck: If the pin feels stuck, make sure it is inserted correctly and not obstructed by any part of the knob.
– Screws are stripped: If you stripped a screw, you might need to replace it. A slightly larger screw might work if the hole is still intact.
Each of these issues is solvable with a little patience and persistence. Remember, many of us have faced similar hiccups during DIY tasks!
Enjoying Your New Privacy
Now that you’ve installed your privacy pin, take a moment to pat yourself on the back! You’ve just upgraded your door knob, and that’s no small feat. This simple addition can enhance your home’s privacy significantly. Whether you need to focus on work, enjoy a movie, or just want to unwind in solitude, your new lock will provide that necessary barrier.
You might find that having this privacy feature opens up your home in ways you didn’t expect. It allows you to create boundaries that help maintain peace in a busy household. And the best part? You did it yourself!
In the end, installing a privacy pin on a standard interior door knob is a simple task that can provide a lot of benefits. With the right tools and a bit of patience, you can create a more comfortable living space. So next time you need a moment alone or just want to keep your space secure, you’ll know exactly how to do it!